World Mover Design Overview
First off I strongly encourage you to download and play World Mover for yourself before spoiling it with this overview.
This post is actively being edited to fix formatting and clarify information.
The Design Problem Assigned
My task was to create an engaging first person exploration platformer which empowers the player to utilize physics objects and battery powered interactable features to assist them in overcoming or bypassing various obstacles as they navigate a connected and evolving space.
Key Takeaway
All the best aspects of this level are the product of watching hours upon hours of playtest footage, taking notes, iterating, and doing it all over again. I love iterative design so much. Watching players go from being frustrated in early builds to really enjoying themselves in later builds made my brain tingle in ways I didn't even know were possible. I can't wait for the next project because I'm going to push myself to get the playtesting going on each segment even earlier, and get even more iterative goodness than I was able to achieve with this project.
Prototype Has Minimal Textures and No Sound
This grey-box prototype does not include any textures other than visual language textures. It also does not contain sound. The importance of audio and visual feedback in a video game cannot be understated, and if this were an actual product I would of course ensure it had the juice. I have chosen to focus exclusively on practicing level design itself here.
The core values of this project
- Non-linearity in time scales of moment to moment, and minutes.
- Rewarding player attention, intuition, and experimentation.
- Making the most of framing and predicted sightlines to communicate key information and emotional impact.
- Consistent use of the levels visual language with no golden path spray paint
- Golden path spray paint makes perfect sense as an accessibility feature, but when practicing the fundamentals of level design, I think relying on yellow spray paint will lead me down the wrong path. It’s best that my levels are easy to navigate with no yellow spray paint. Yellow spray paint can be added later as an accessibility toggle.
- First person and minimal UI for maximum player immersion
- No navigation UI other than a written objective. This will highlight unintuitive design. Navigation UI can be added later as an accessibility toggle.
The Design Process
The design process for the project was rapid iteration and testing. I started by establishing a realistic scope and an early paper prototype of the intended level experience. I created this using a flowchart and general gameplay terms such as basic jump, high jump, long jump, traps, key, door, collectable, and exit.
The unifying concept of the level was bring power to a central hub which would create access to new paths, eventually collecting enough batteries would allow the player to escape on the lift. My first fully playable layout of the level did not successfully execute on this core concept. The pieces of the level didn’t feel connected, and the lift objective wasn’t in line with the players actual actions over the course of the level. After an iterative cycle involving many hours of playtest footage, many change notes, and valuable professional advice, I reworked the level around its strong points with the intention of creating a more unified experience.
The solution was to directly integrate the lift with everything that the player was doing as they worked their way up the level toward the exit. The lift is the player's vehicle forward, and their shortcut back and forth between areas they’ve already conquered. At the same time, I made a serious effort to remove all required backtracking from the level, and to make any optional backtracking as painless as possible with the introduction of even more bi-directional navigation affordances.
Areas of the Level
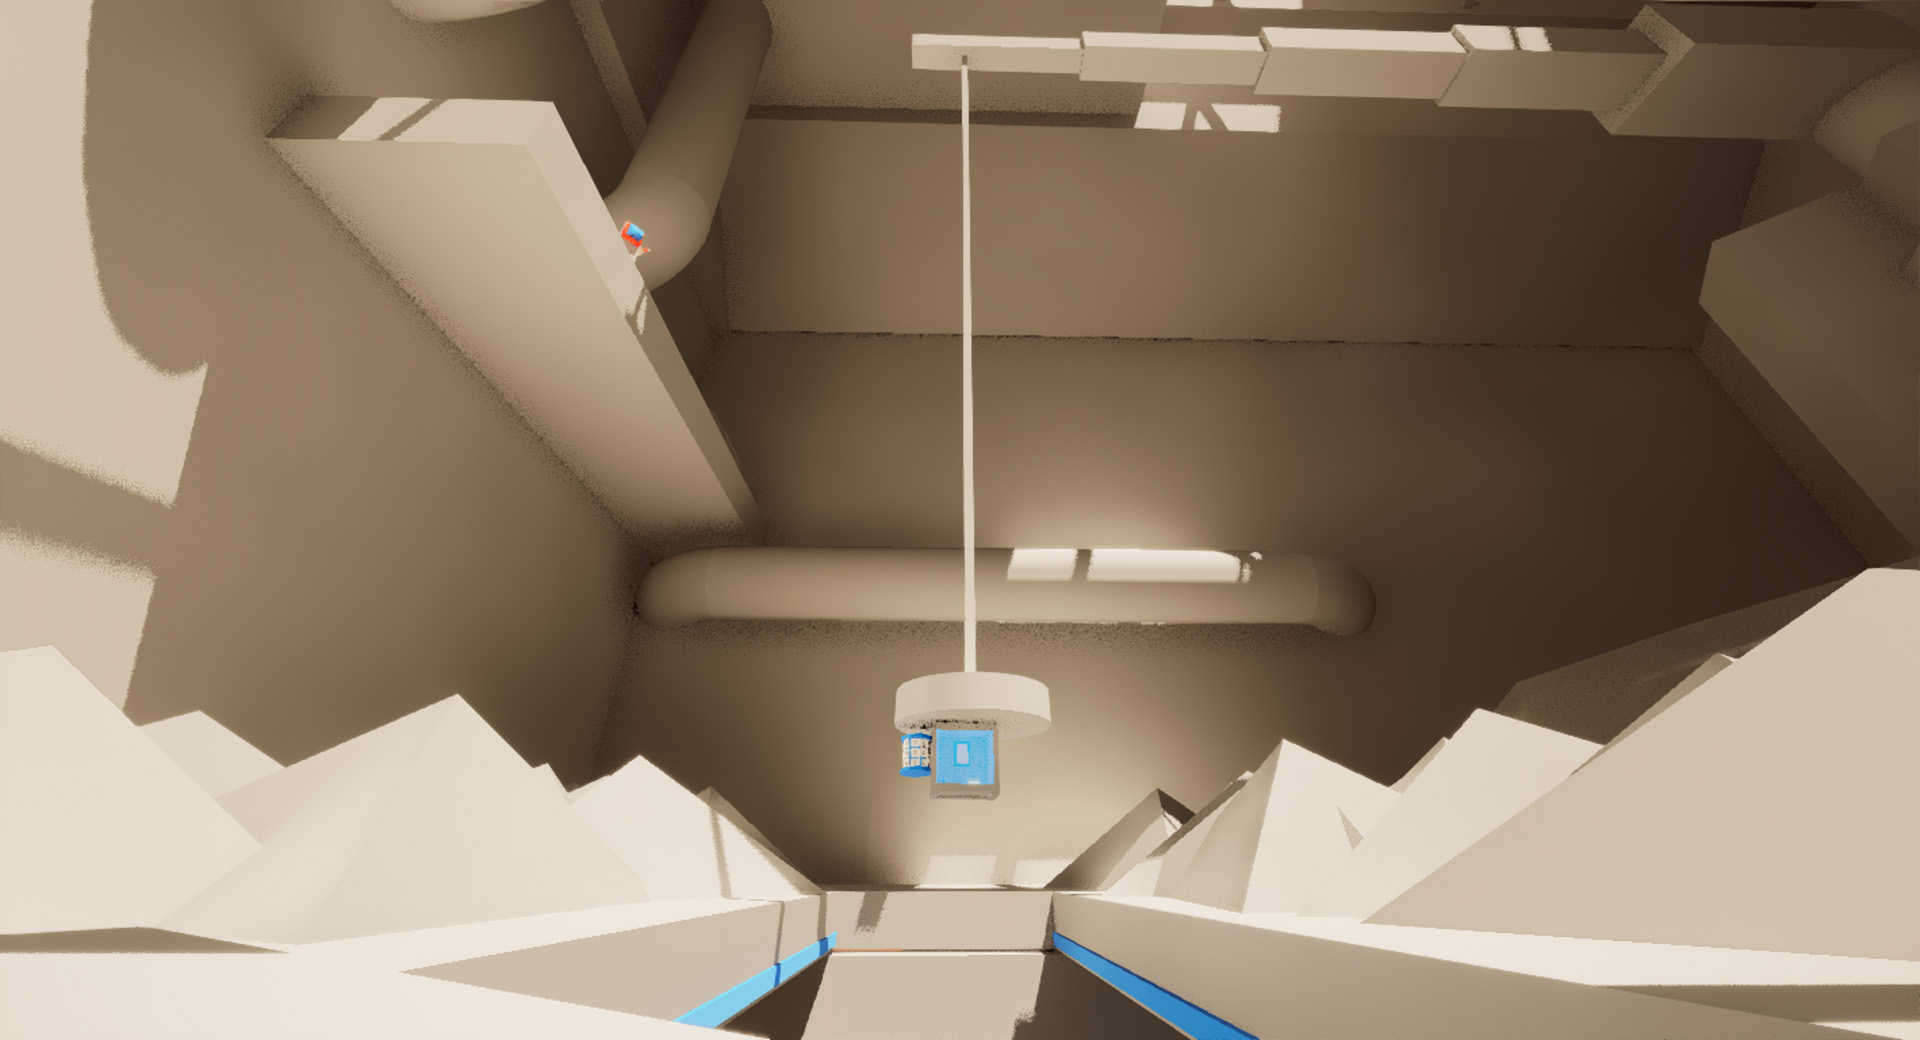
Starting Point - Floor 0, Compactor Room, Side A
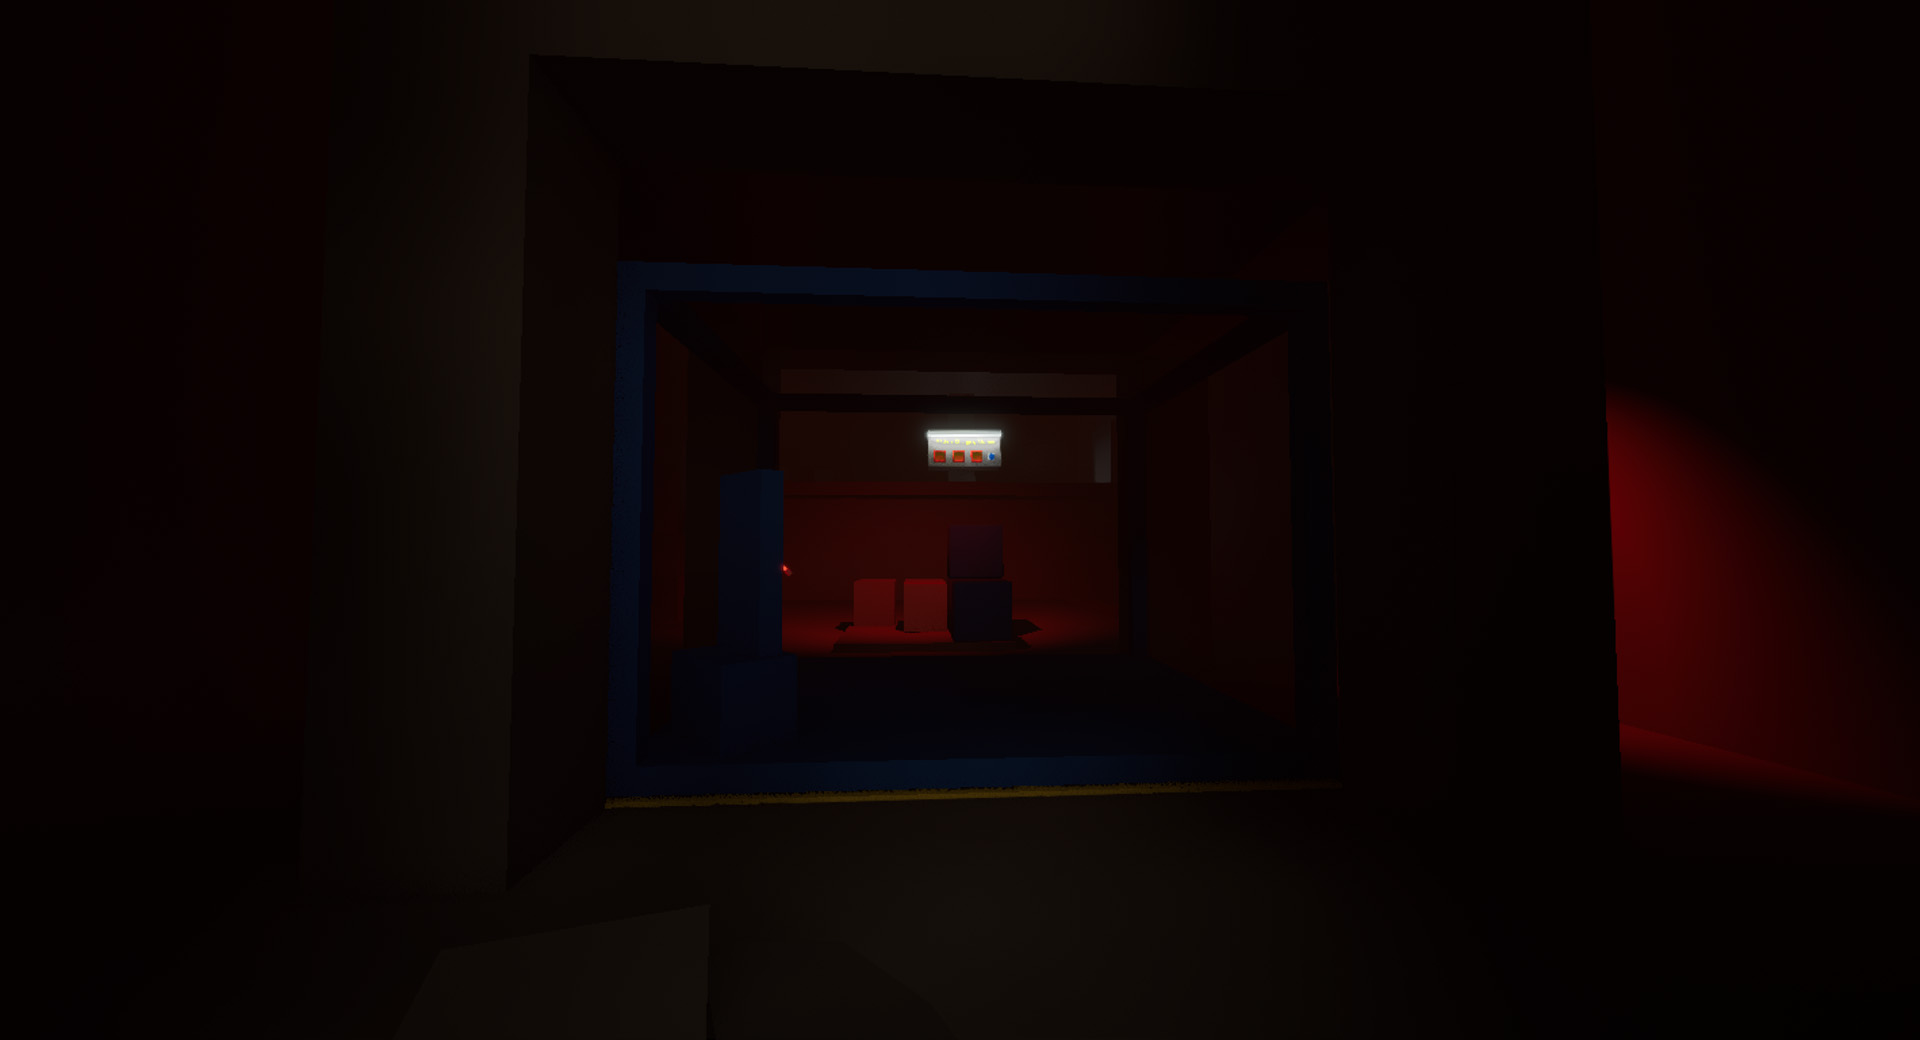
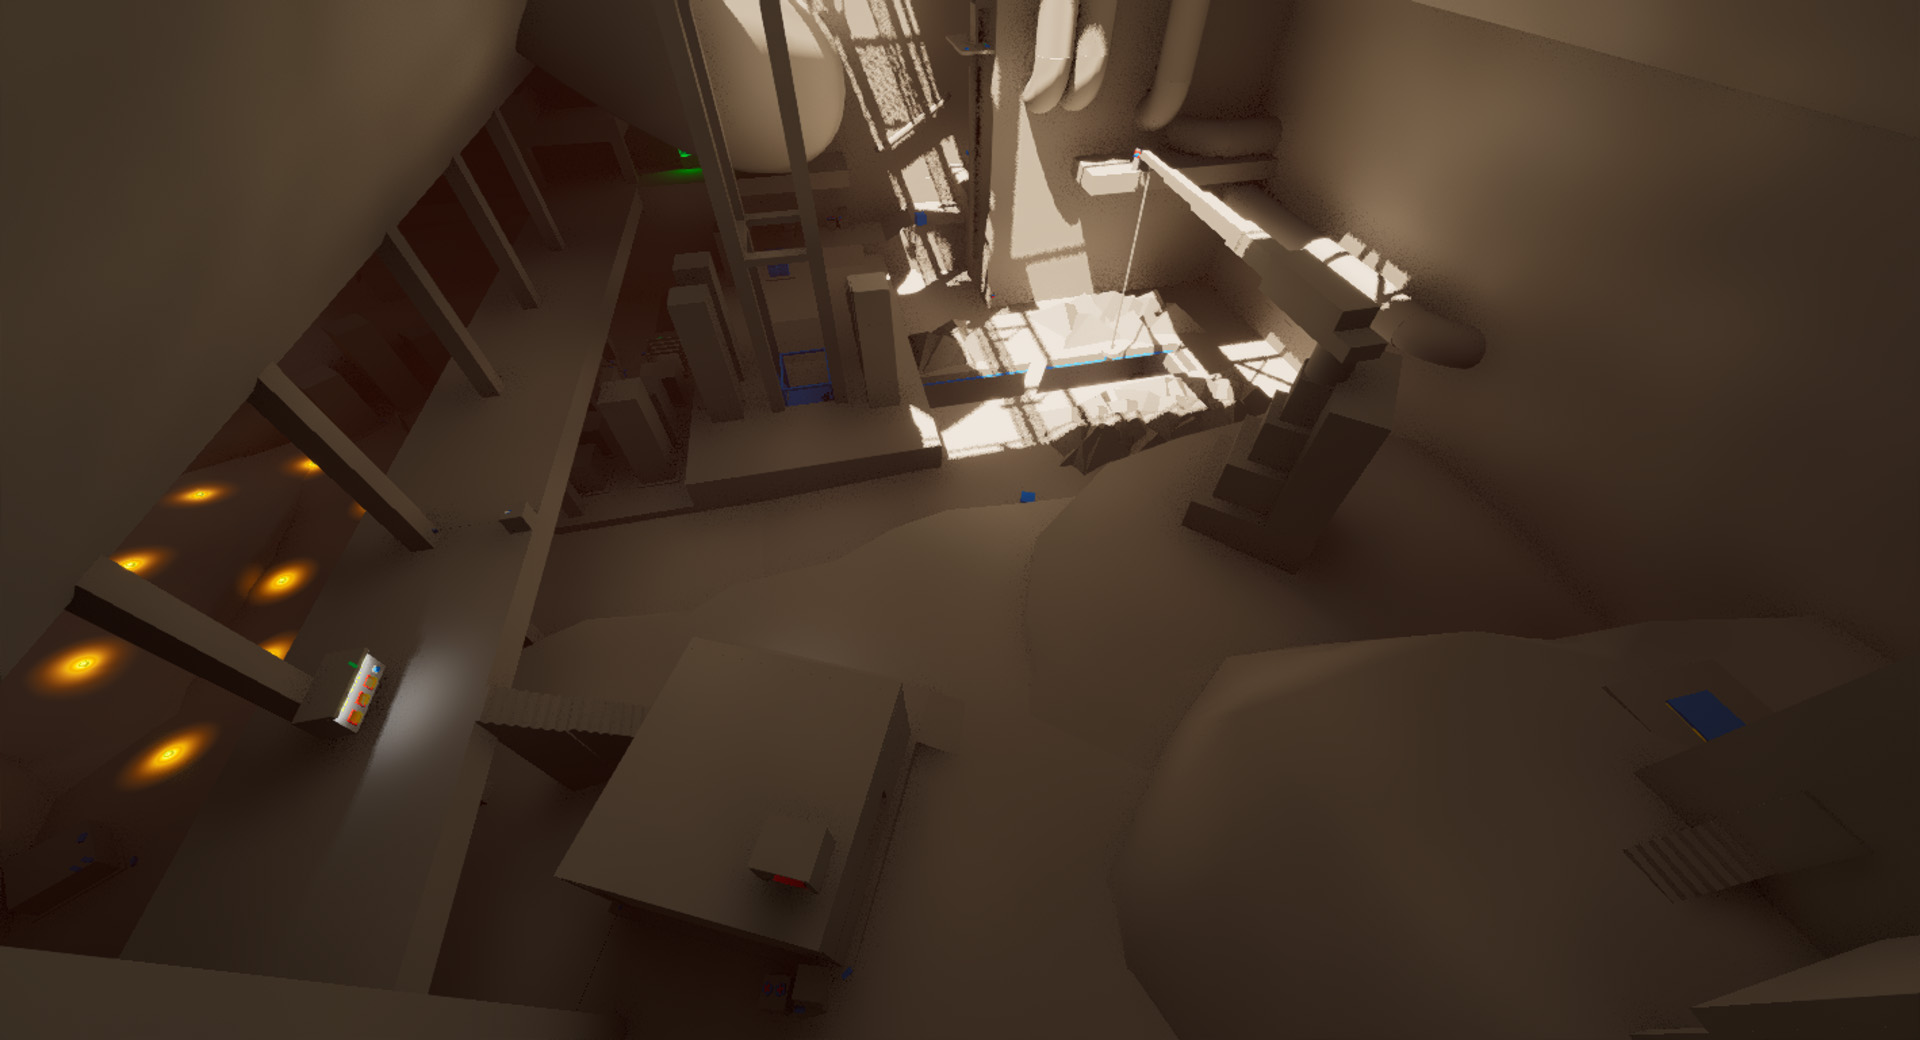
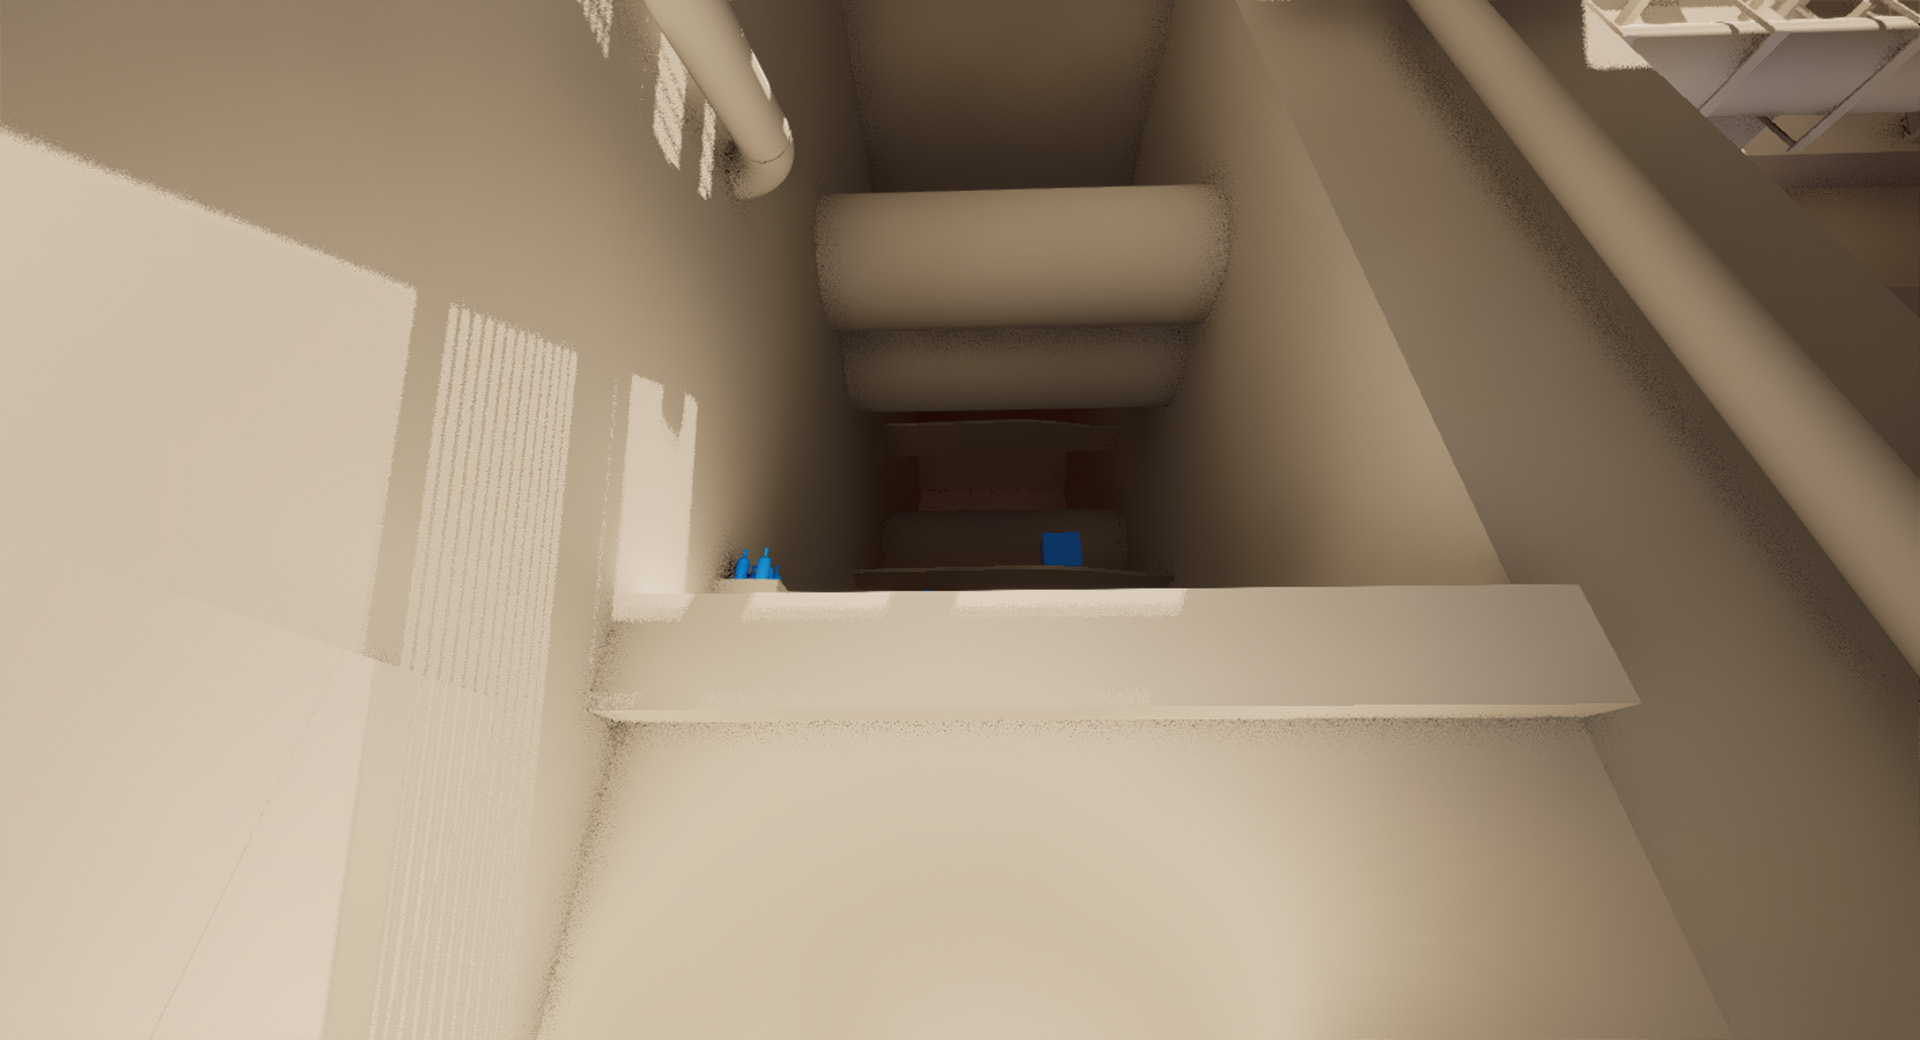
It was important to me that this early view remained consistently and compelling as I designed the level out from the first room. Each time I added anything to the level that might be within this frame, I would re-check this view to ensure that it still showcased the primary objective in the distance, and maintained the presentation of scale.
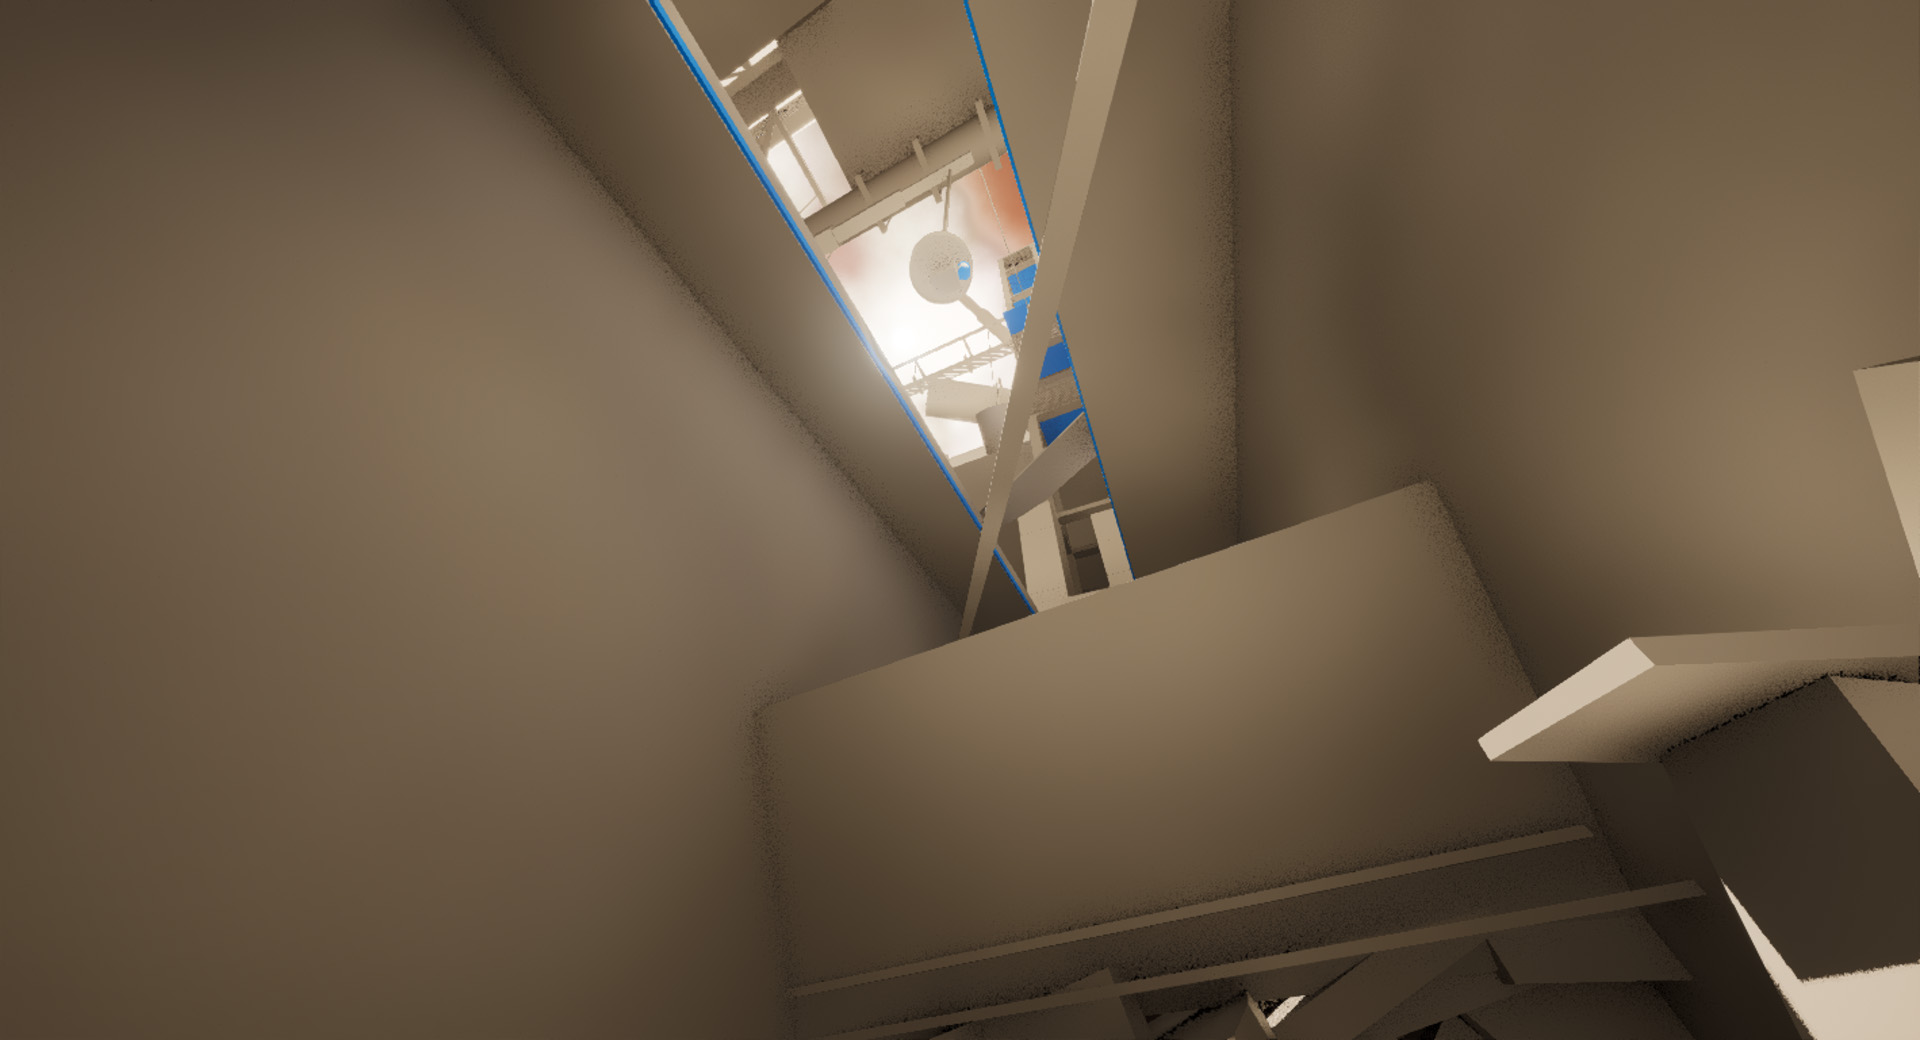
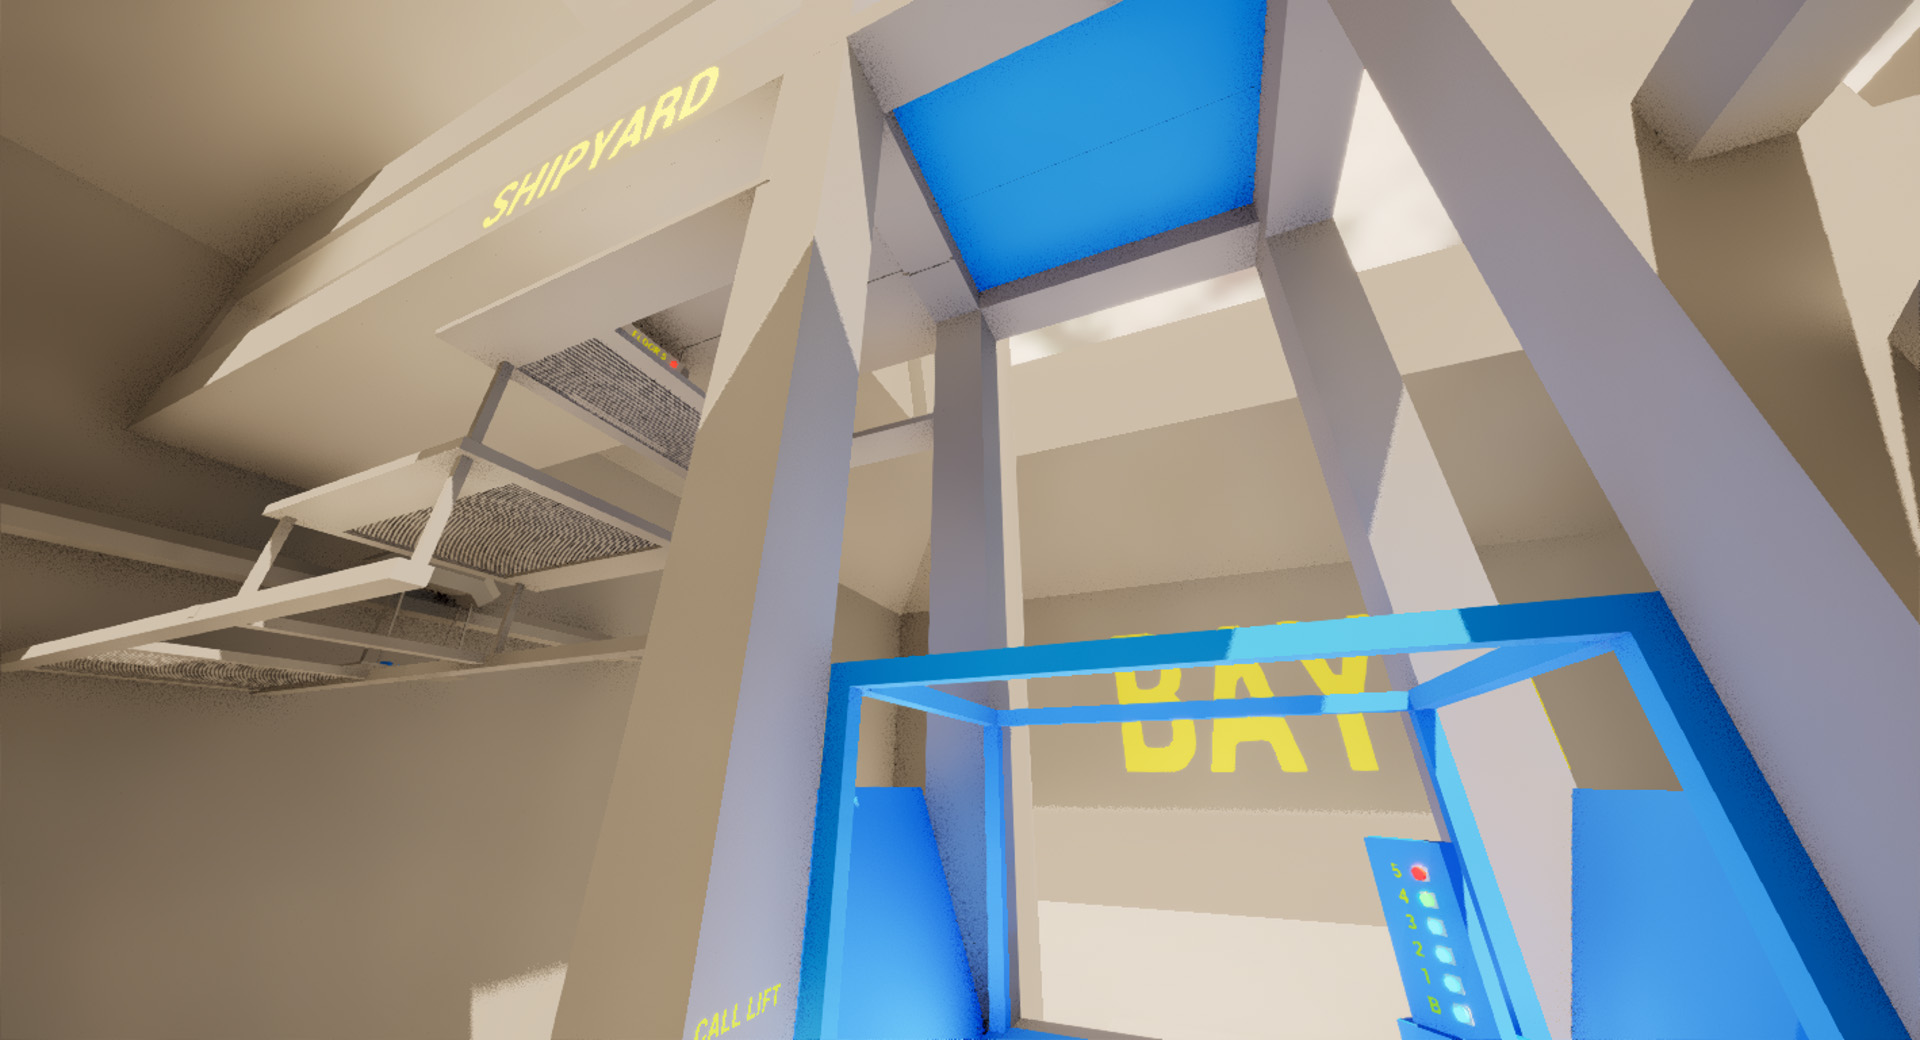
The first room begins by showing the player the core feature of the level (the lift) and the primary destination in the distance (the shipyard).

Iterative playtesting highlighted the importance of keeping the early rooms simple and focused. In the end, all that exists in this early space, other than the direct path forward, is a high jump that requires a box from the next area. This puzzle is intended to reward players for perception and problem solving while not causing too much distraction.
Floor 0, Compactor Room, Side B
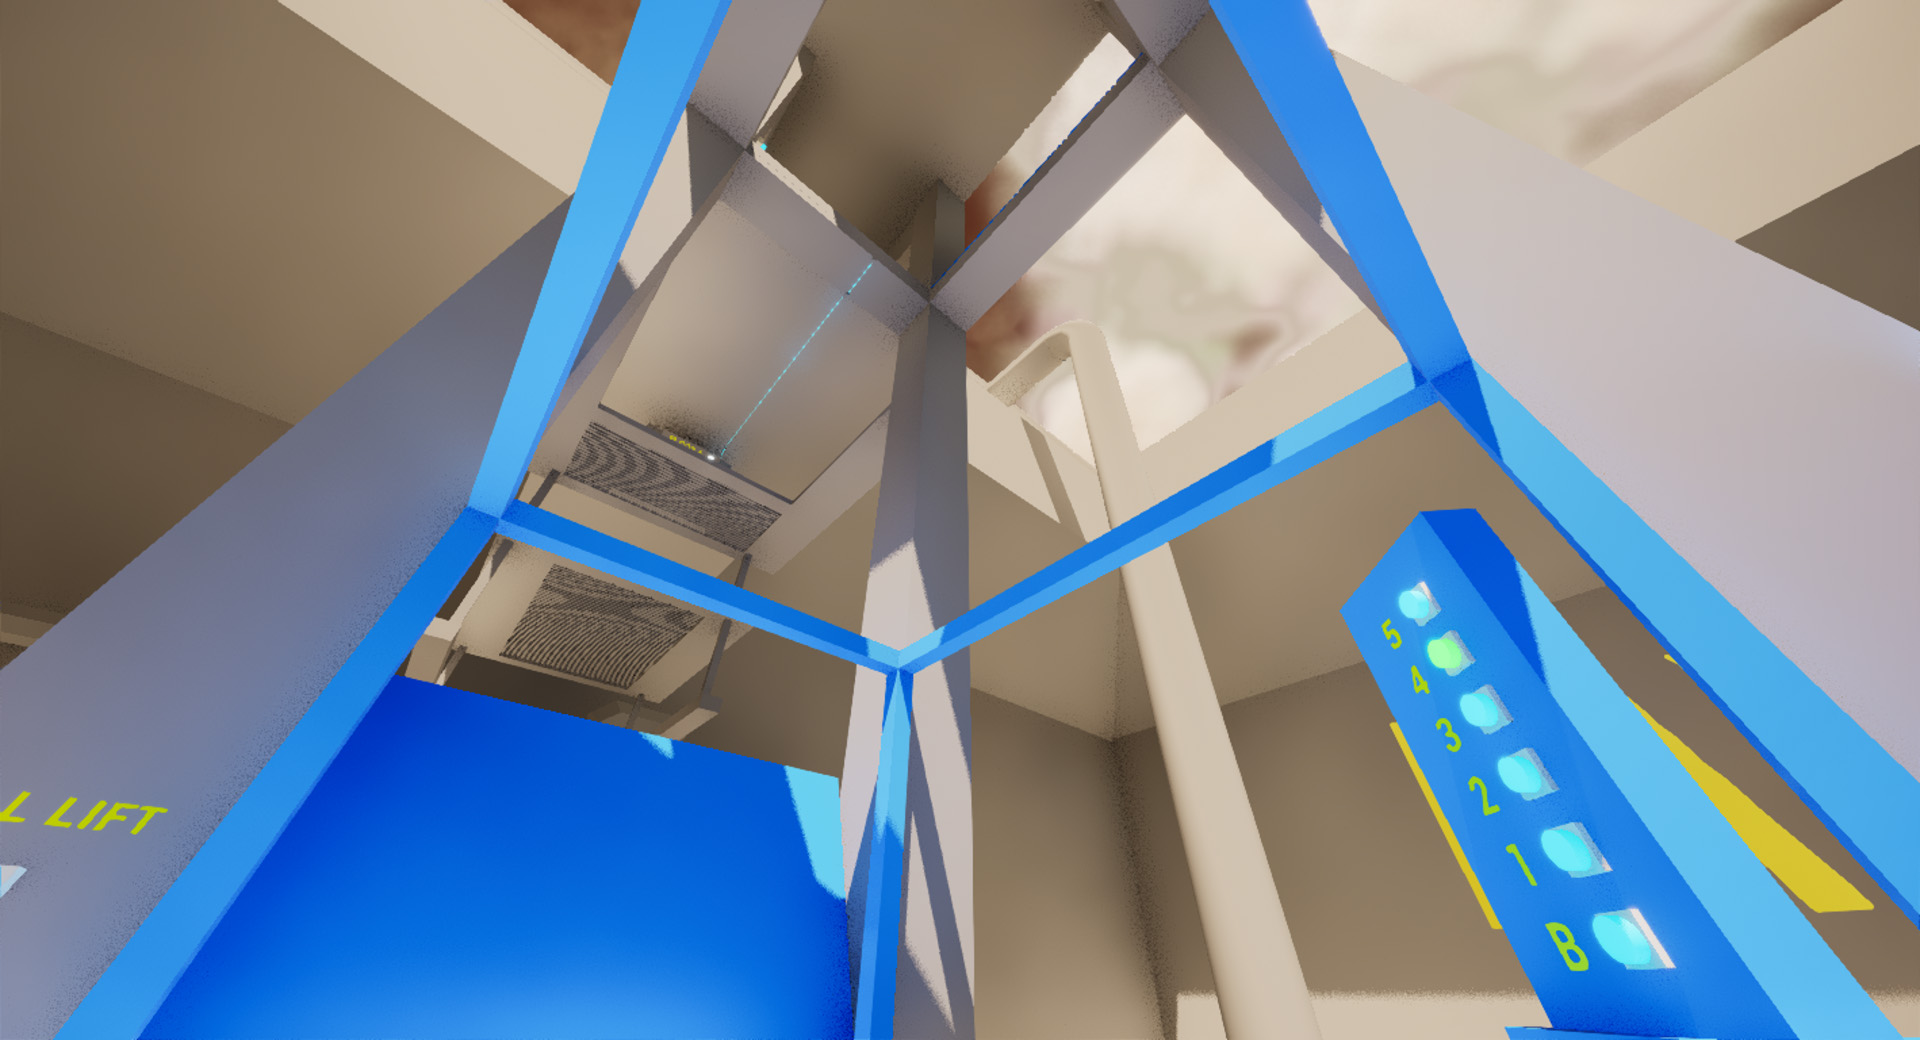
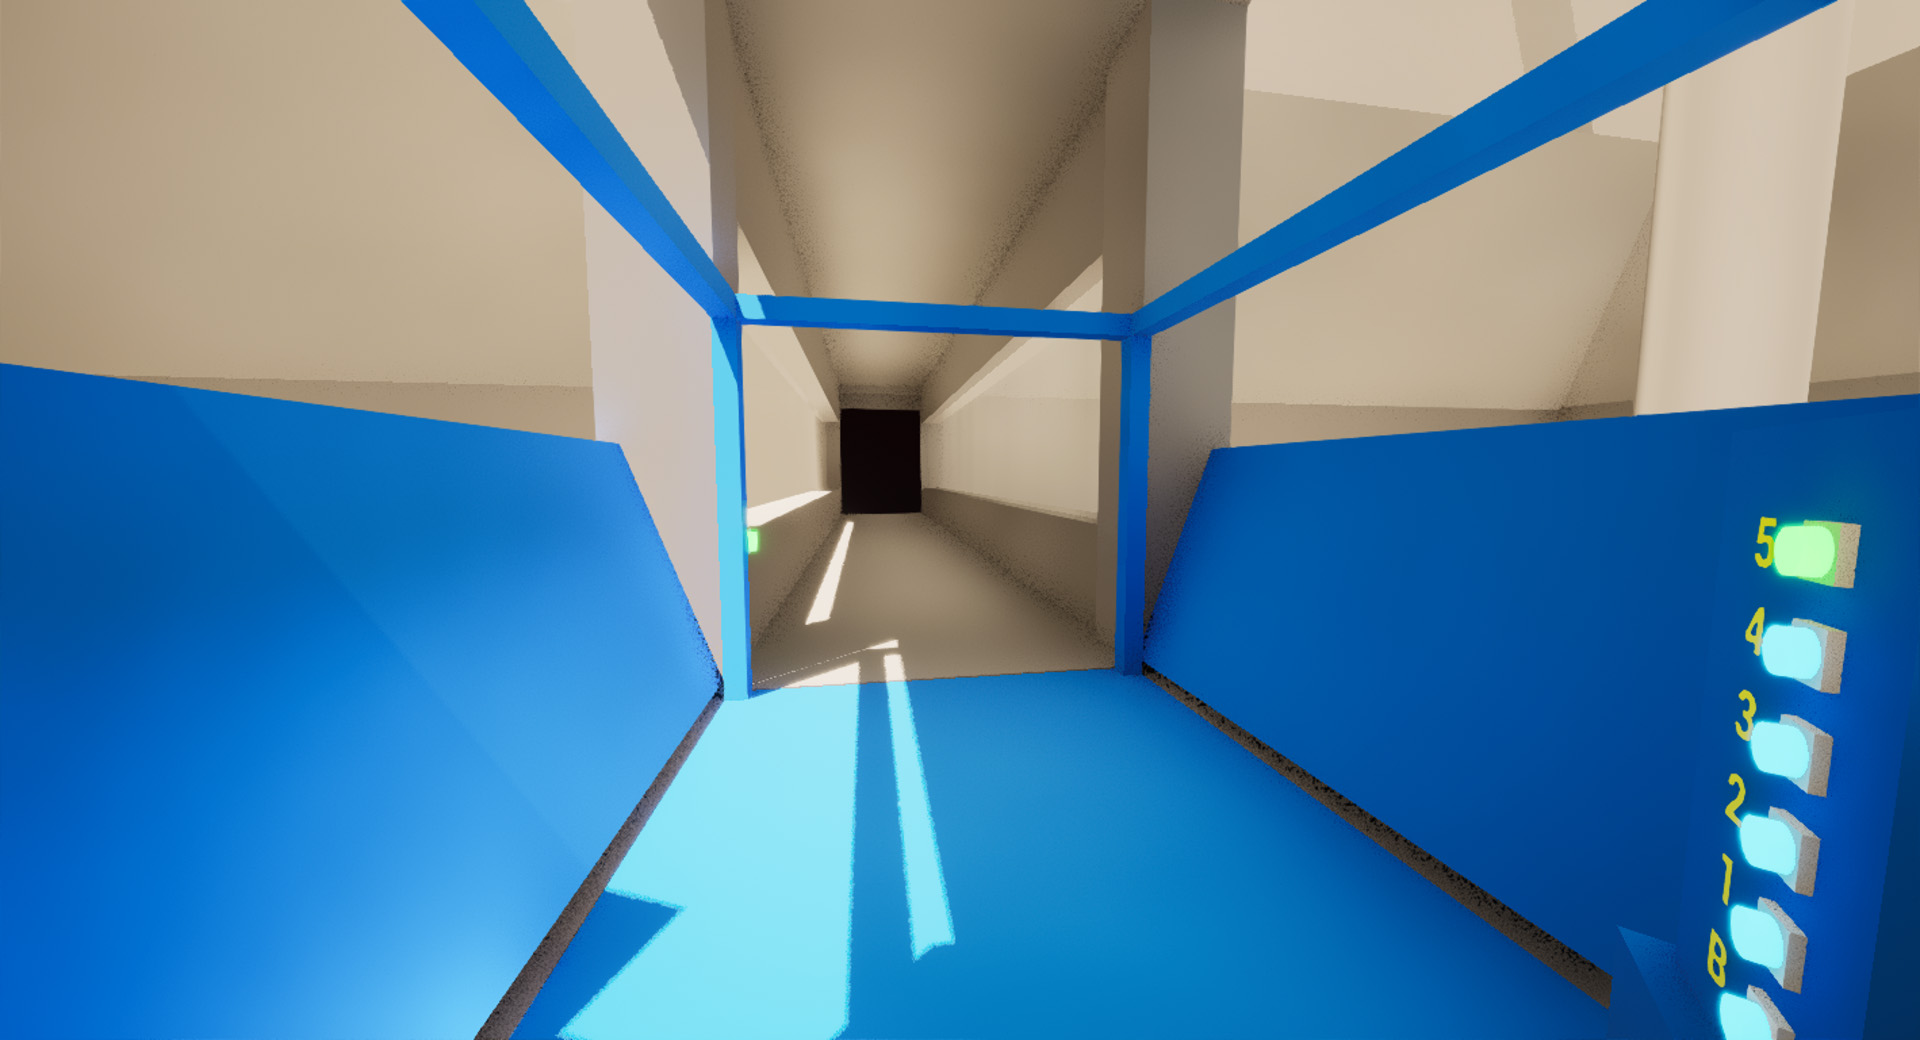
Floor 0, Lift Room
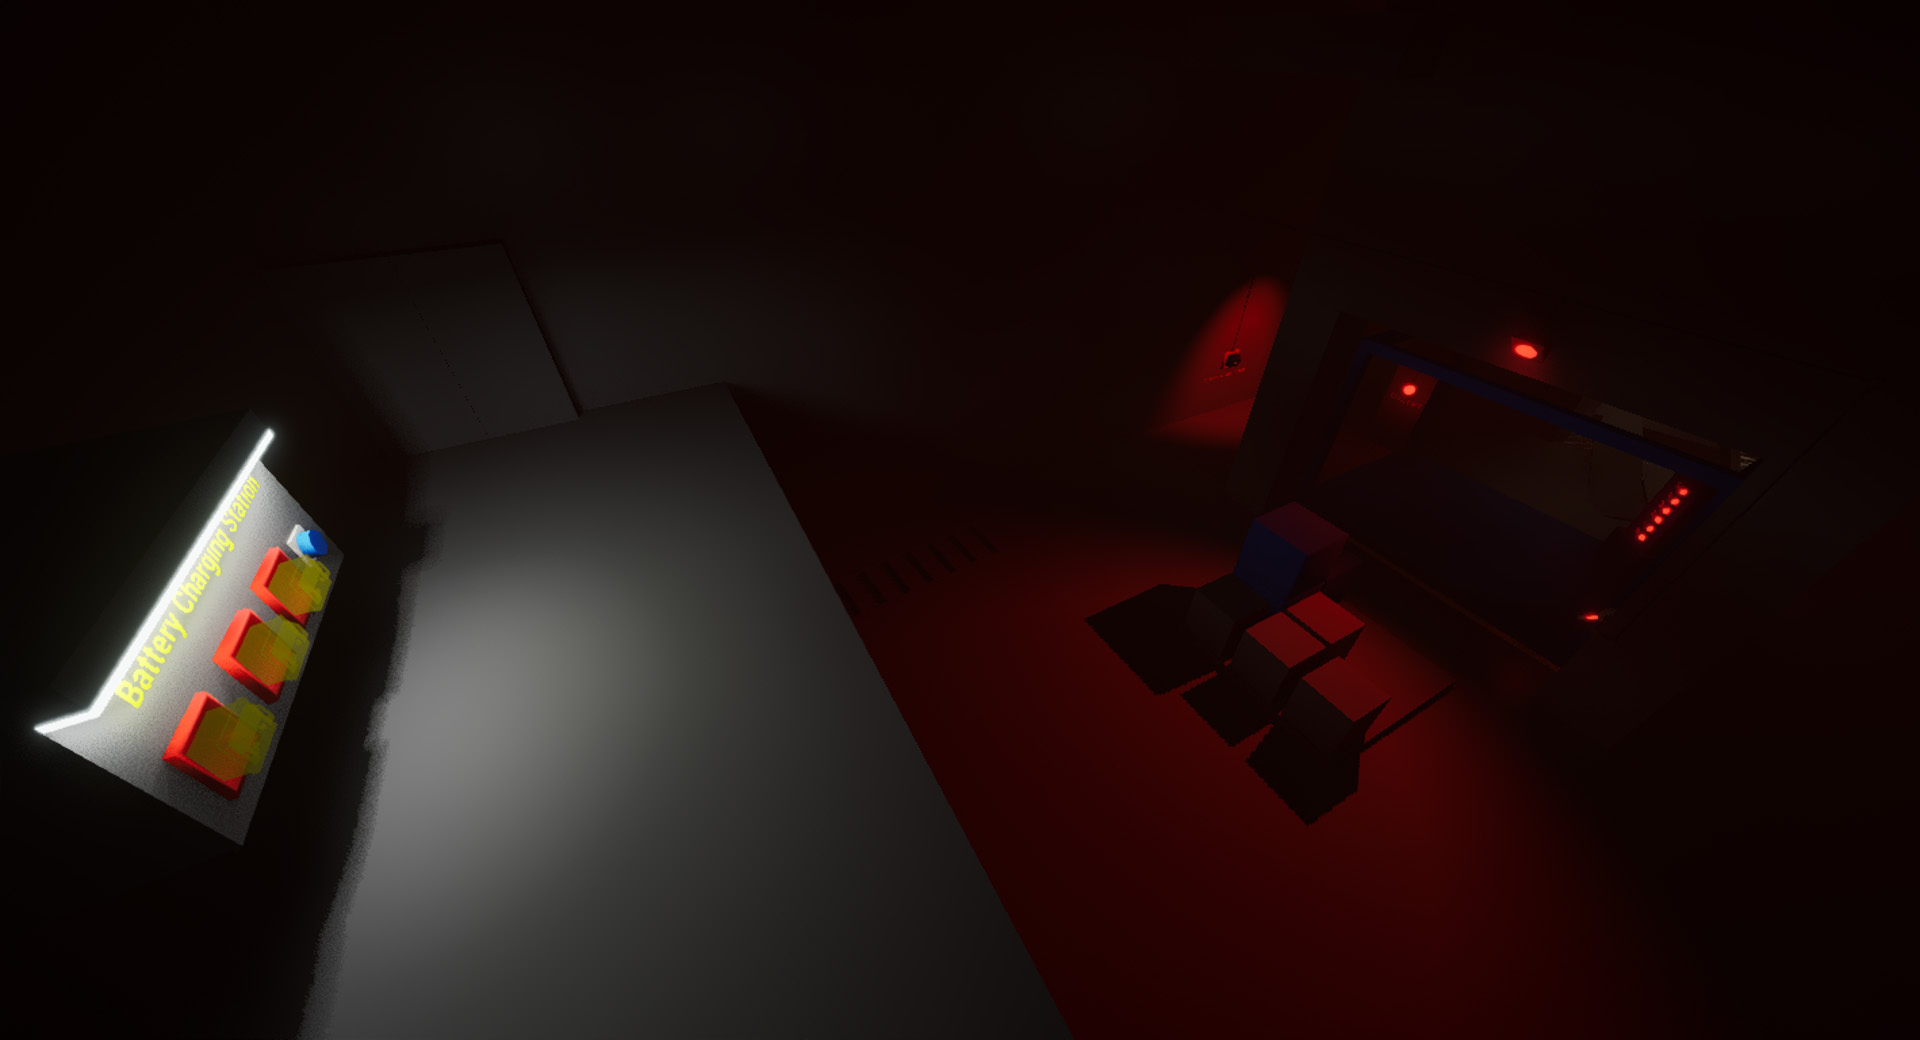
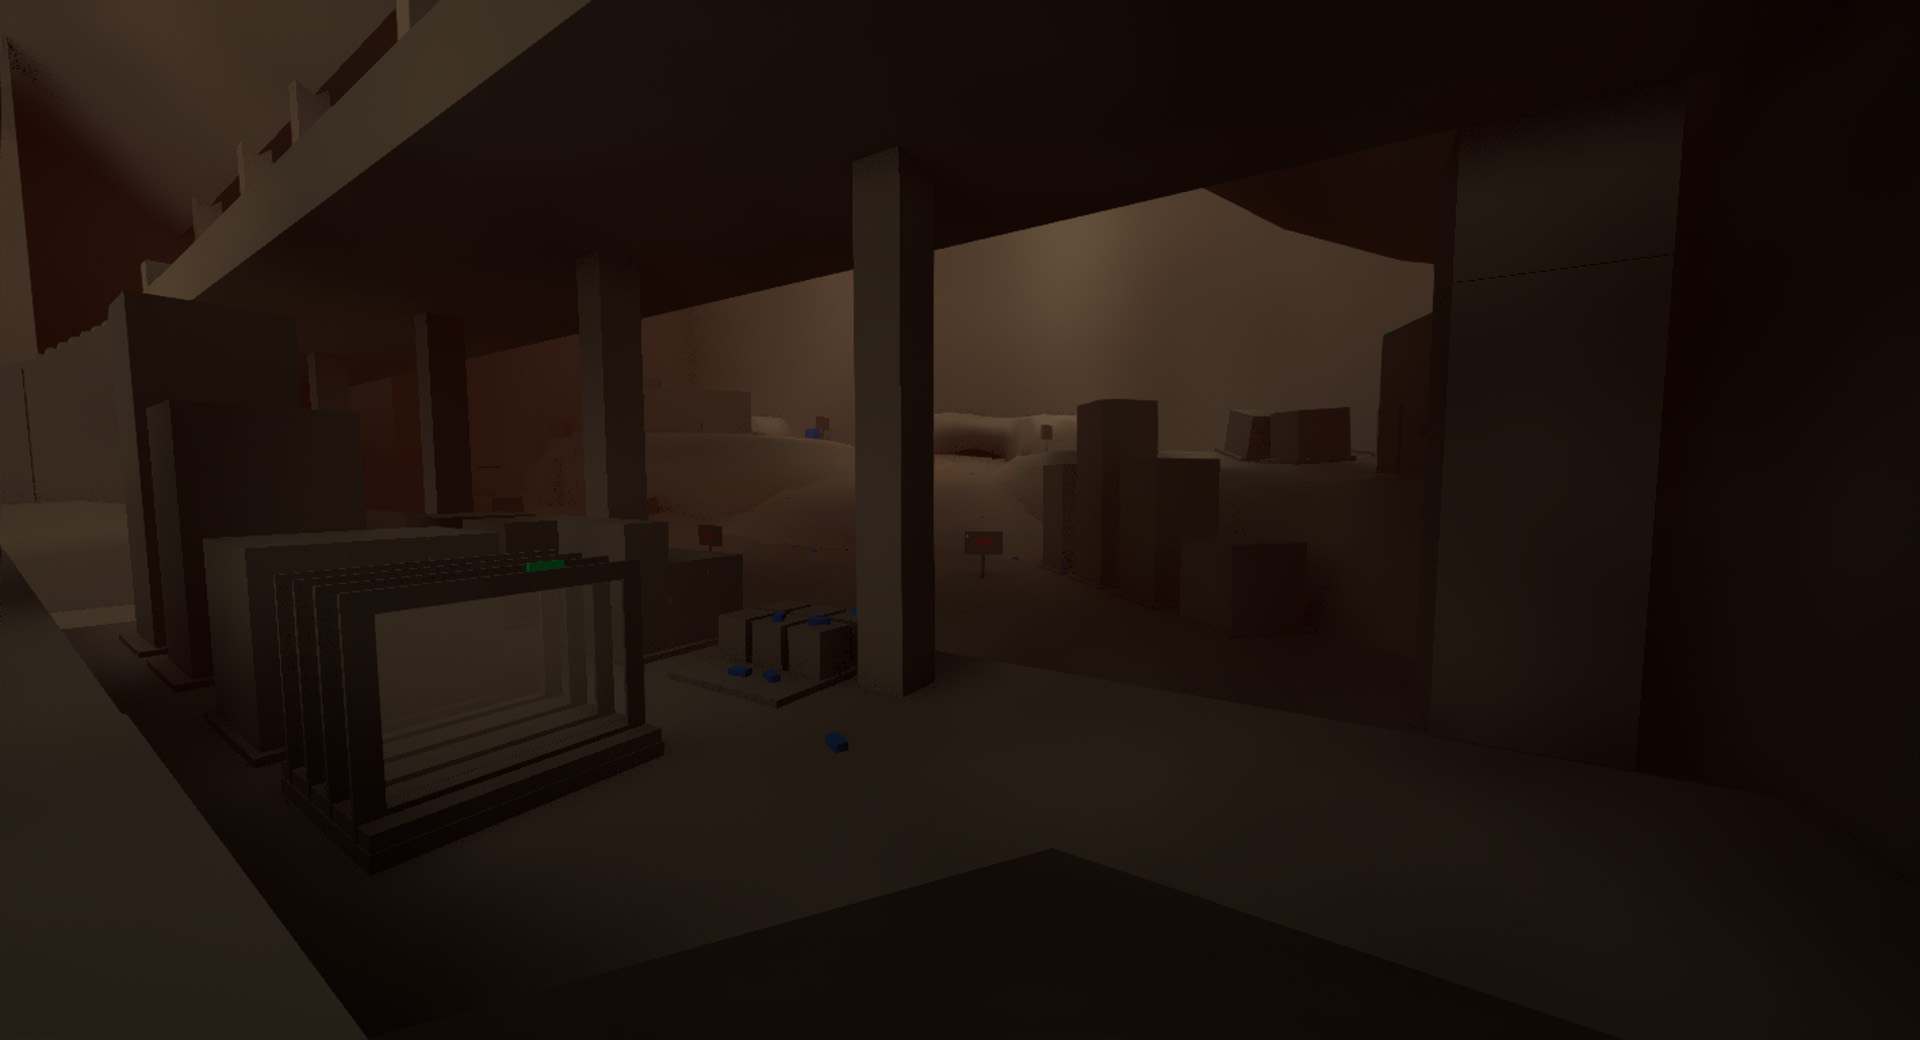
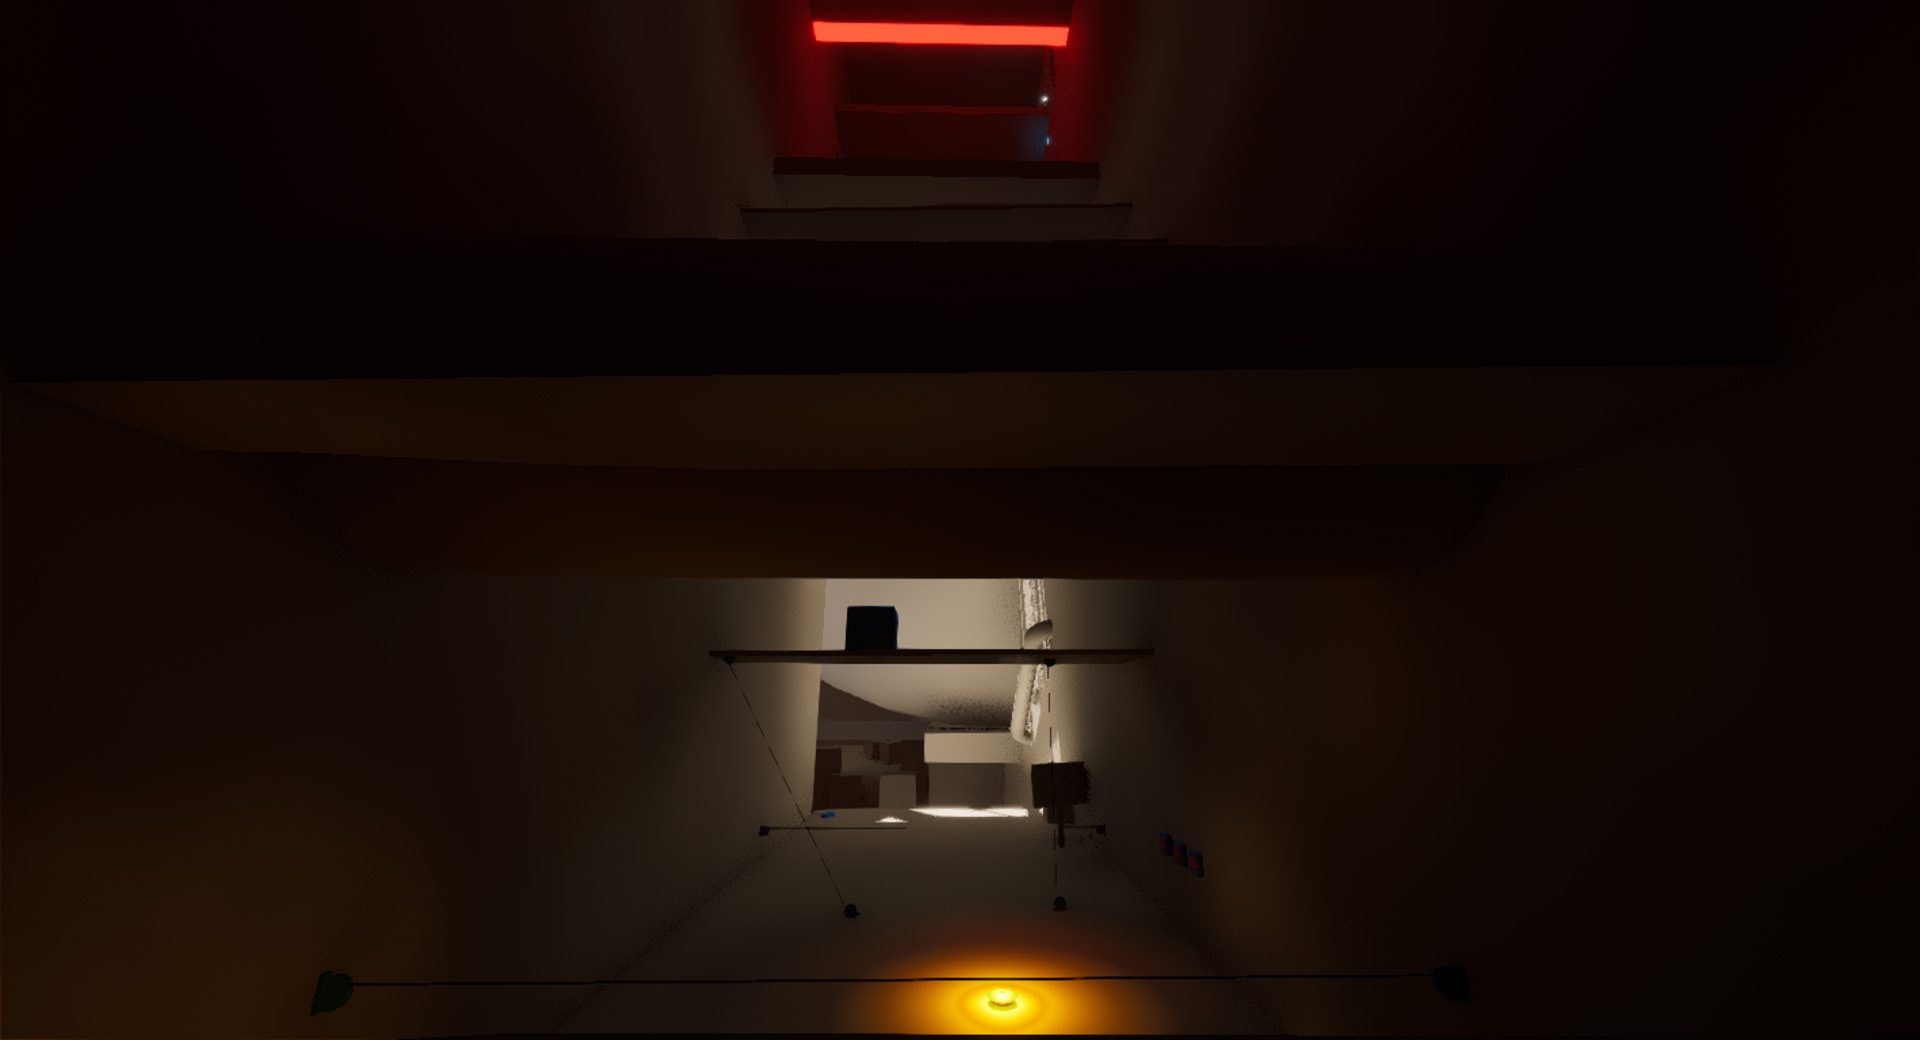
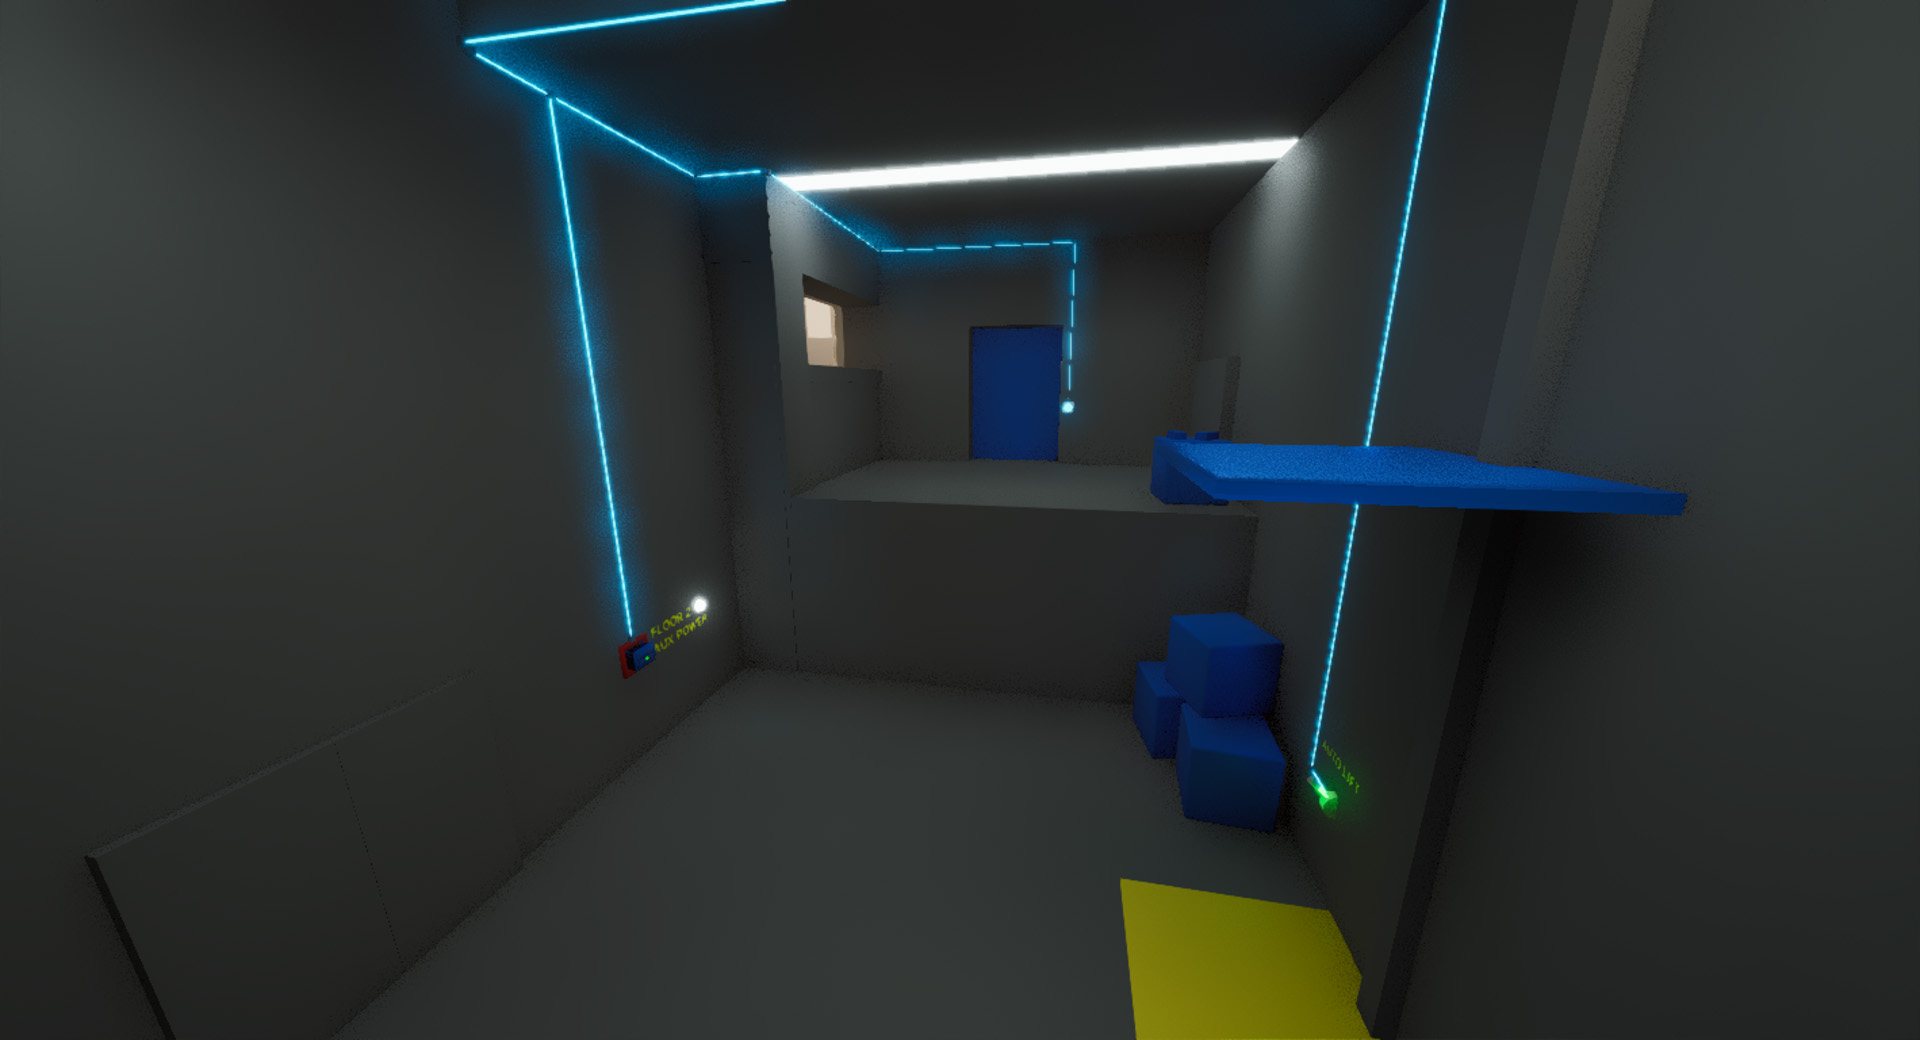
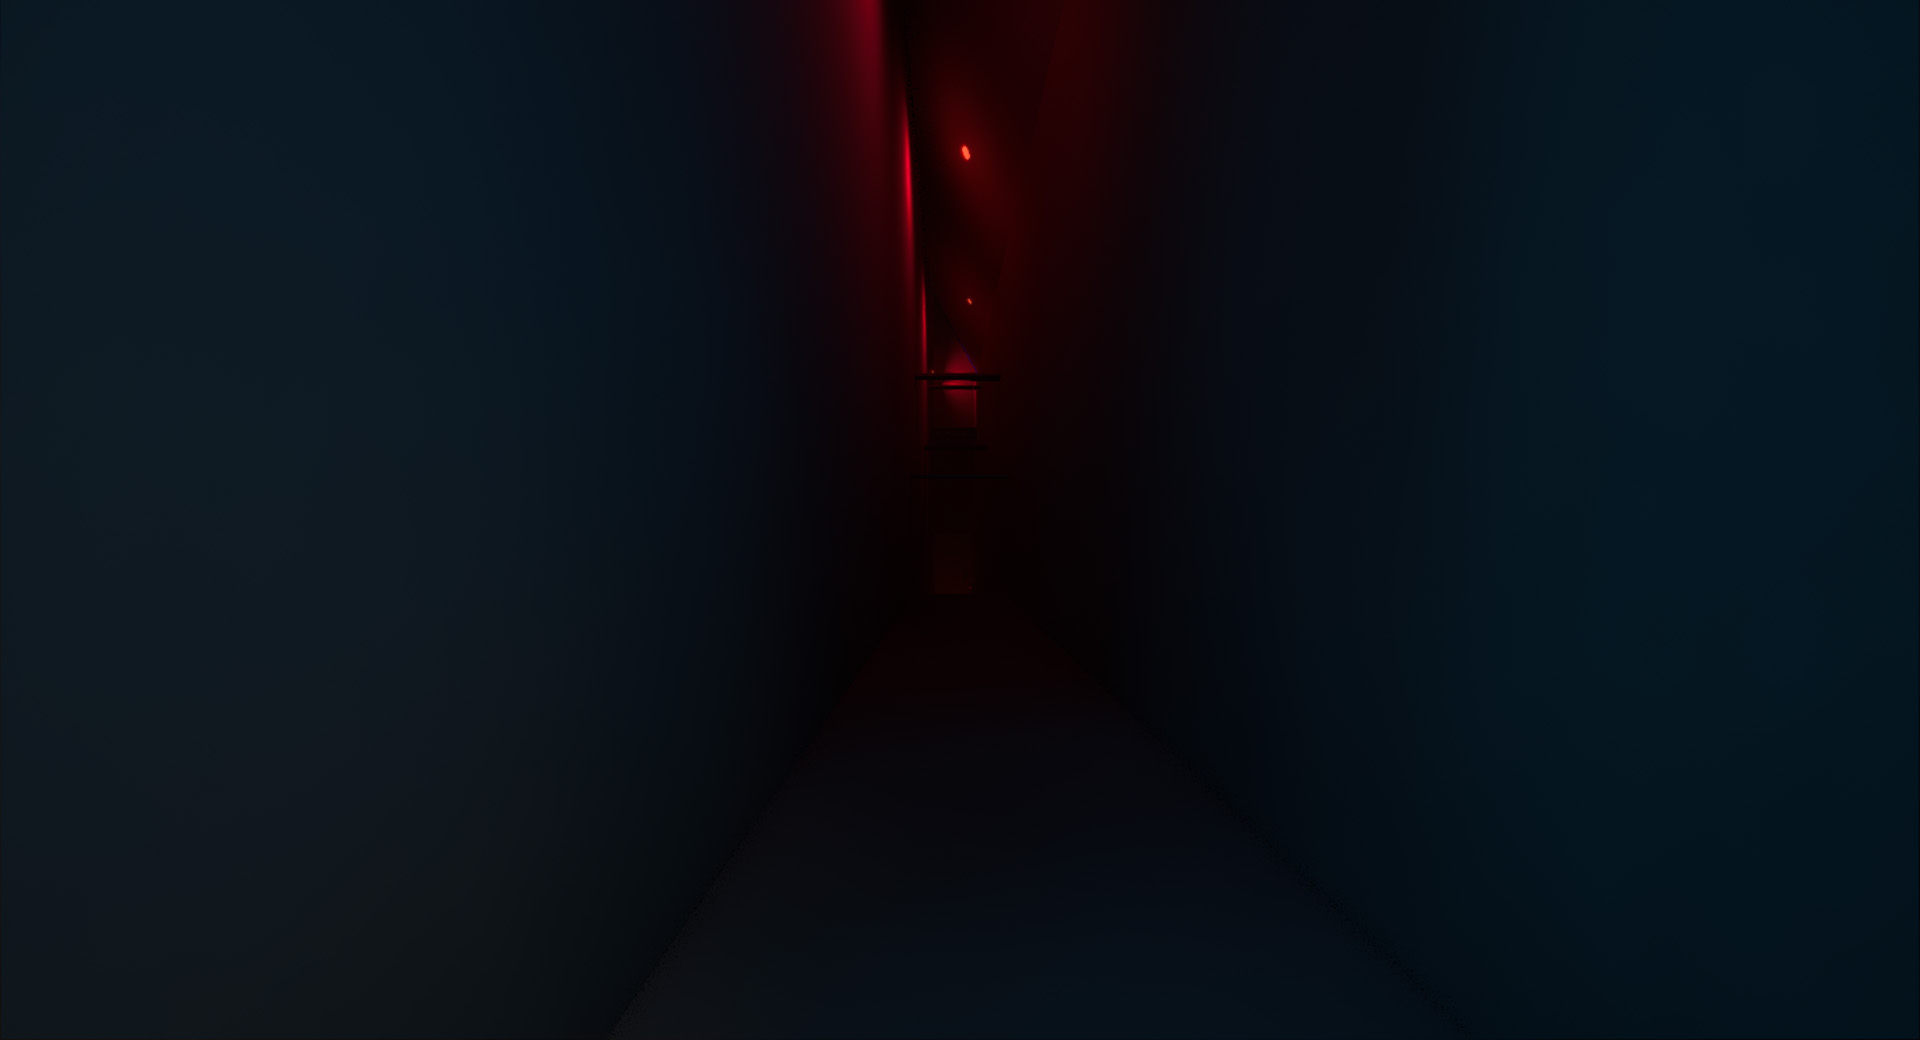
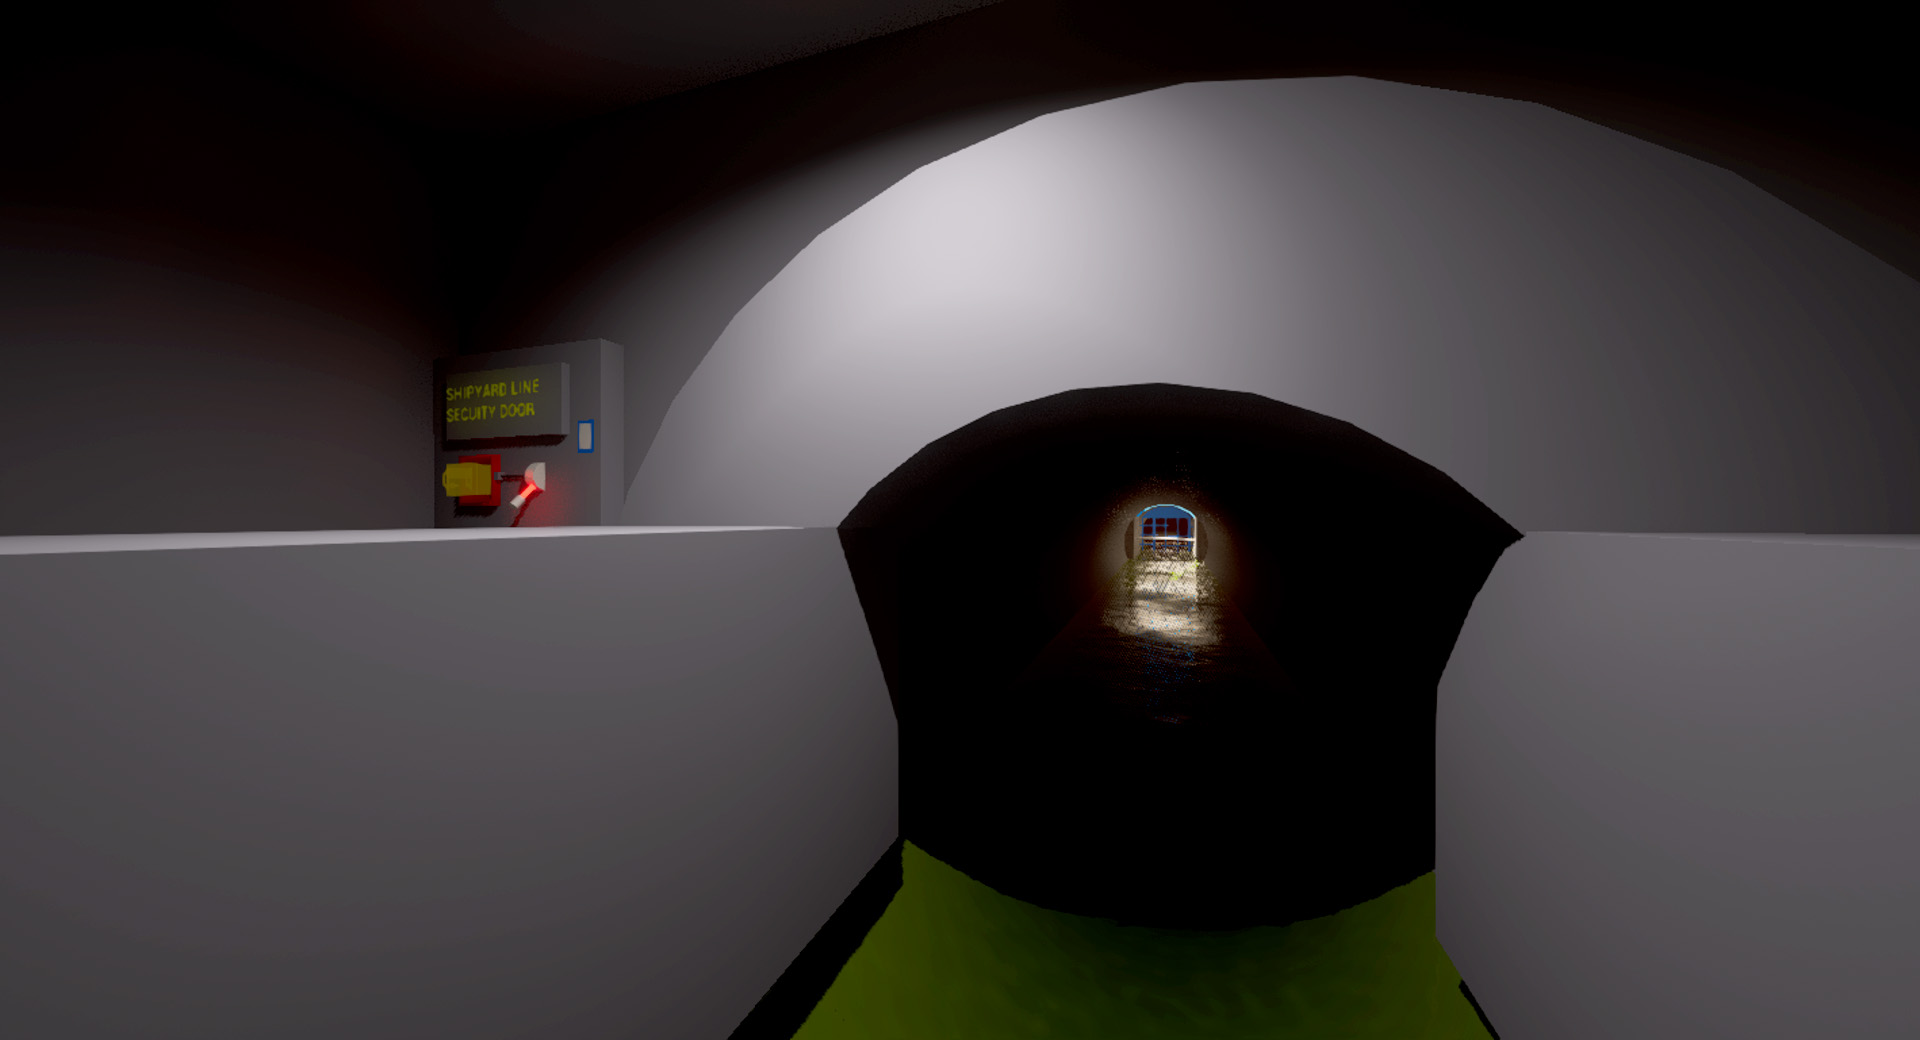
This area is intentionally dark, because it is the flashlight tutorial area, and the flashlight tutorial is especially important for this level as lighting is used throughout and the flashlight is considered one of the mechanical tools required to overcome some of these challenges. Most players are drawn naturally toward the bright white light of the battery charger in the distance. Red emergency lighting is used in intentional locations to highlight the other most important things that the player should pay attention to until the power is turned on.
This area originally had multiple puzzles, lore to read, and additional mechanics to experiment with. Playtesting highlighted the importance of keeping the starting areas simple and straightforward. Over time iterative design refined this room down into a simple, straightforward space clear of distraction.
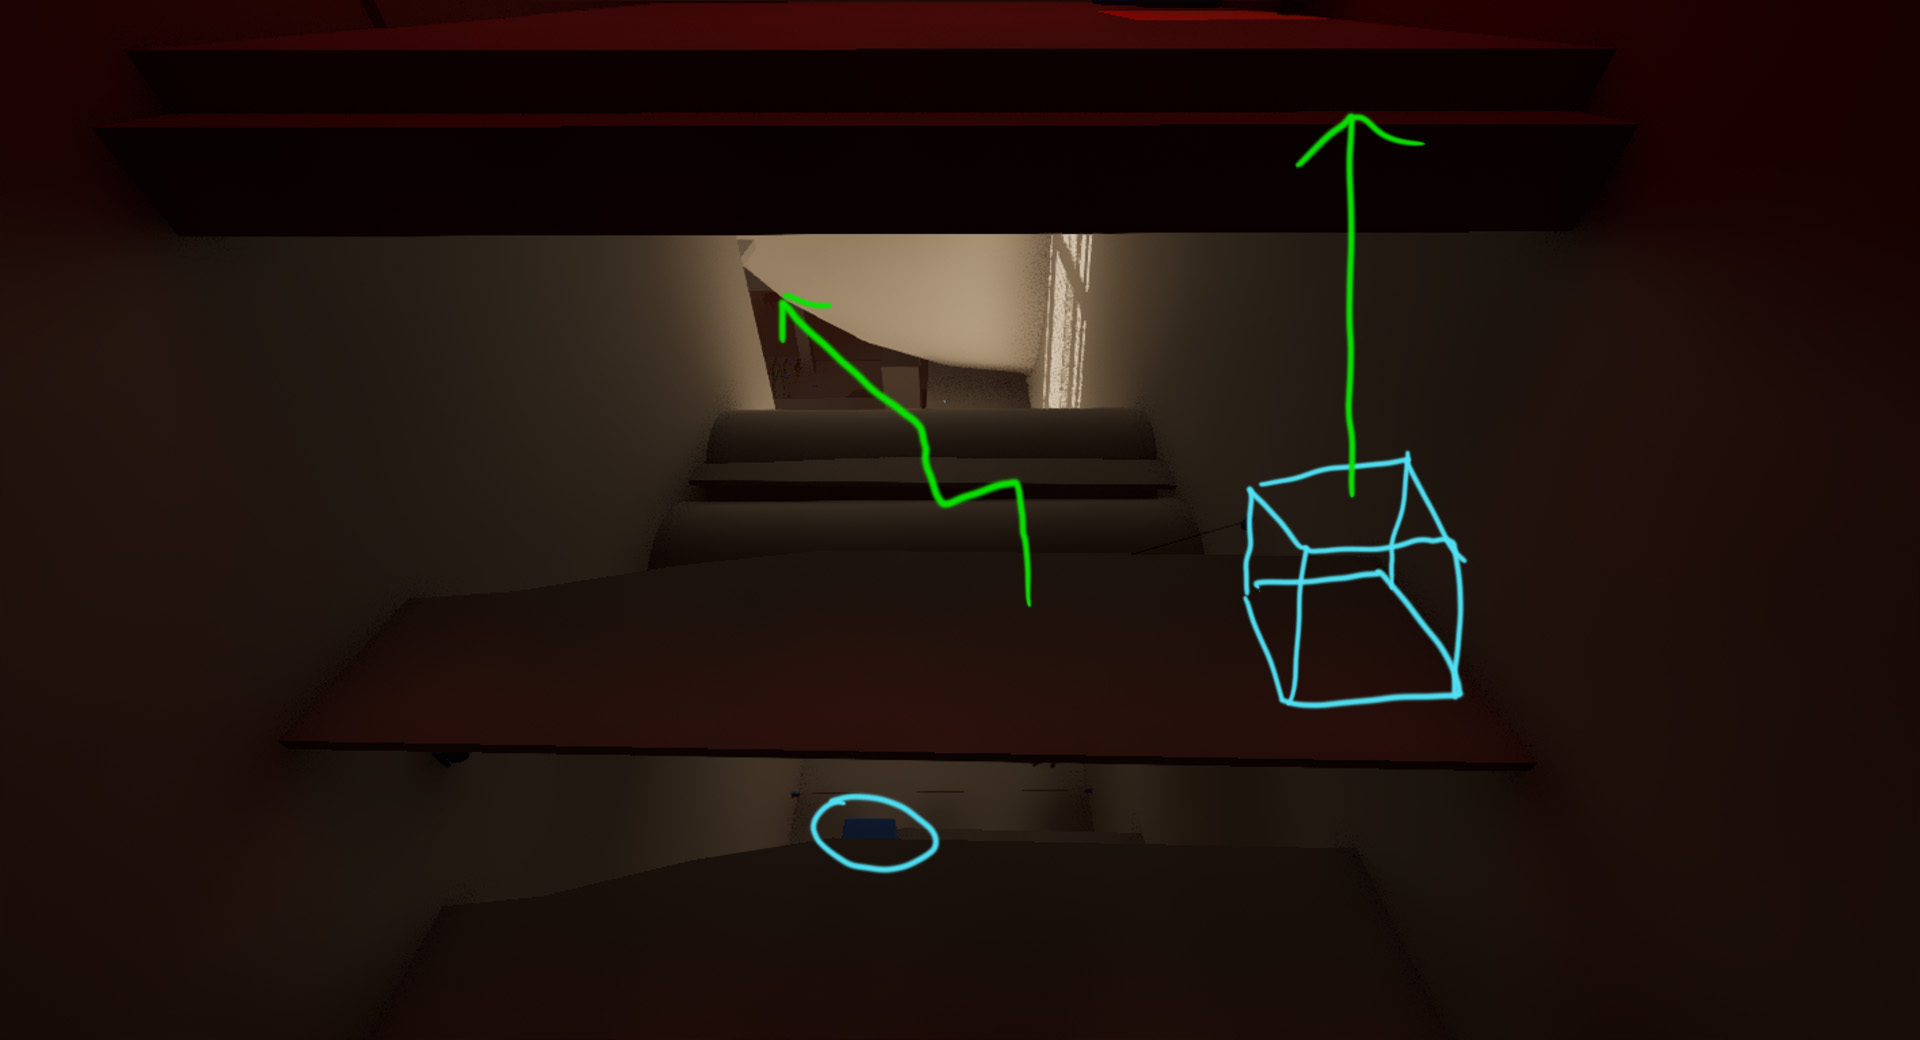
The player encounters a situation of a dead battery in one part of the room connected to a unpowered buttons and levers, and a glowing battery charger in another part of the room. Between the dead battery and the battery charger is a ledge that is too high for the player to simply jump and mantle from the floor. Luckily for the player, there is both a movable box in the middle of the room, and a stack of boxes that facilitate a less obvious skill jump elsewhere in the room.
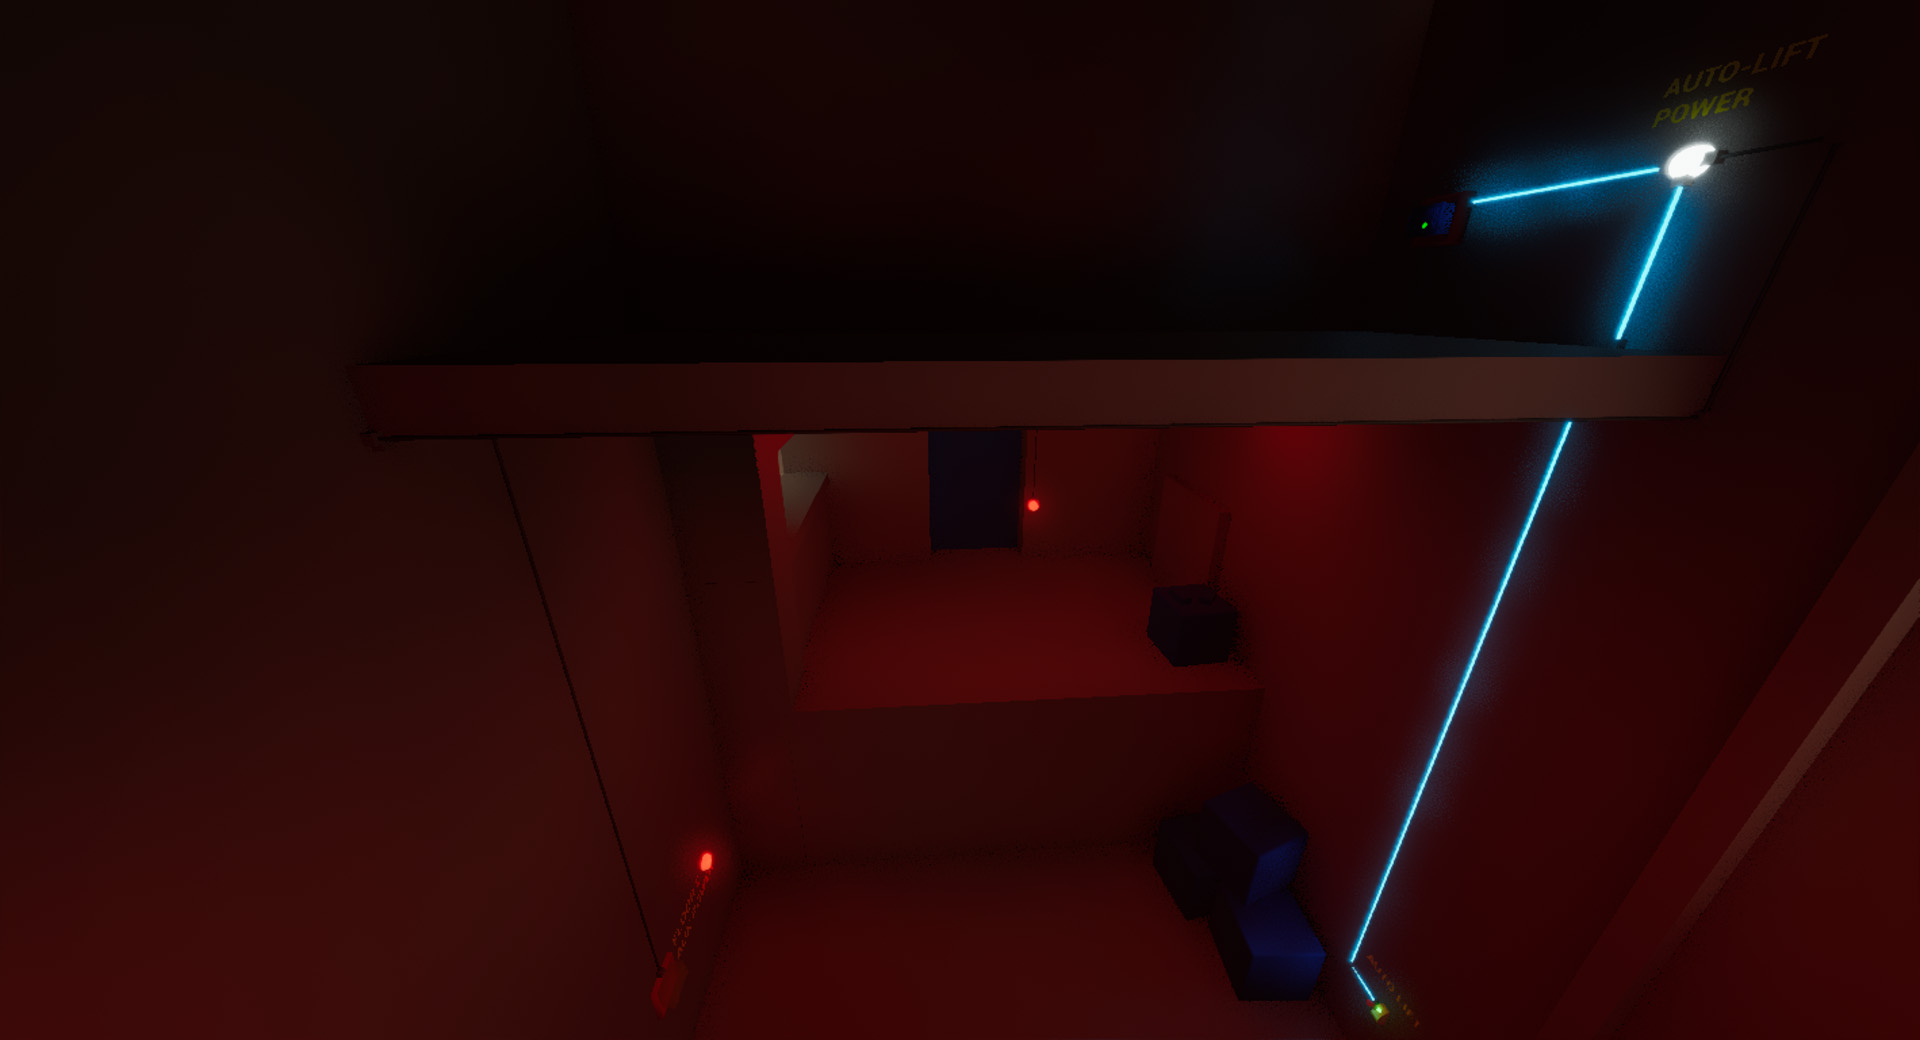
Initially the level only utilize powered/unpowered visual language directly on powered buttons and levers, but after extensive testing it was clear that the player wanted more visual indicators of how each battery port was impacting the world around it. In the end I created a multi-path power grid generator tool so that I could quickly layout and generate dynamic power grids that I could easily manipulate.
After fully implementing the power grid in the level, I now consider any pre-power grid build to be unplayable by comparison. This experience taught me that even when designing levels where the solutions are not intended to be immediately obvious, it is essential that cause and effect is obvious and clear.
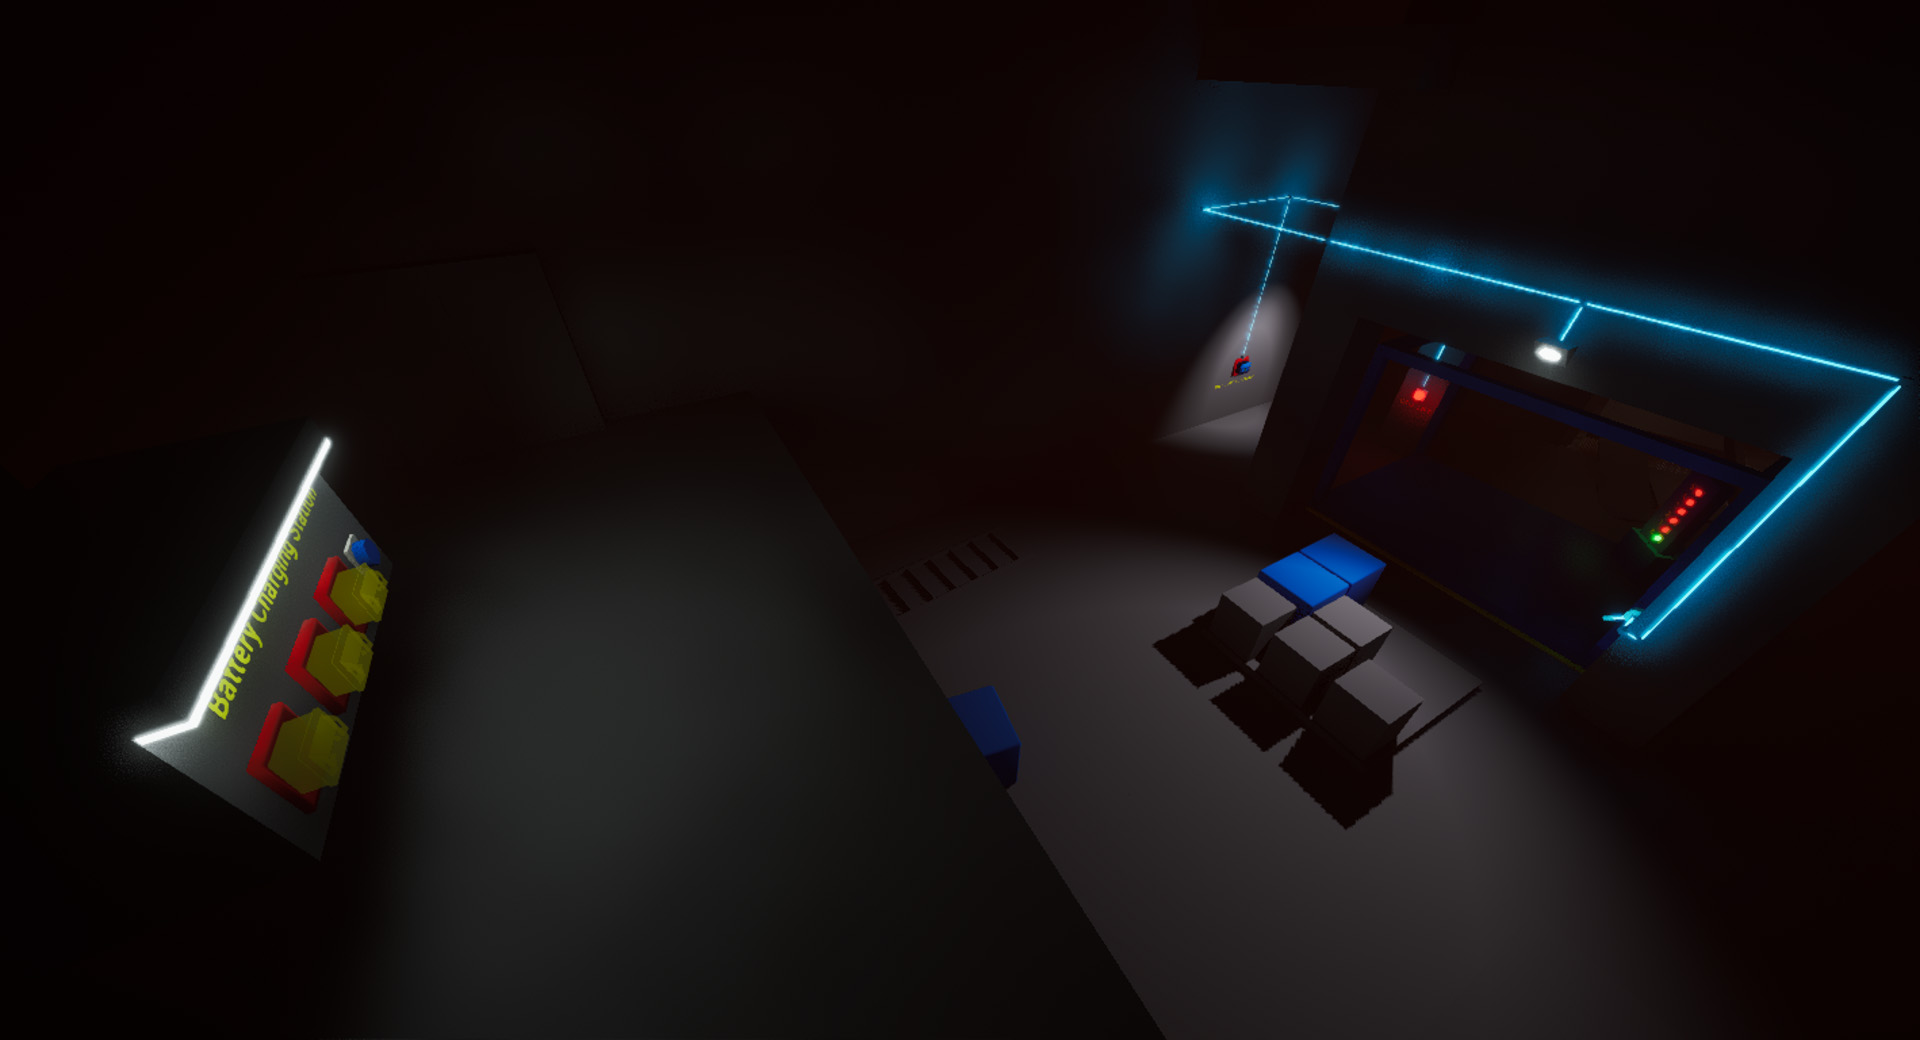
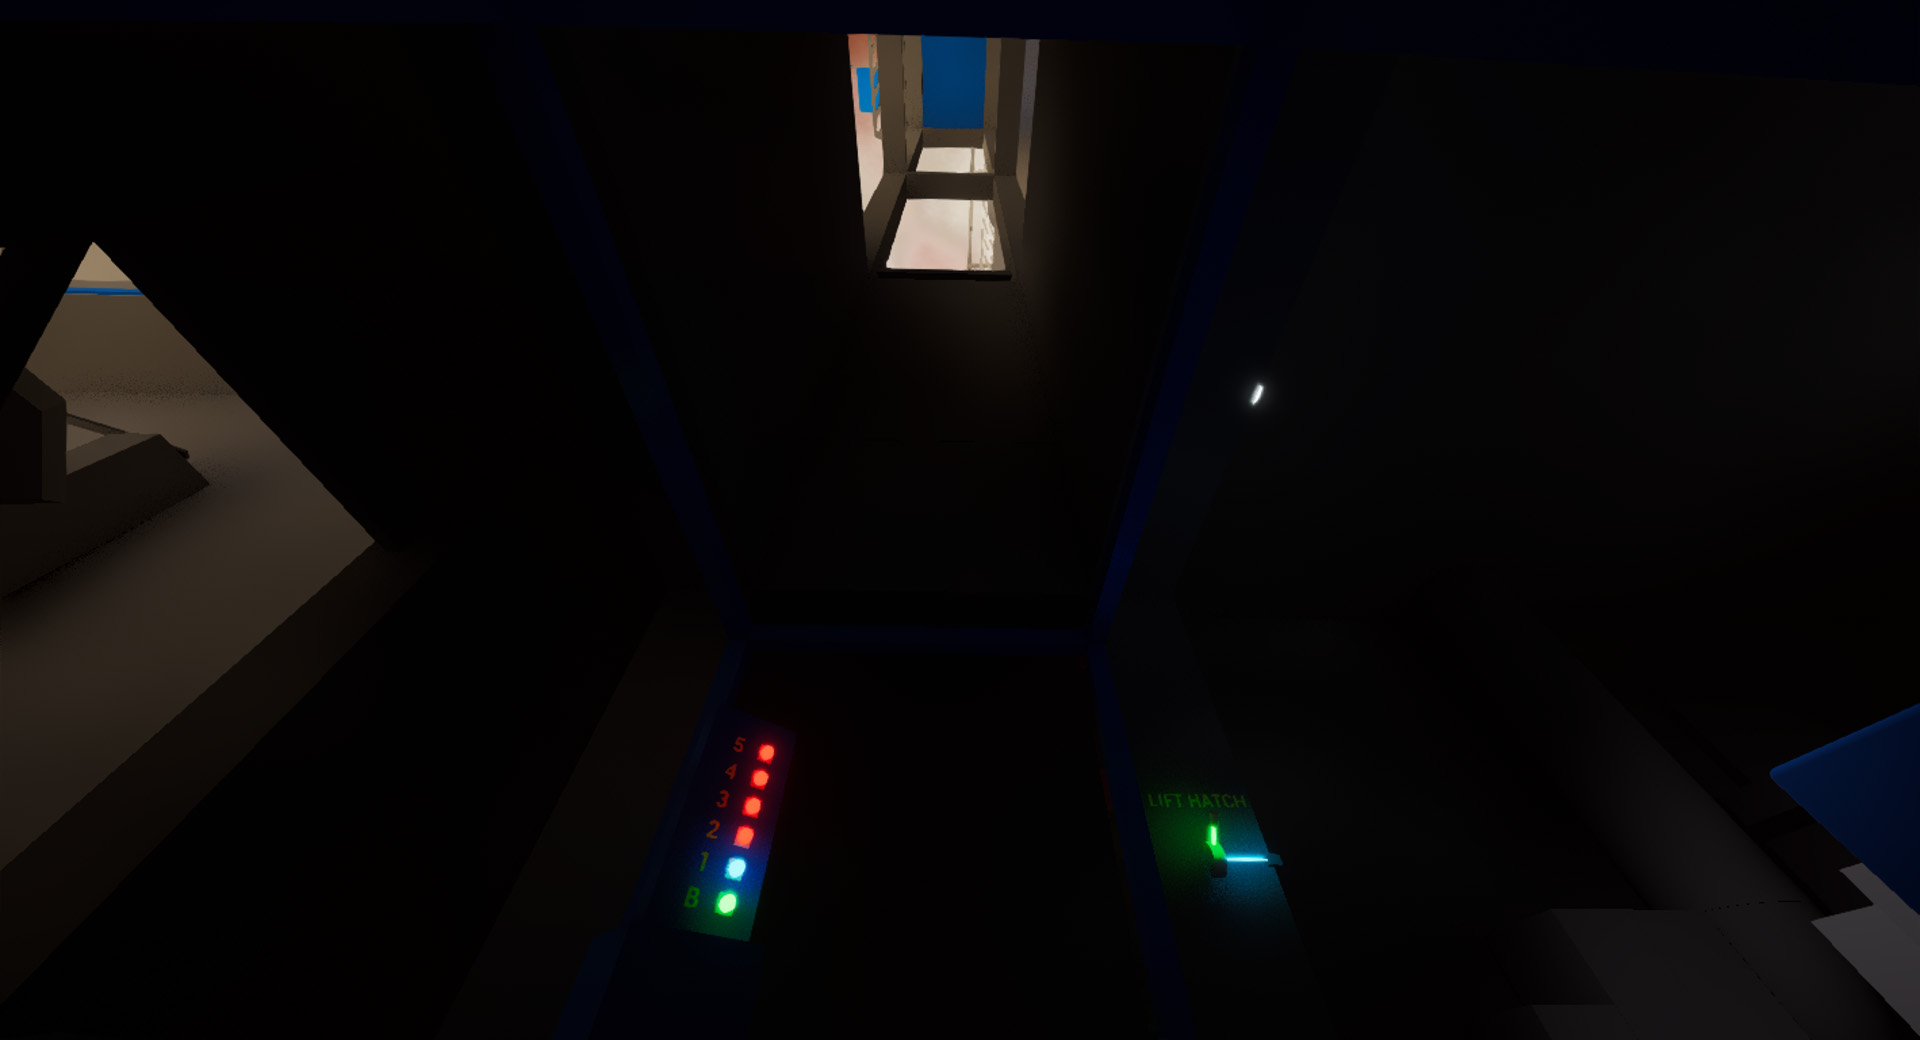
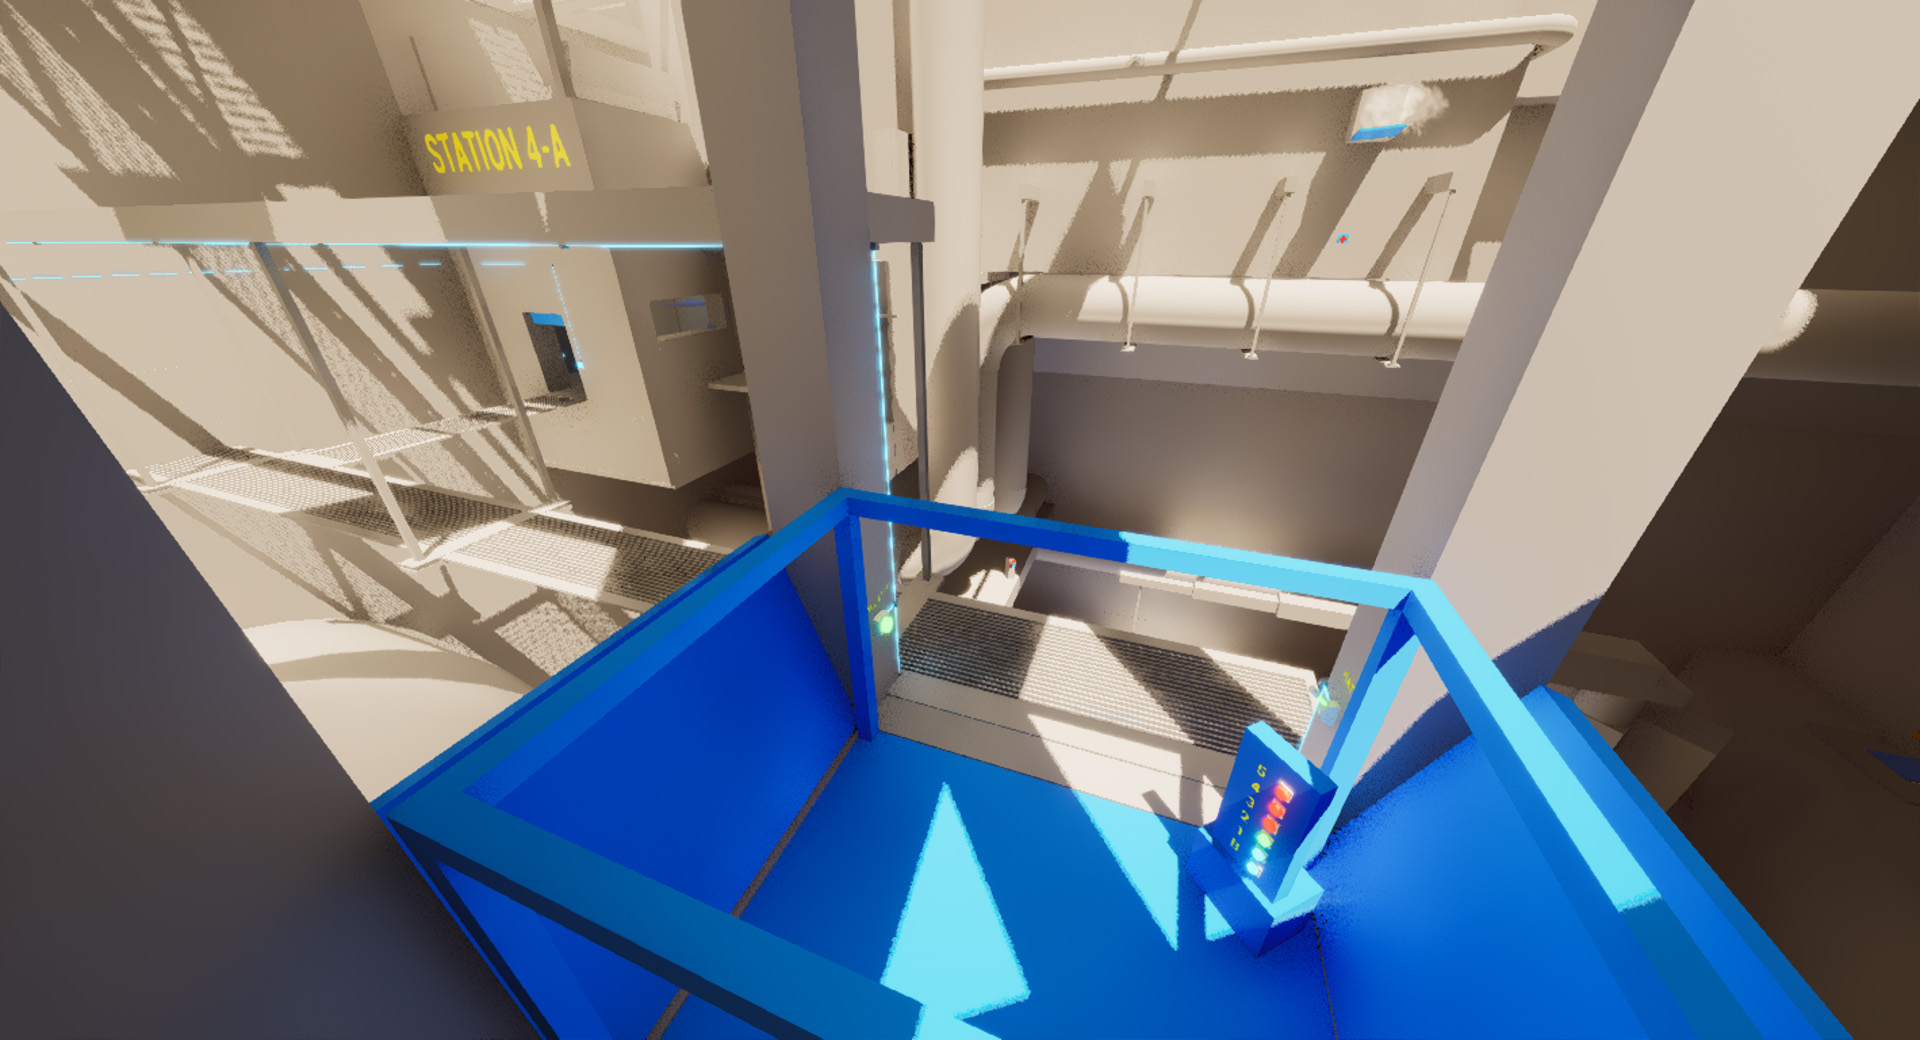
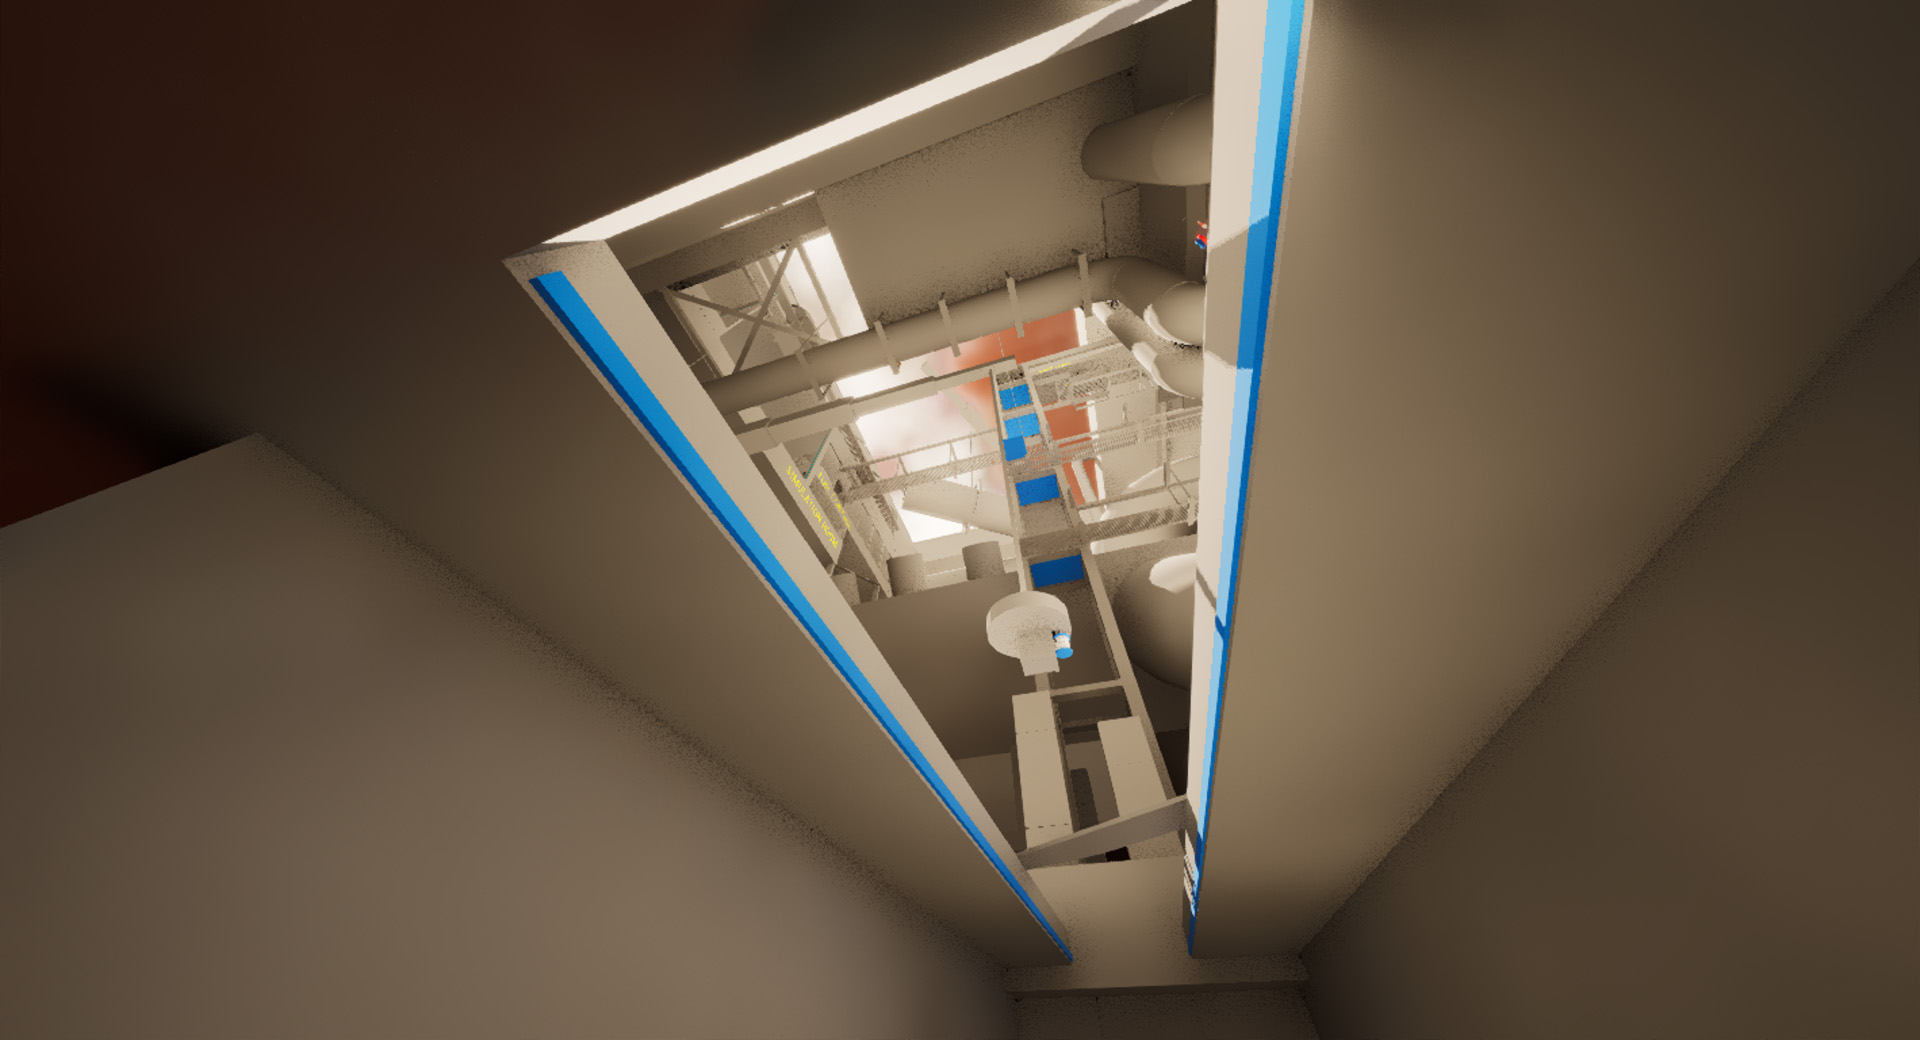
Once the floor is powered, the lever to open the lift hatch above becomes usable. The player then performs a key series of actions for the first time: They use the glowing blue lever on the lift frame to open the hatch, which unlocks movement between floors for the lift, and then they operate/ride the lift. This is a series of actions that the level requires the player to perform 4 more times if they wish to take the primary path to the objective.
Once the series of important actions is complete, the player rises from the darkness of the tutorial area to the surface of the level.
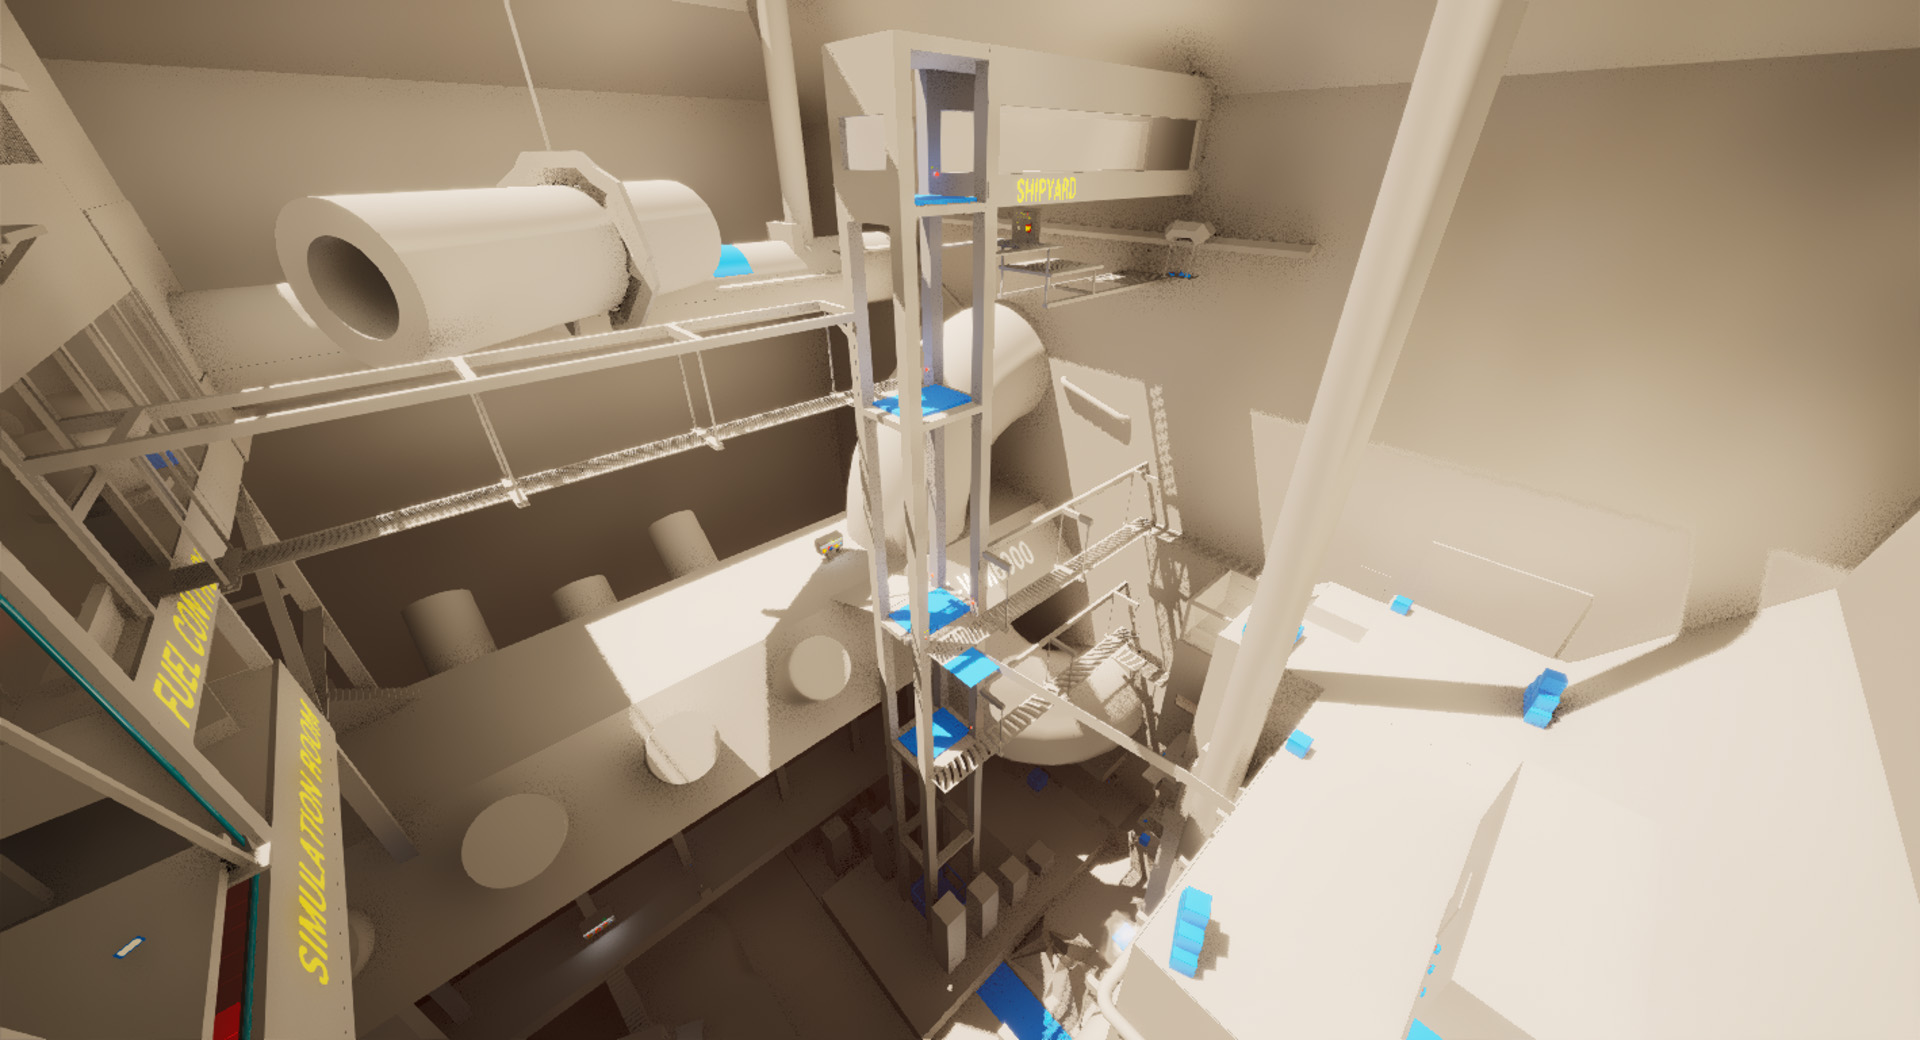
The Surface
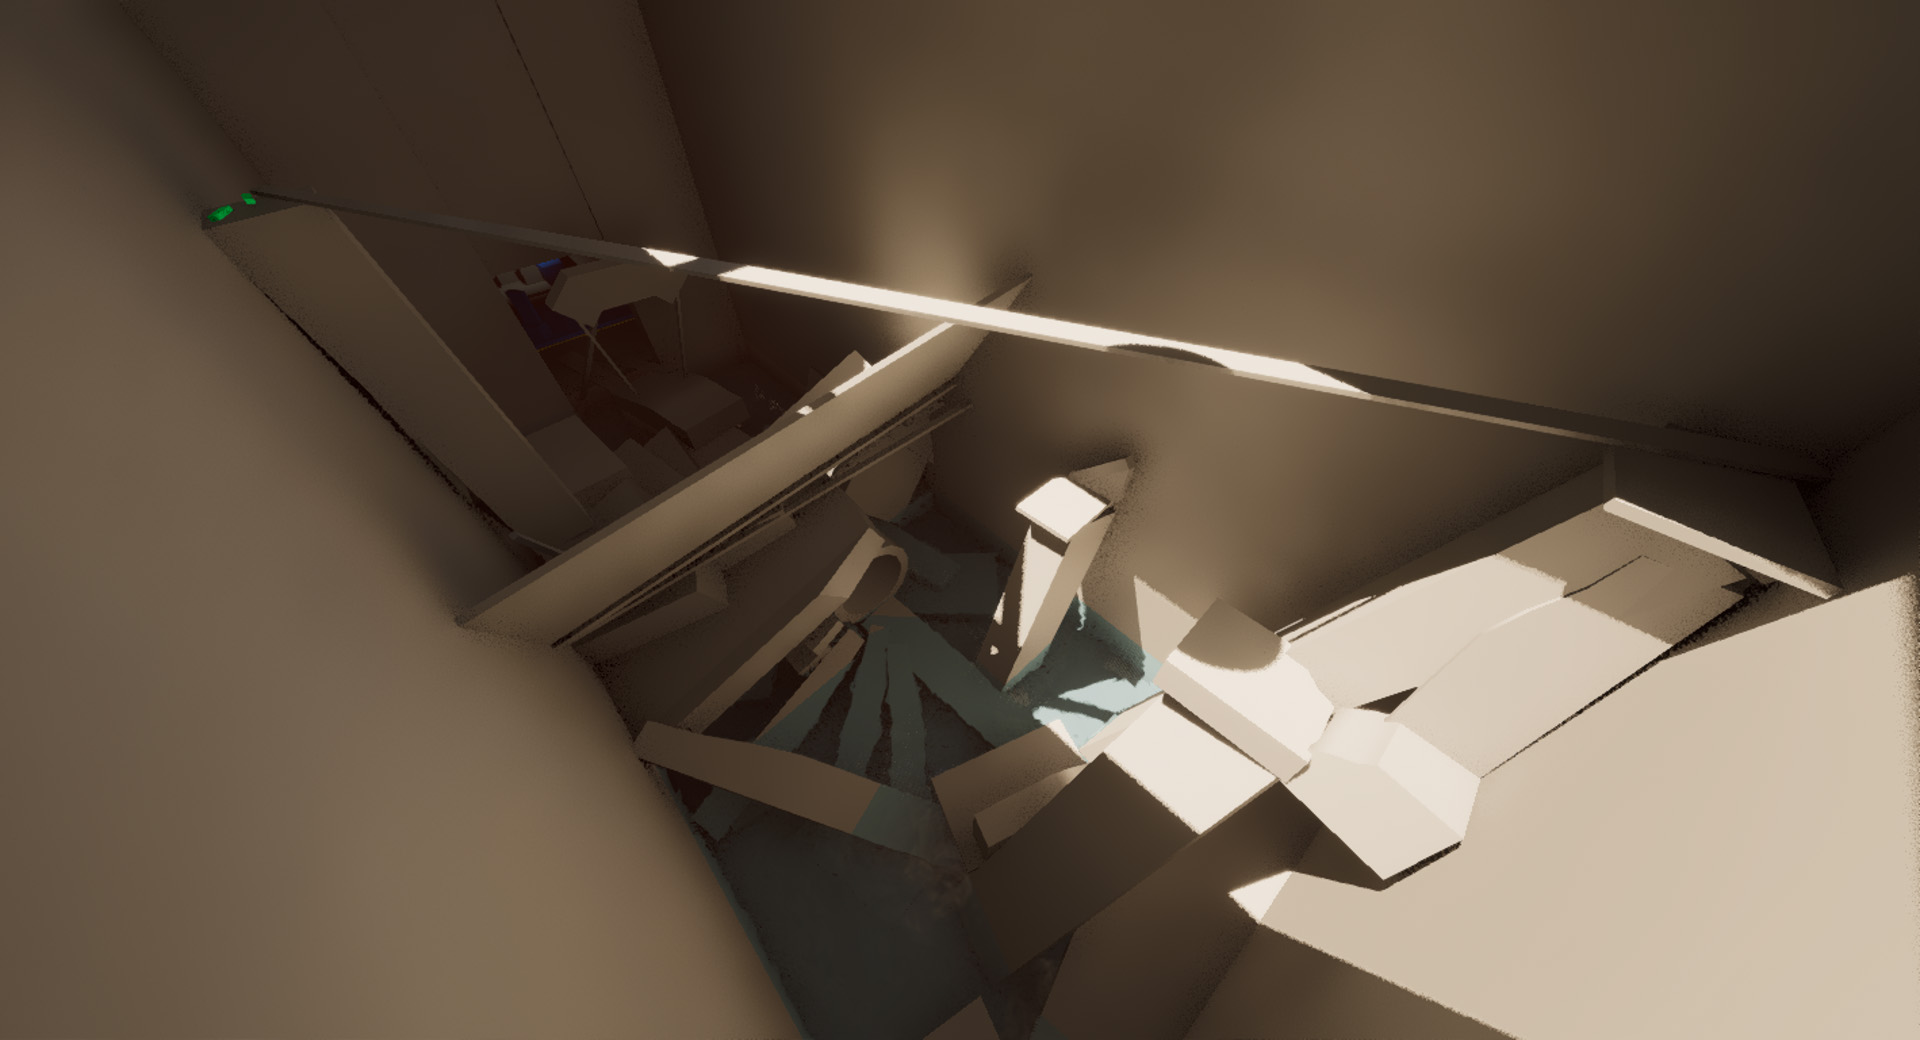
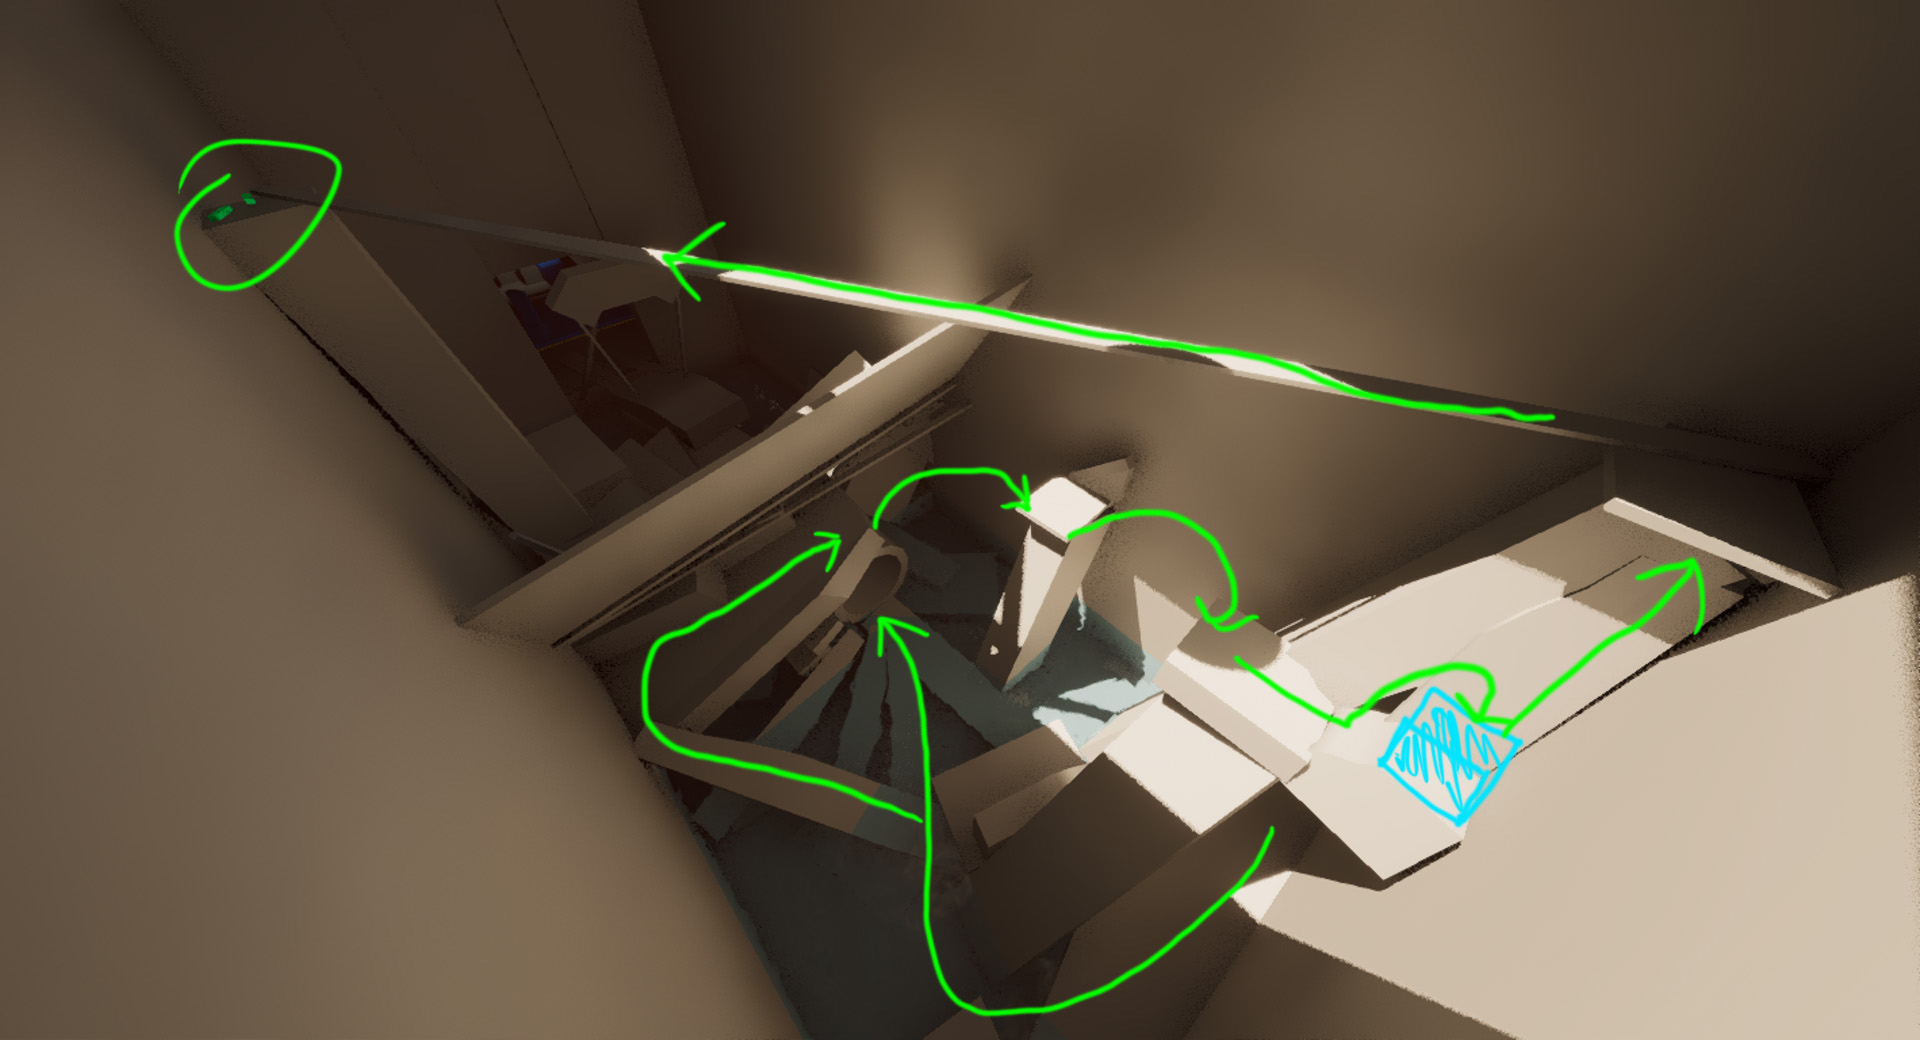
The surface is a large area with many things to discover. There is no golden path, and the player is left to explore in whatever order that they choose. A lot of the content here is completely optional and simply rewards wealth and lore. Intentional scene composition is used in many of the most likely player viewpoints to hint in the direction of the most interesting content.
It has been challenging to strike a balance between giving the player an area to explore and solve on their own, and avoiding leaving players feeling overwhelmed or lost. In the end I think it really comes down to taste, and that's where if I had more time I would simply have a toggleable navigation and detailed objectives feature. That way players who wish to explore and solve the level as intended are free to do so, but players who wish to have more guidance are also able to play and enjoy the level. I admire the way this type of feature has been handled in many of the Ubisoft titles such as Assassins Creed Valhalla, or Ghost Recon Wildlands
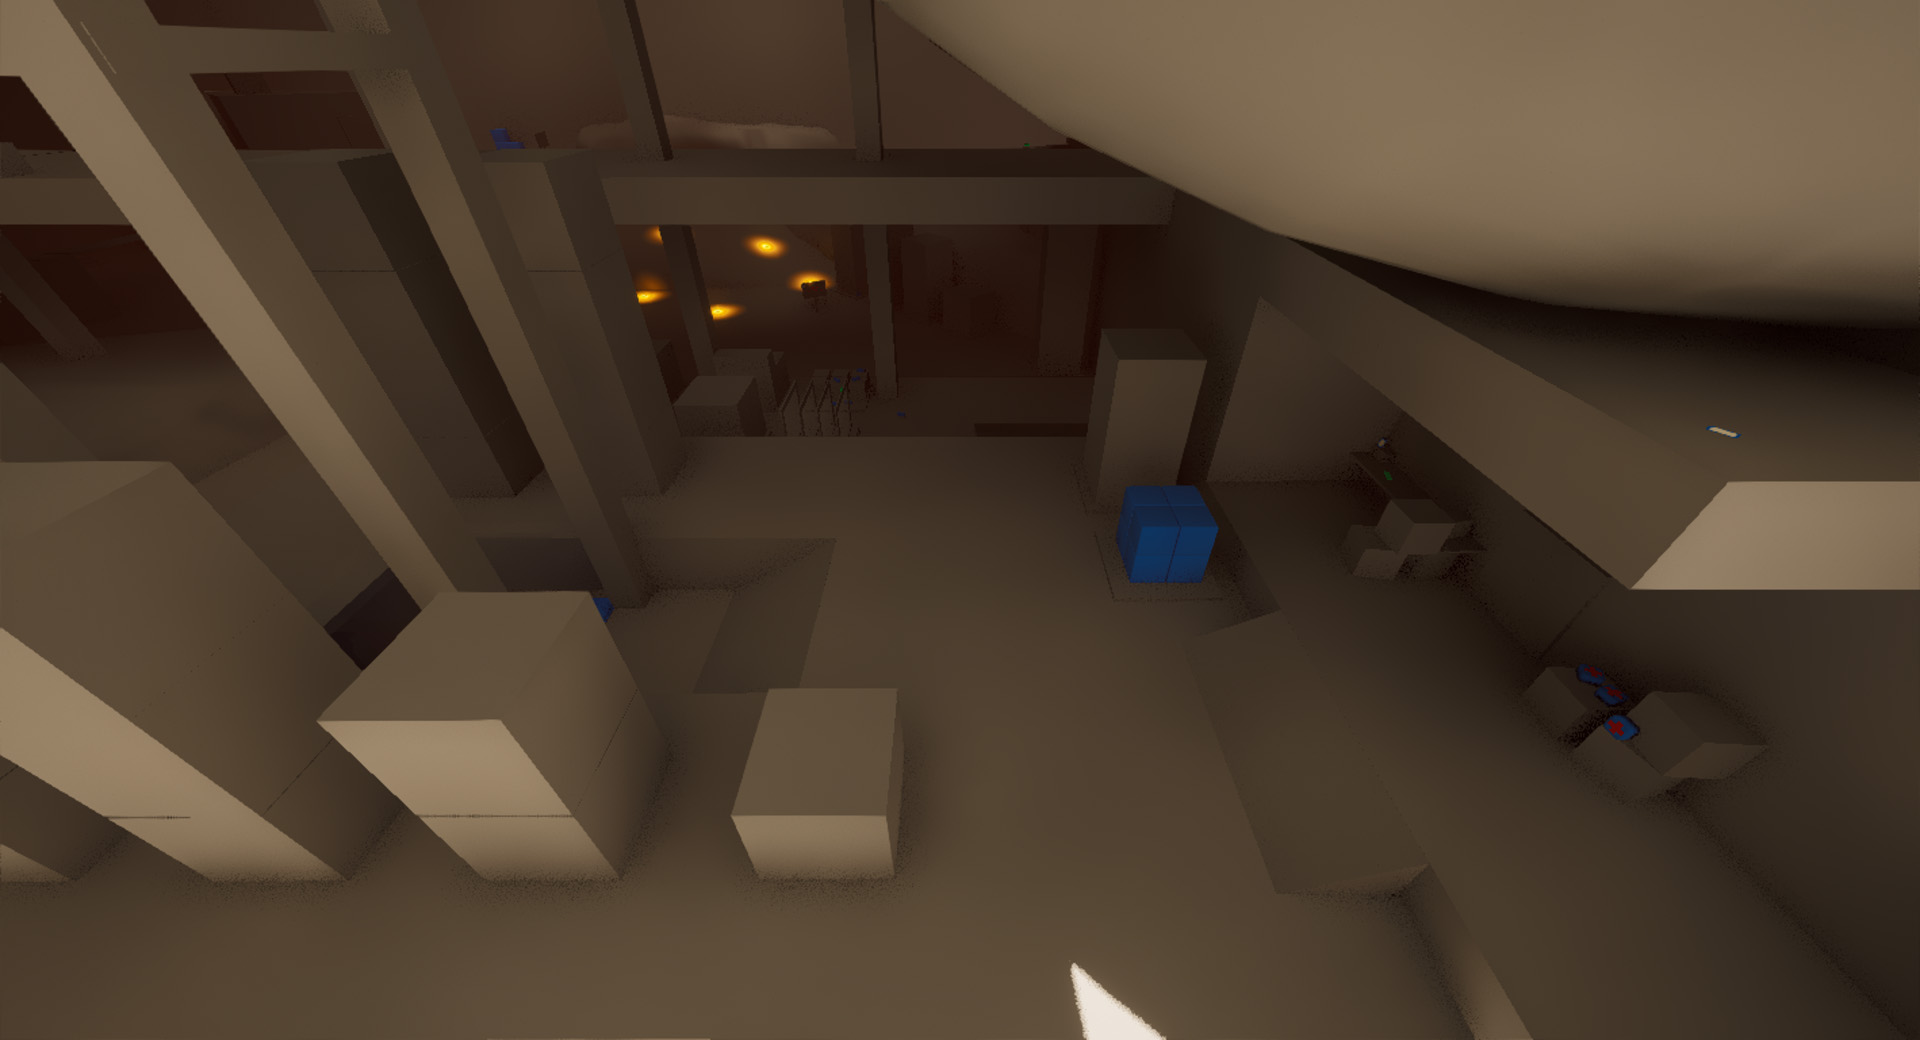
The starting point on the surface gives the player access to a variety of ways to play around with the mechanics they have learned so far in a relatively safe environment.


Surface West
The western side of the surface is completely optional exploration and reward content involving traps, physical tool use, and flashlight spaces.
Close to the entrance to this area, the player is lured toward a mini tutorial by the presence of cash. They are then invited to excrement with smashing glass using bricks. This is a key feature that can be used to bypass many obstacles in the level.
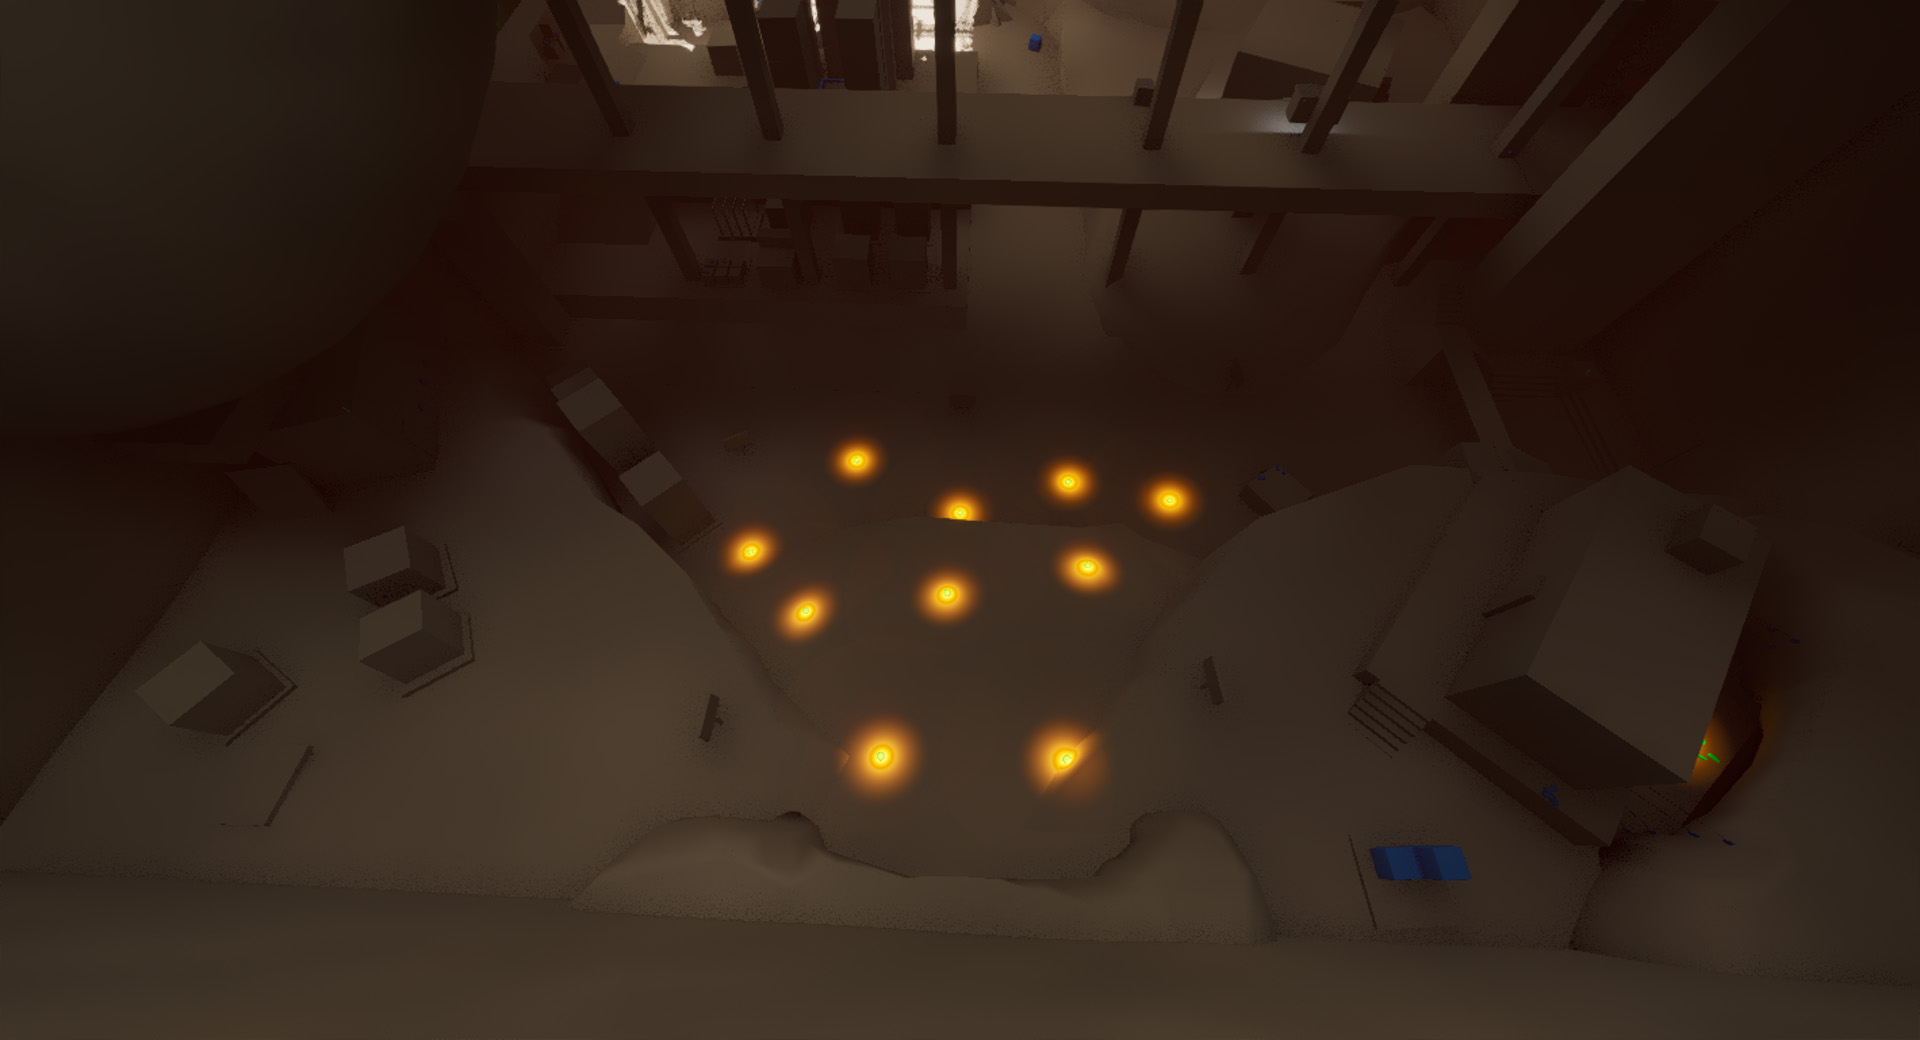
The glowing field of mines serves as an obvious and easy to avoid exposure to the explosive mines used in a couple other locations. This gives the player the opportunity to experiment by throwing bricks or bottles at the mines and observing the outcome from a safe distance.
There's also platforms setup to encourage the player to avoid the minefield altogether and practice basic platforming skills instead.
Leaving the west side of the level shadowed created more dramatic juxtaposition of tone as the player progresses upward. It also serves to re-enforce the importance of using a flashlight when appropriate.

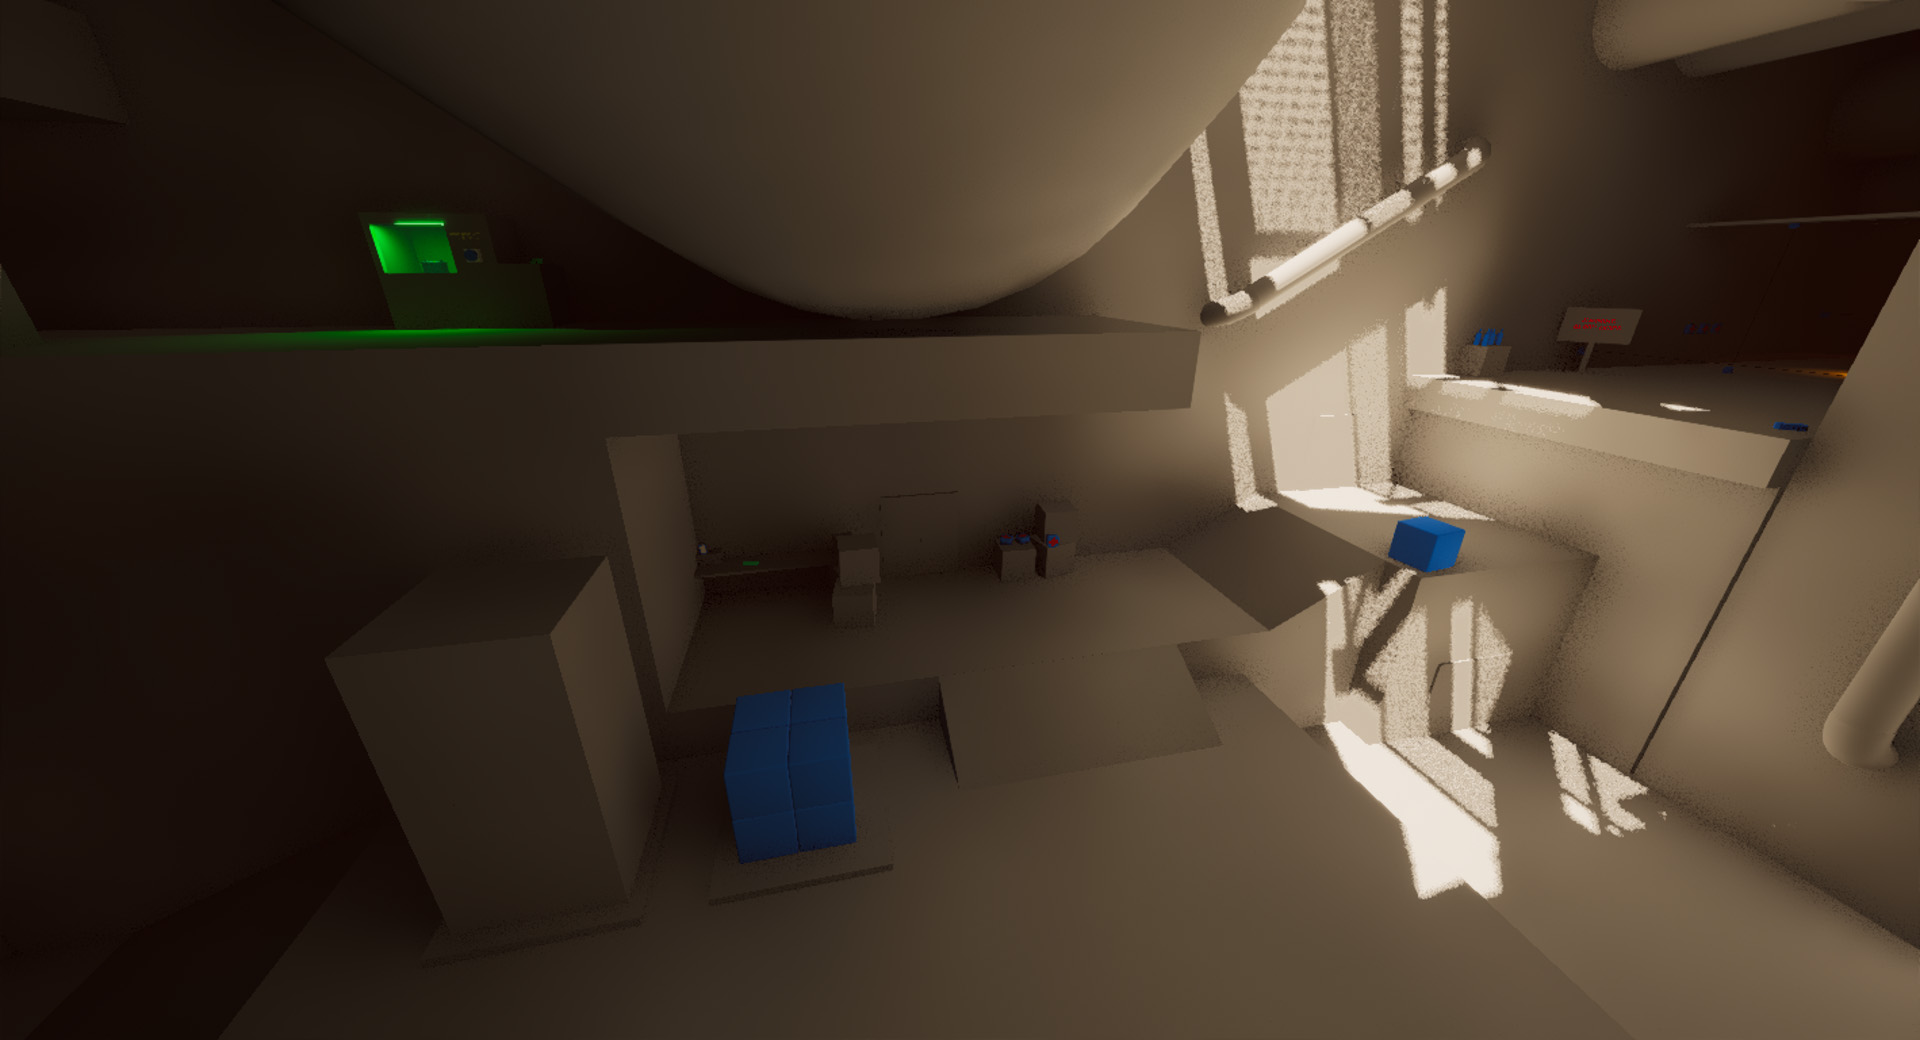
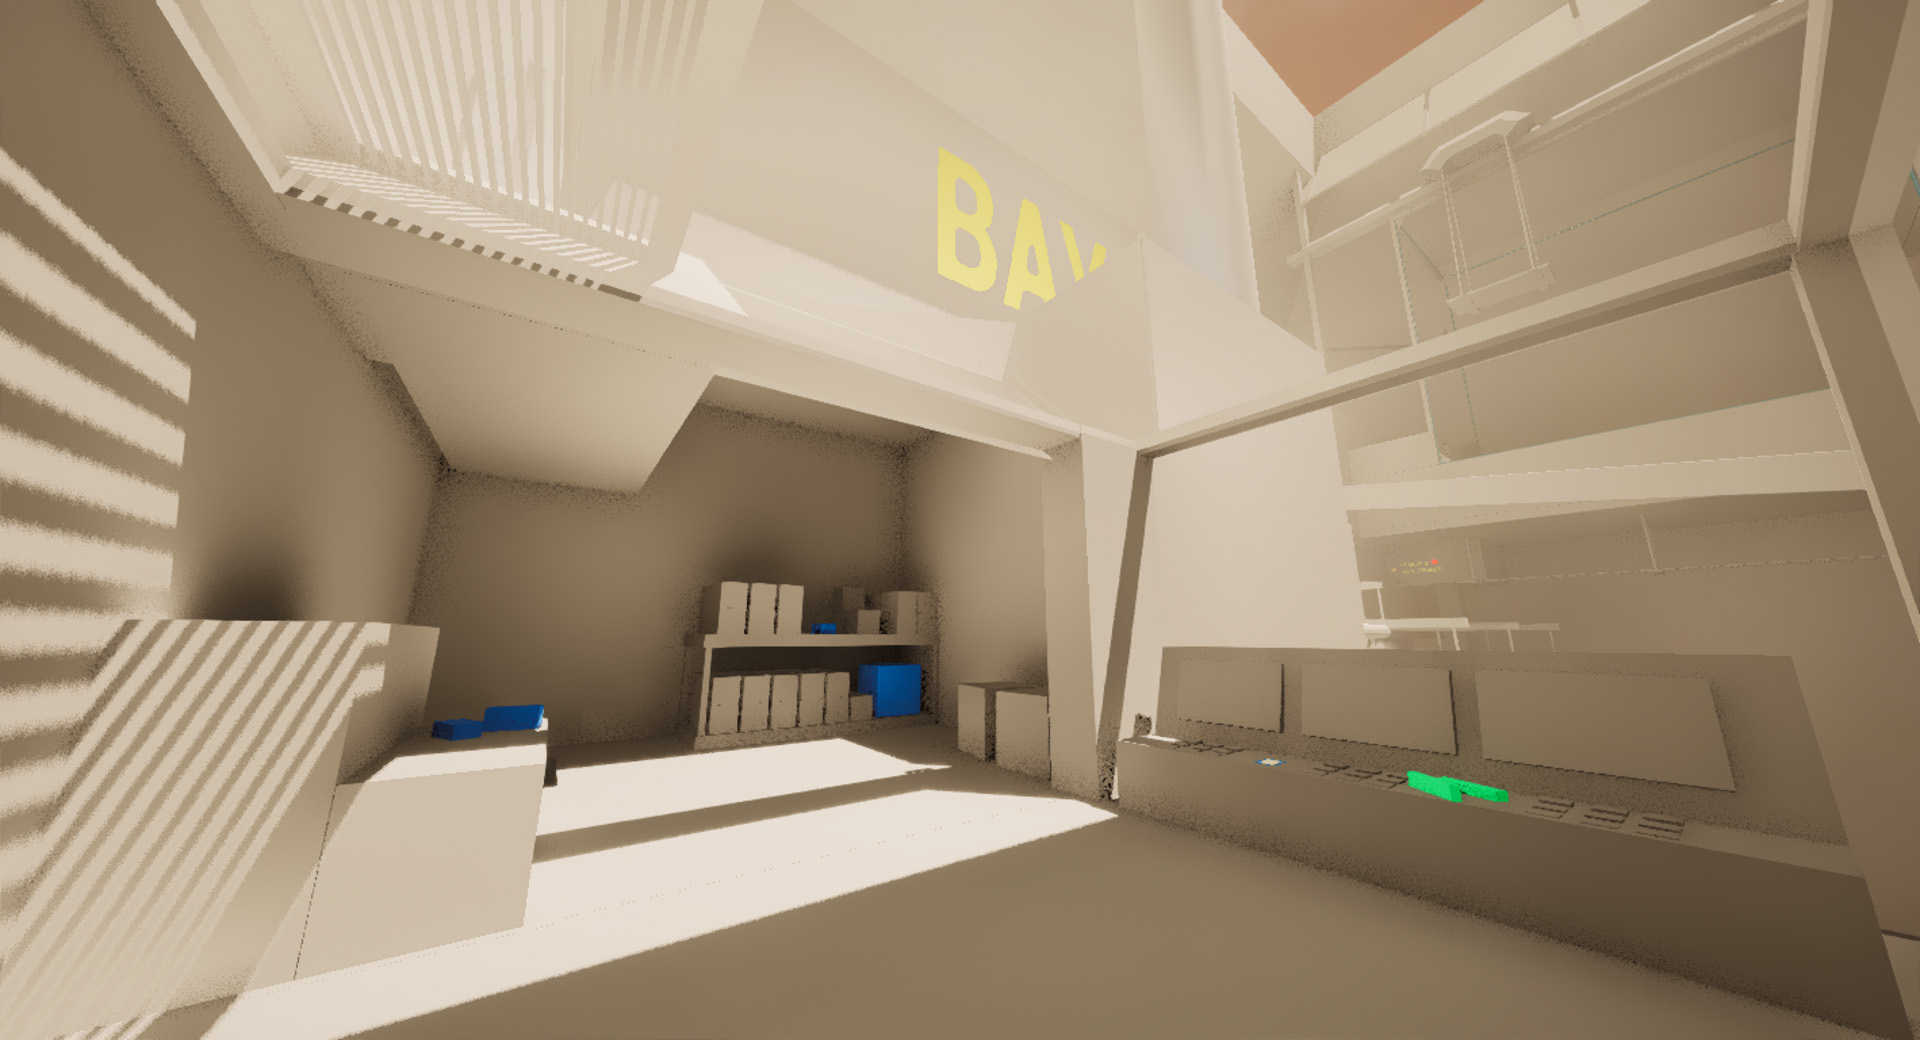
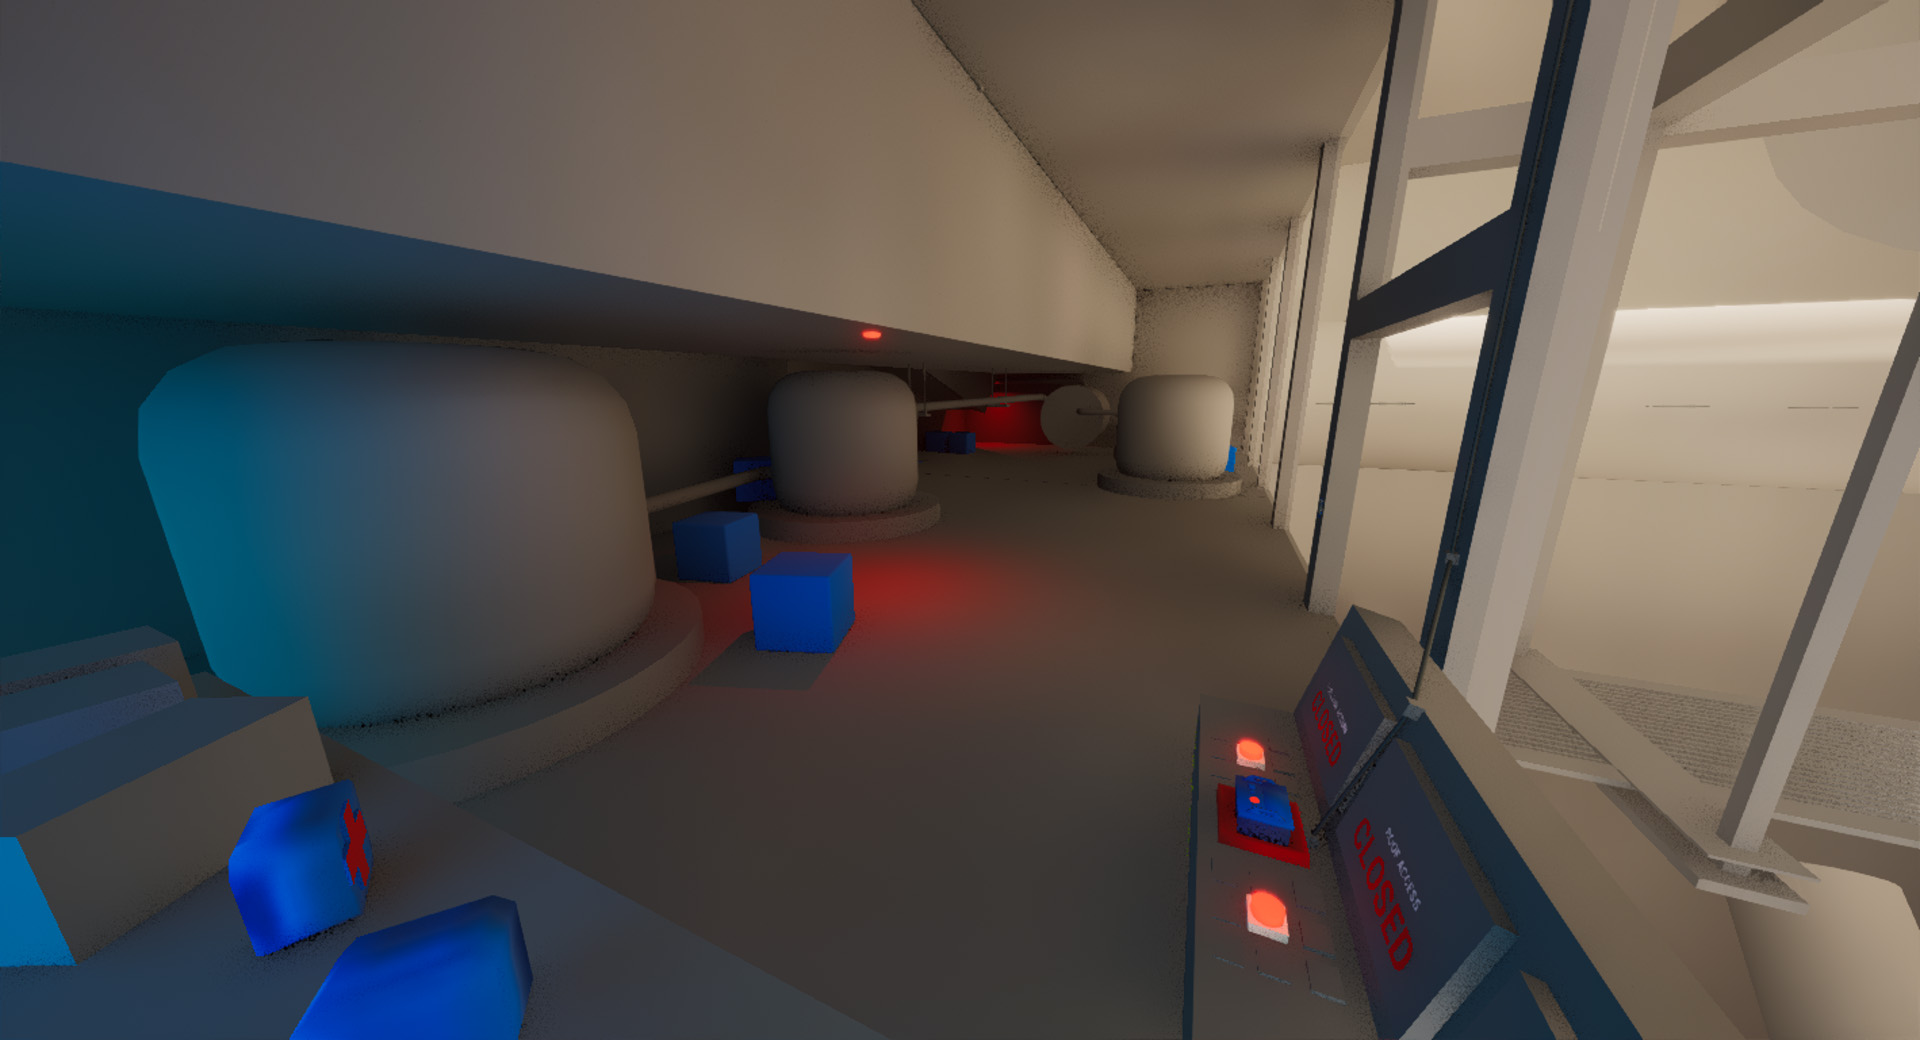
Surface South-East

The surface features two different batteries, the object essential for making progress in the climb toward the shipyard. Each of these two batteries is gated behind a different type of challenge. One challenge is simply perception and platforming, while the other is collectable gathering.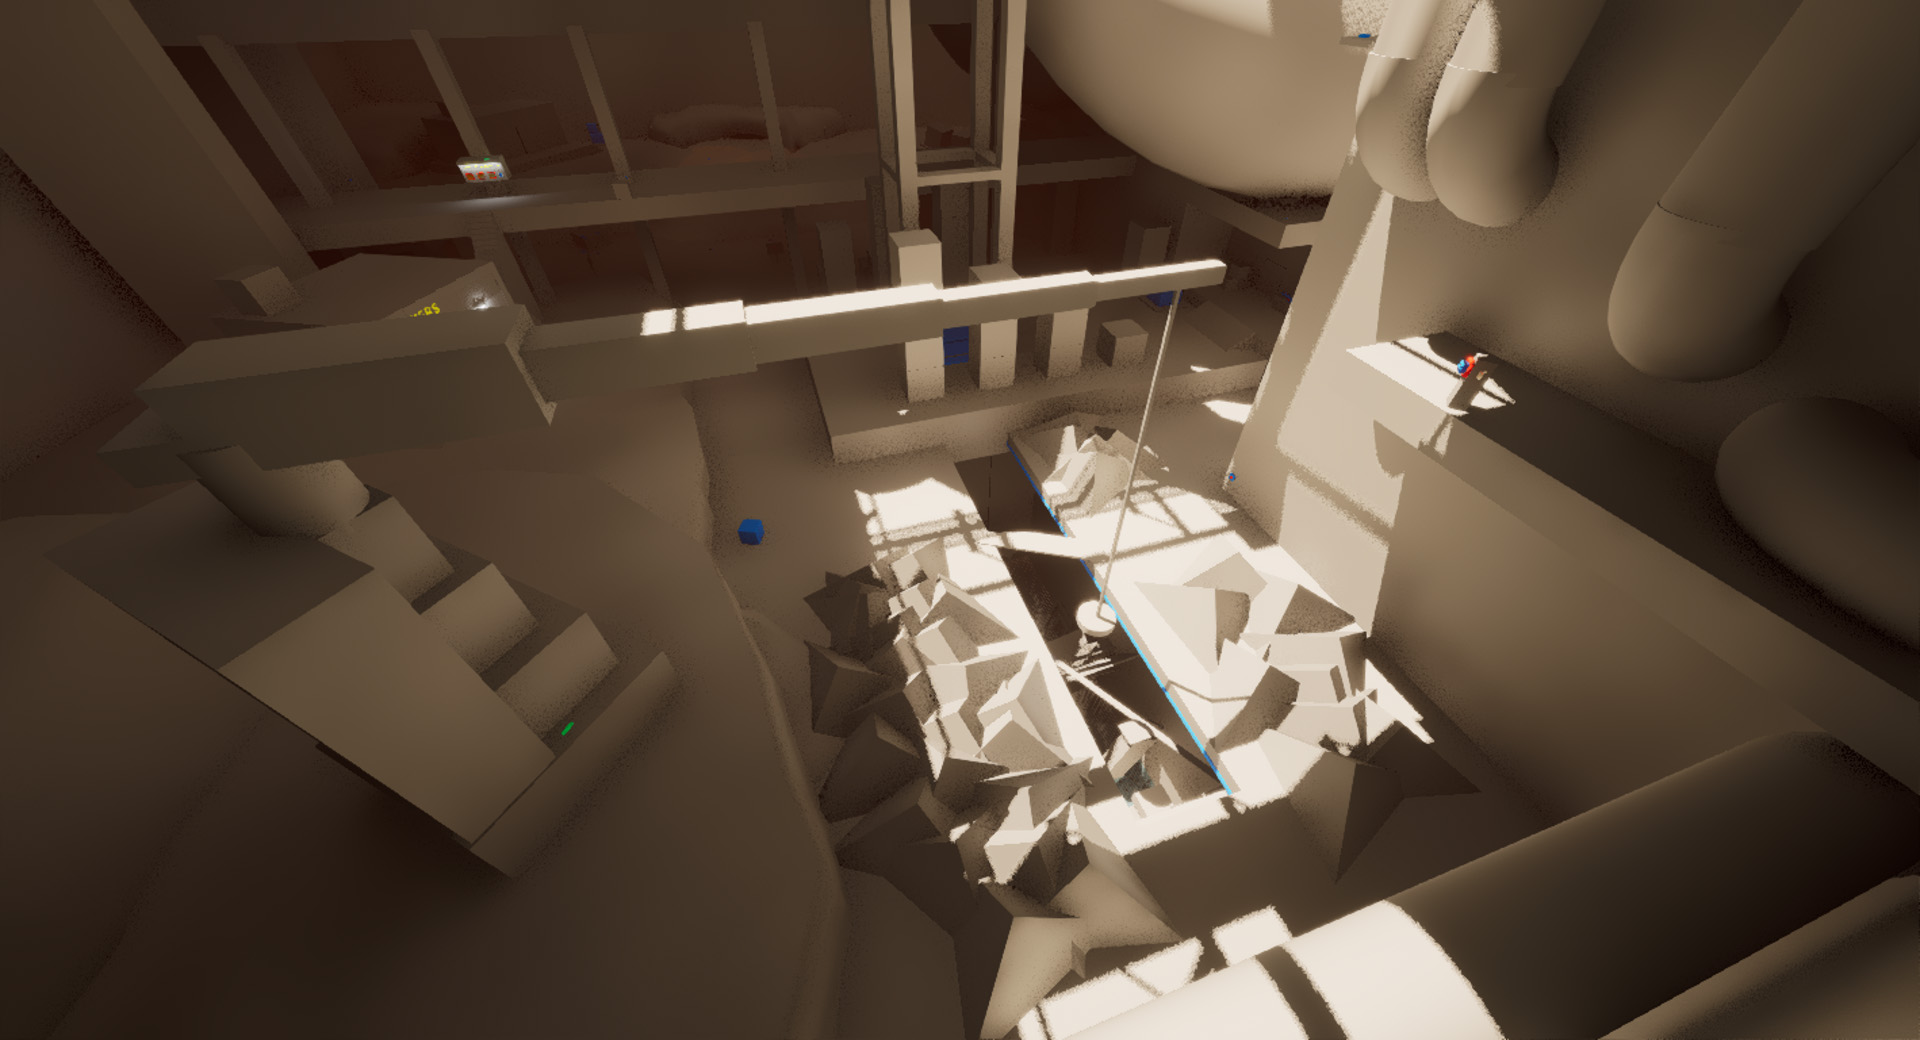
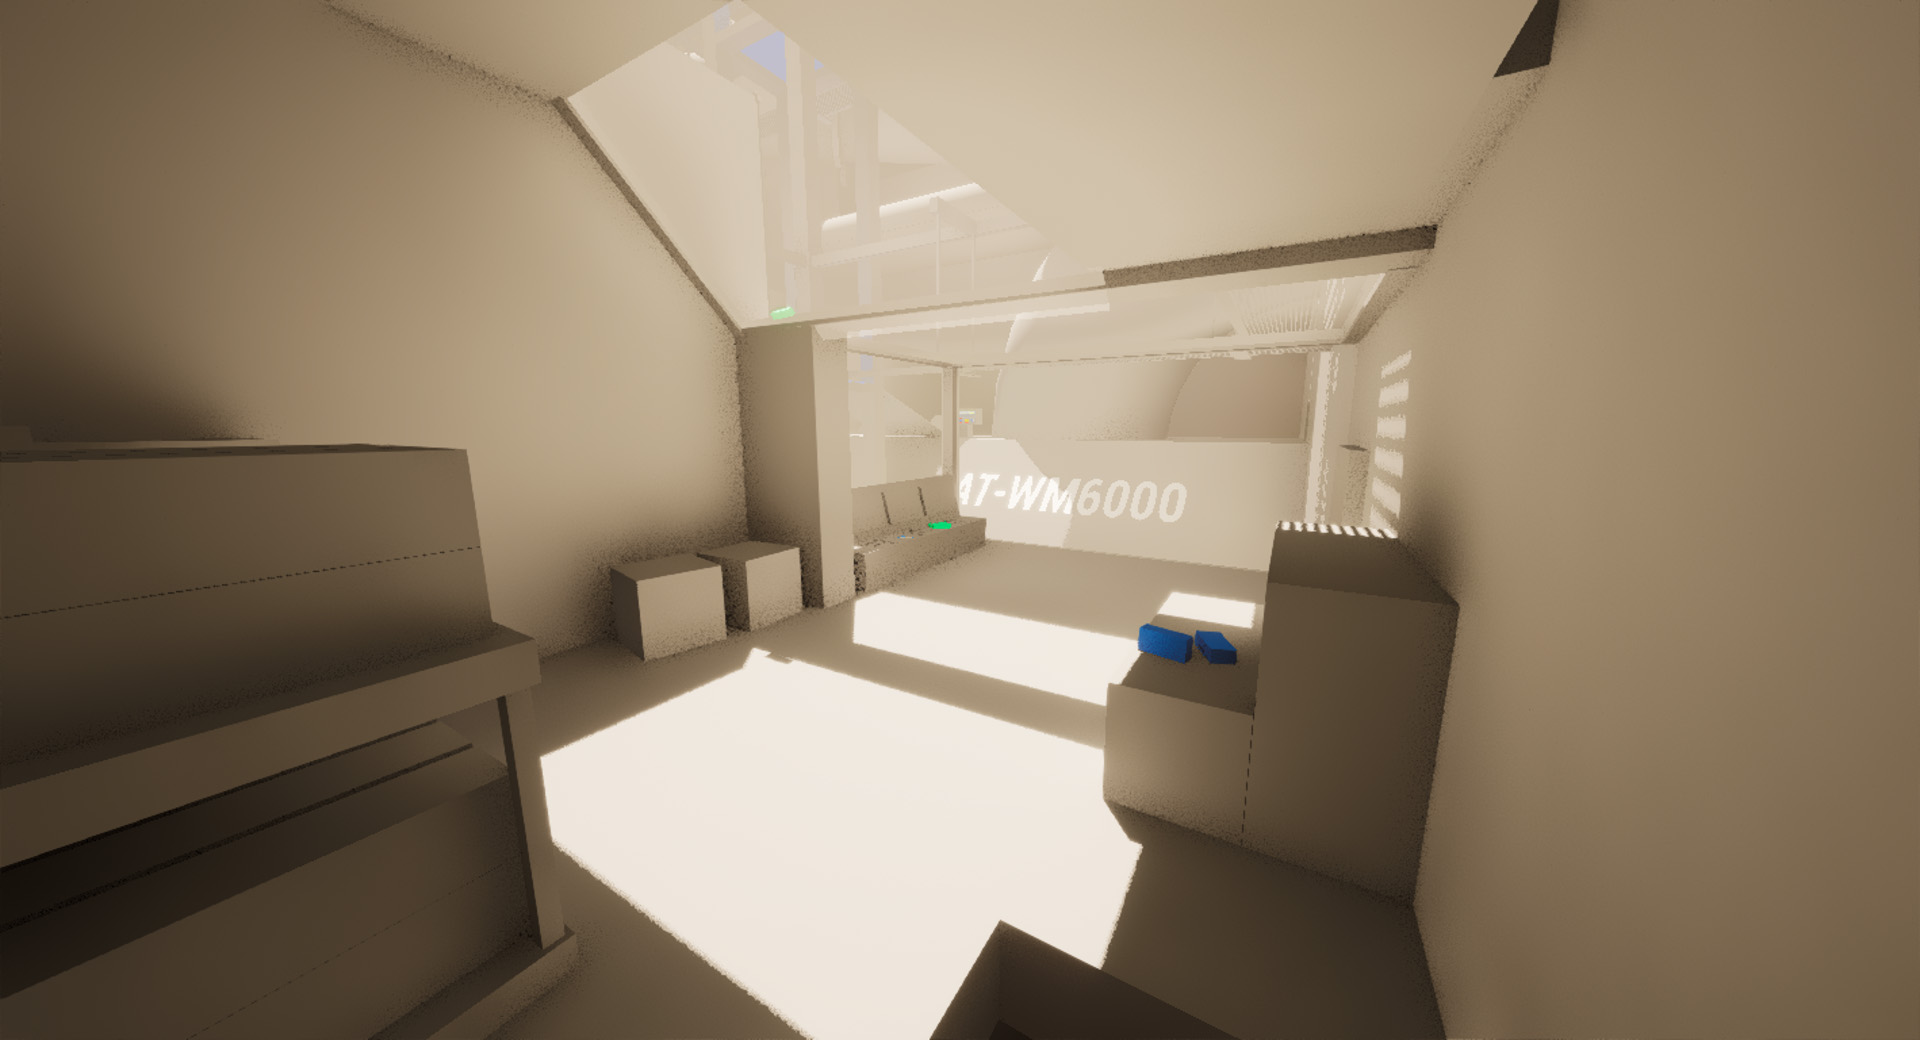
This area also features an explorable building that can be entered via the roof, breaking the window and mantling through the broken window, or powering the sliding door and using the door button. This is intended to reward players for creativity, and to hint to those players that there may be opportunities for non-linear play elsewhere in the level.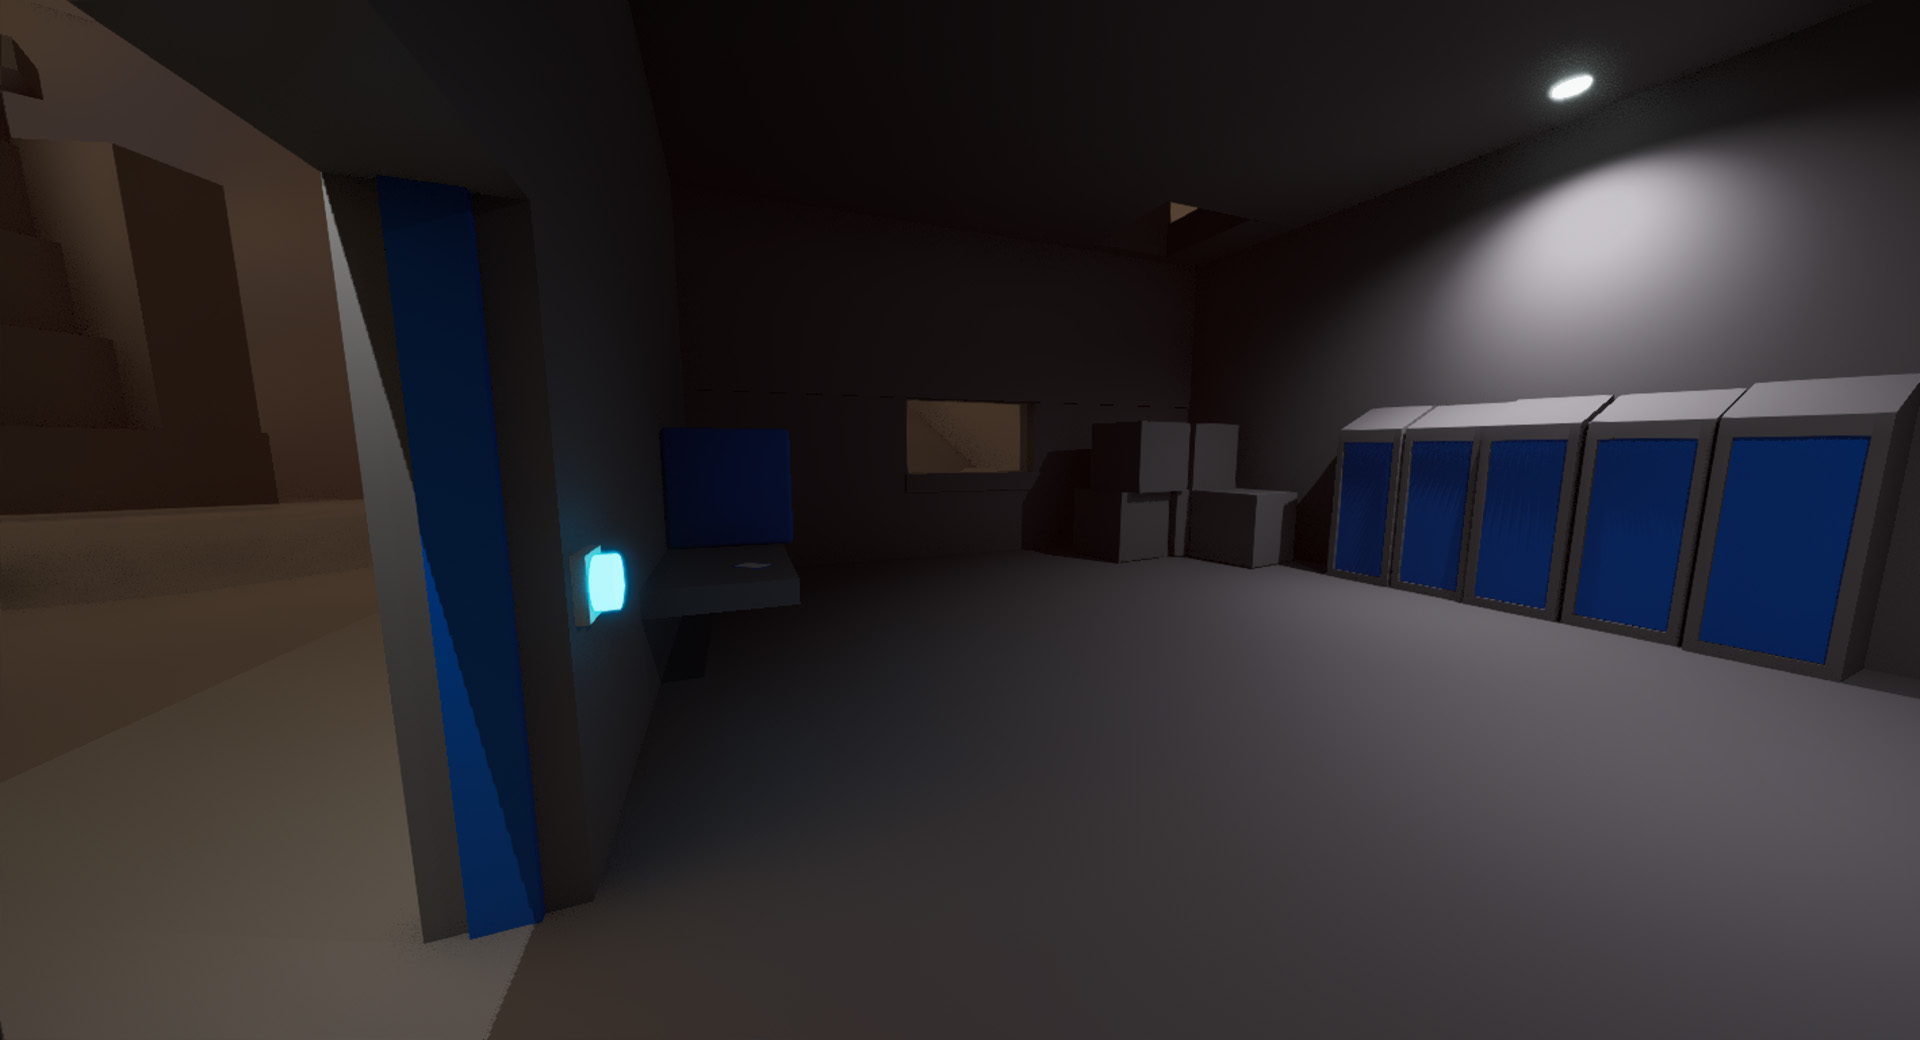
There's a battery port at the base of station 4B that powers an auto lift. This auto lift affords players access to a platforming section which leads up to floor 3, and connects bi-directionally with another path connecting the surface and floor 2.

Advanced players can also use the momentum on the lift to catapult themselves past the entire platforming section as shown here.
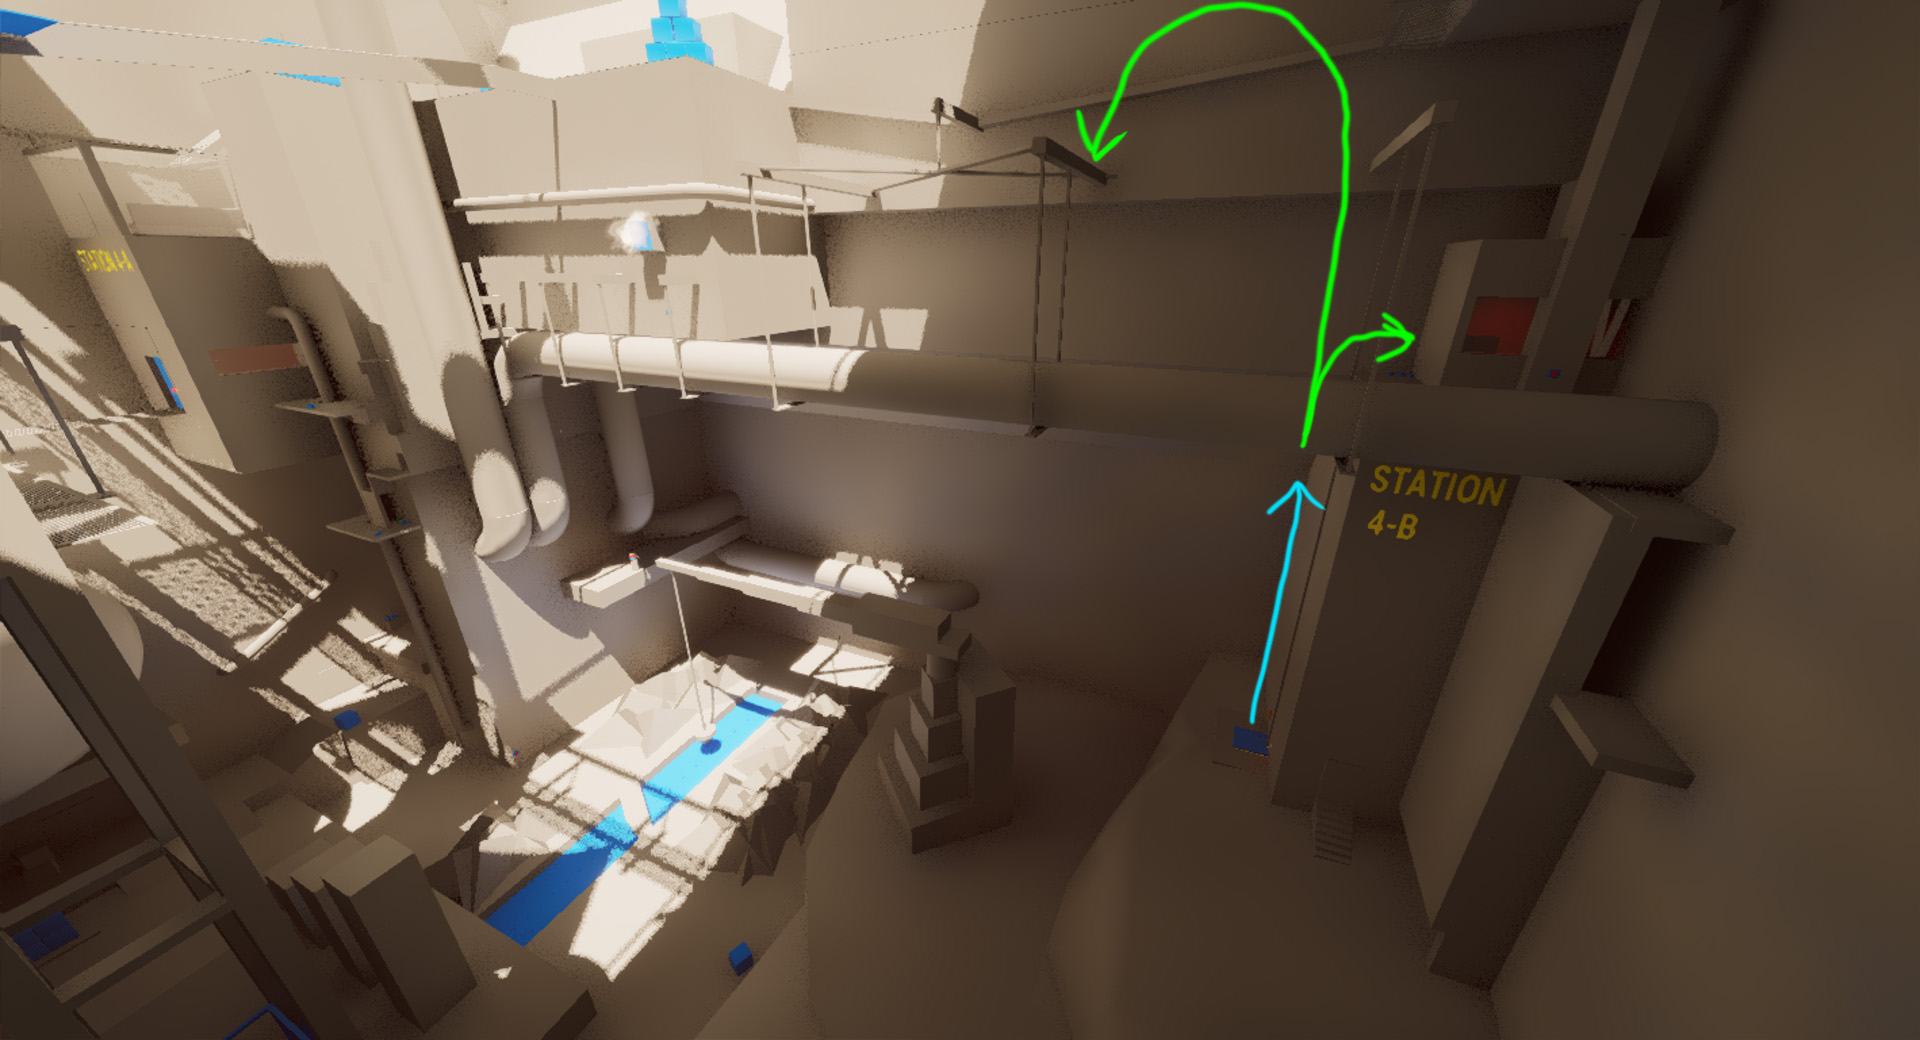
Playtesting revealed the need for this one way valve so that non-linear players can get down safely if they manage to get onto this location without having the lift powered.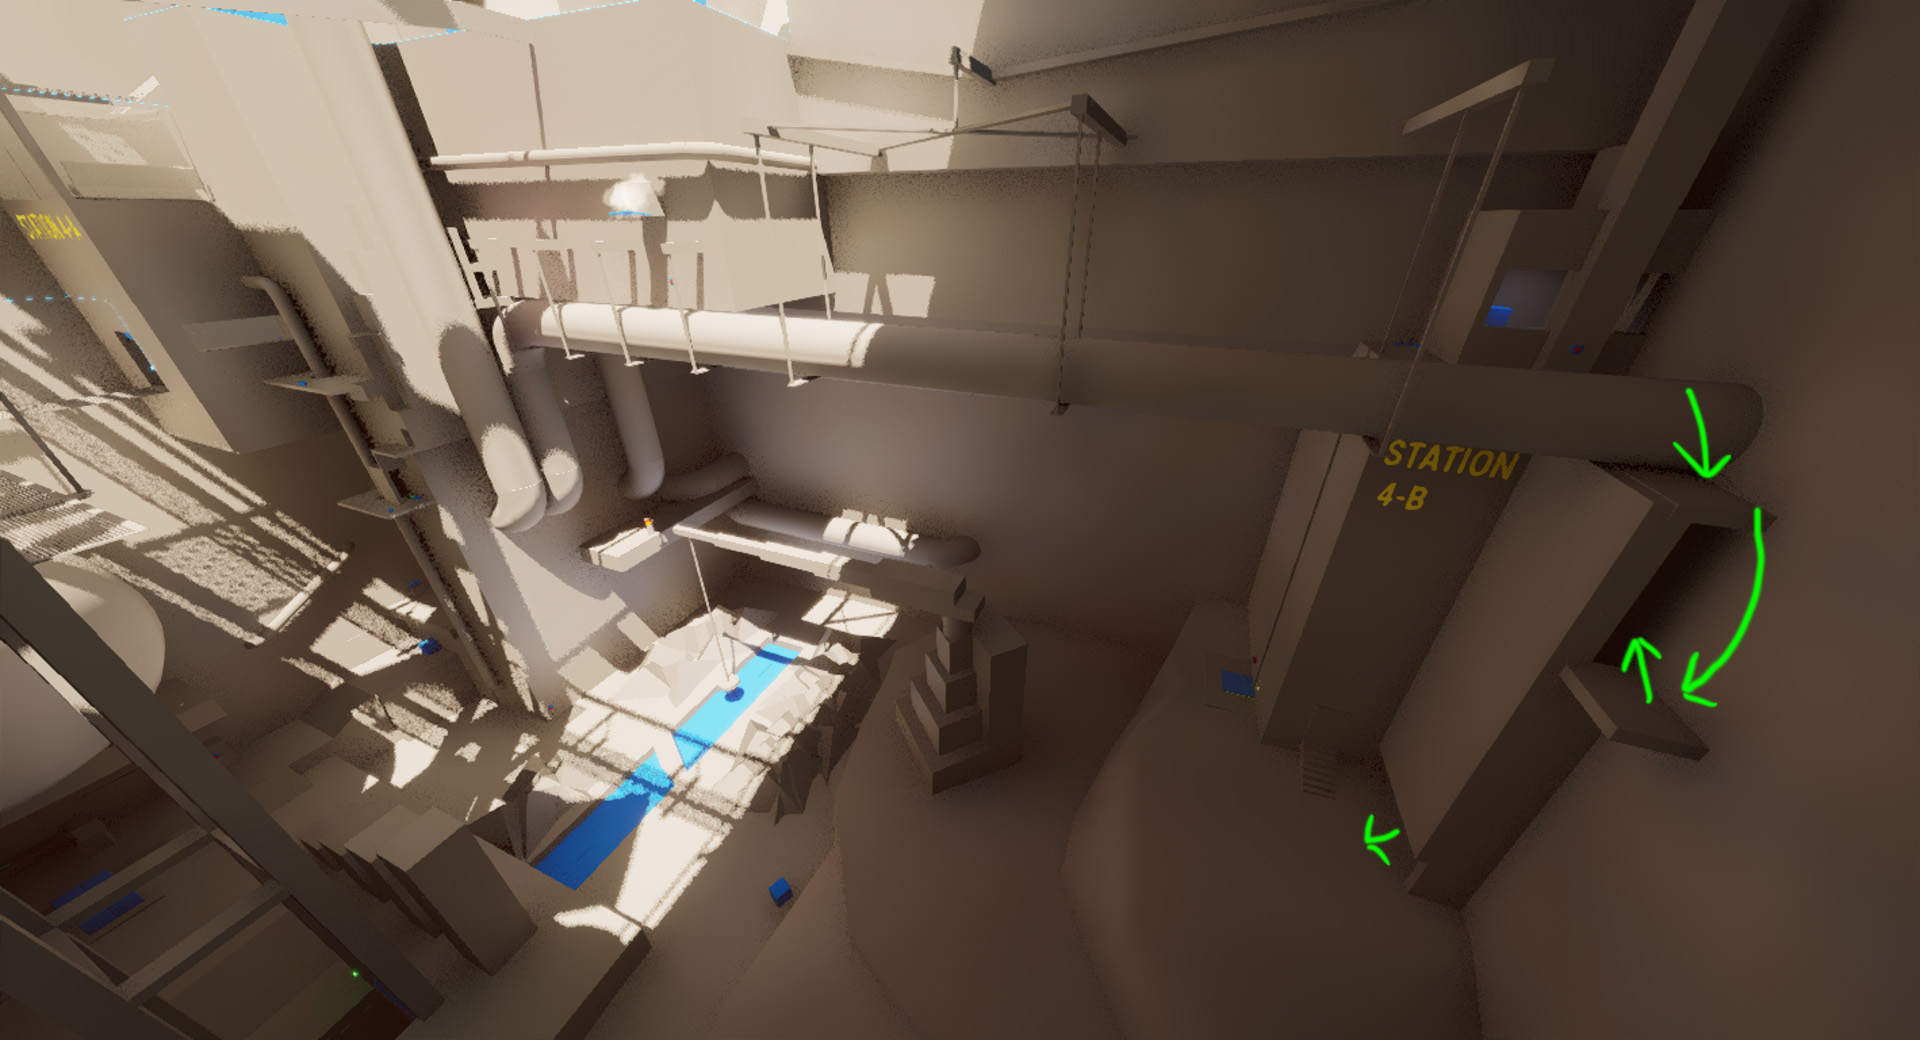
Station 4B features two different points using different methods of entry and separate paths to the entry points. One of the entry points is via breaking the window at floor level and mantling through, but the other is to drop through a vent in the ceiling that can only be accessed via a side path on the platforming section that leads to floor 3. 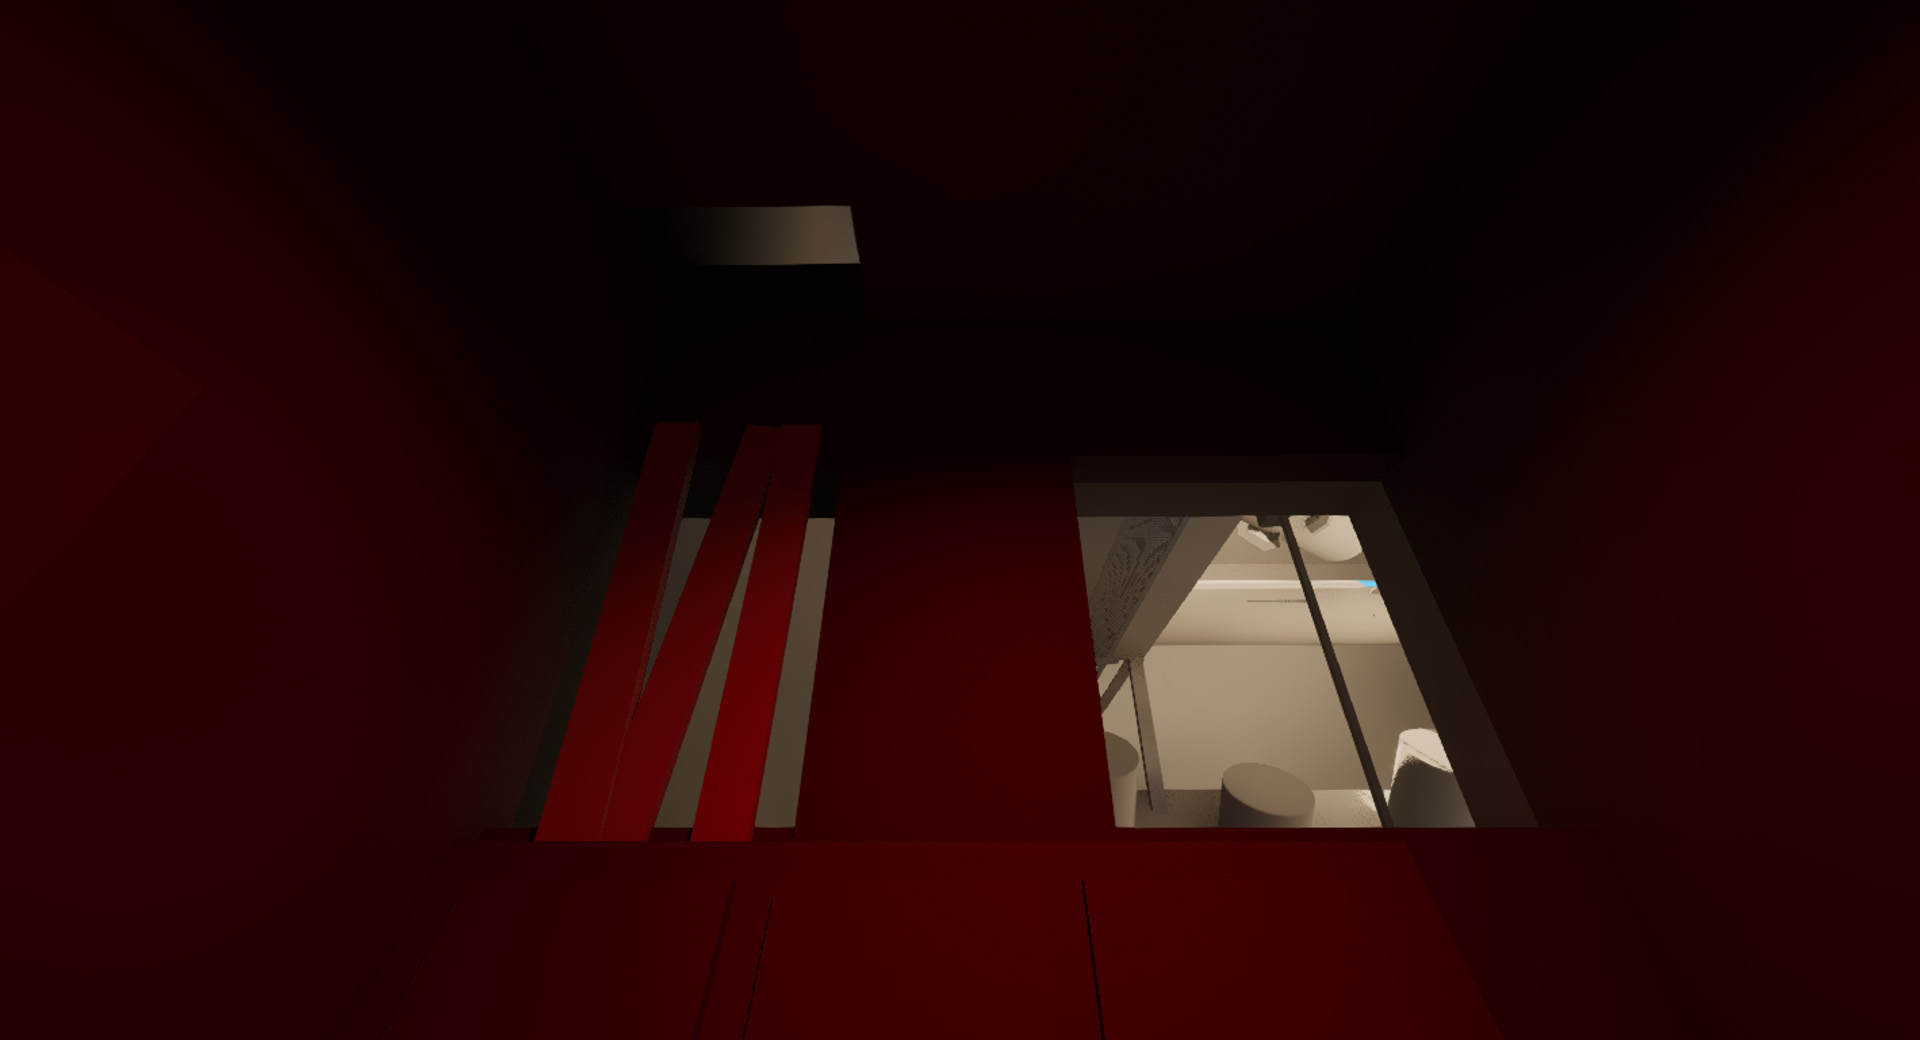
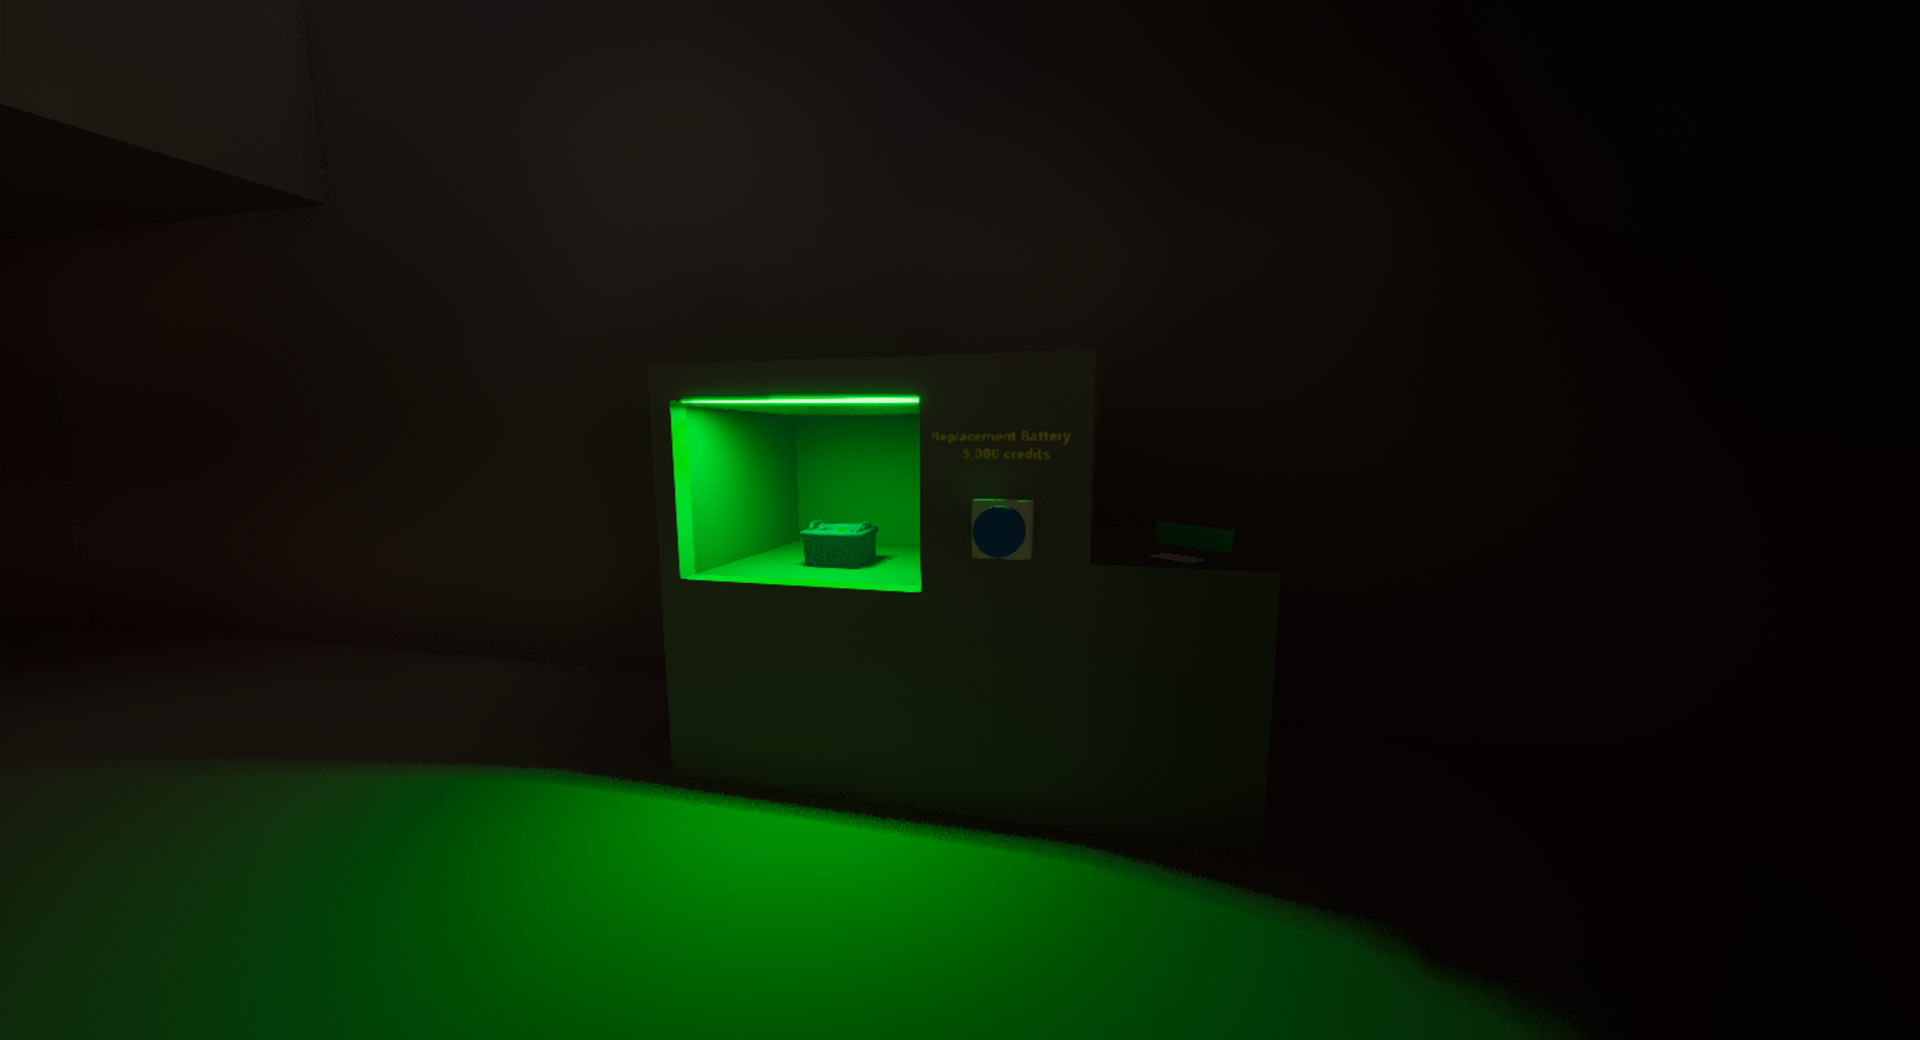
Surface Feature- Vending Machine
The vending machine serves the purpose of truly providing a backup battery for players that manage to somehow get themselves stuck with no batteries. It also serves as an obvious source of battery for players who do not manage to notice the free battery located elsewhere on the surface. Beyond that, it also serves to compel the player to collect money beyond simply telling them to imagine it was a real game and there was things to spend money on.
Surface Feature- Locked Safe
The safe is suspended over the compactor is meant to be an extra challenge for players who are perceptive completionists. The player must first power and close the compactor lid, and then find the combination for the safe which is hinted to elsewhere before returning here to open the safe.
Initially this safe was in the tutorial area, which proved to be a disaster in nearly all playtests. It became clear that something as compelling as a combination lock must be kept far away from the tutorial area.

Surface North-East
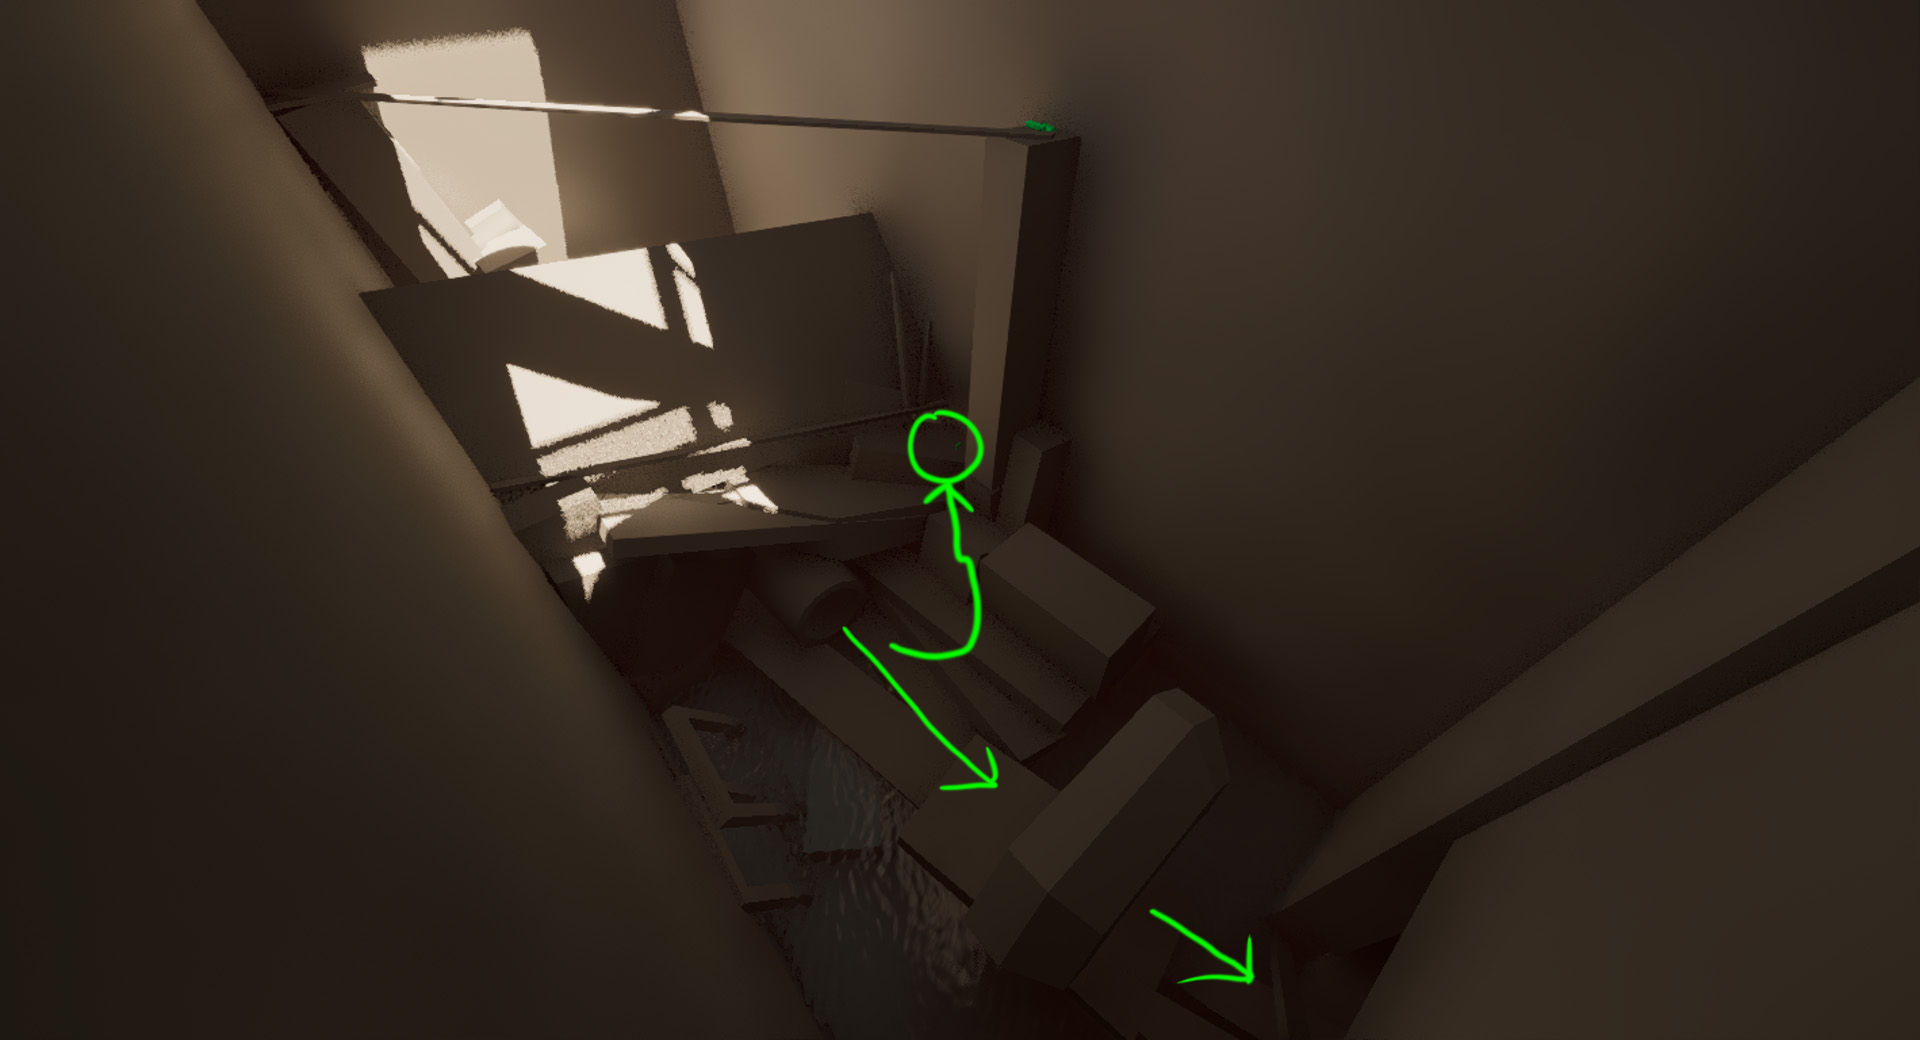
The hope is for a healthy segment of players choose to explore the north-east portion of the surface early on because because of the leading lines. It's framed almost immediately after arriving on the surface, and it presents the player with the same box and high ledge puzzle they've just solved in the basement.
This section is intended to challenge the player with obstacles including traps, platforming, and darkness. Here the player has the tools available to discover that bricks are great for throwing at mines, bottles are pretty good for getting tripwires from afar, and if they get close enough they can even disarm tripwires. In playtesting there's a healthy split between players who always throw things at traps and never get close enough to learn they can be disarmed, and players who immediately try to get close and disarm them but rarely throw things. I tried to keep both groups in mind.
This platforming section challenges the player to use their flashlight to trivialize the challenge created by the darkness. Challenges like this are why the flashlight tutorial in the basement is so heavy handed.

There's a tall jump at the top with a box on the platform just below it. This box is the same box that the player can see from below the entrance to this area, so they might already remember it and seek it out right away. They can also easily fall and land next to it during the platforming challenge. Alternatively if they simply go forward from the high jump platform they will come to what feels like a dead end. The dead end actually features a discrete alternate path around the corner, but most players won't notice it and will instead turn around and spot the cube when they try to go back.
There's also access to the pipe that acted as the leading line into this area. It provides access to a readable lore object that the player can easily spot from up here. This feature often leads to a satisfying moment for the player, but it has derailed some players out of this area in playtesting, causing confusion or lost opportunity.
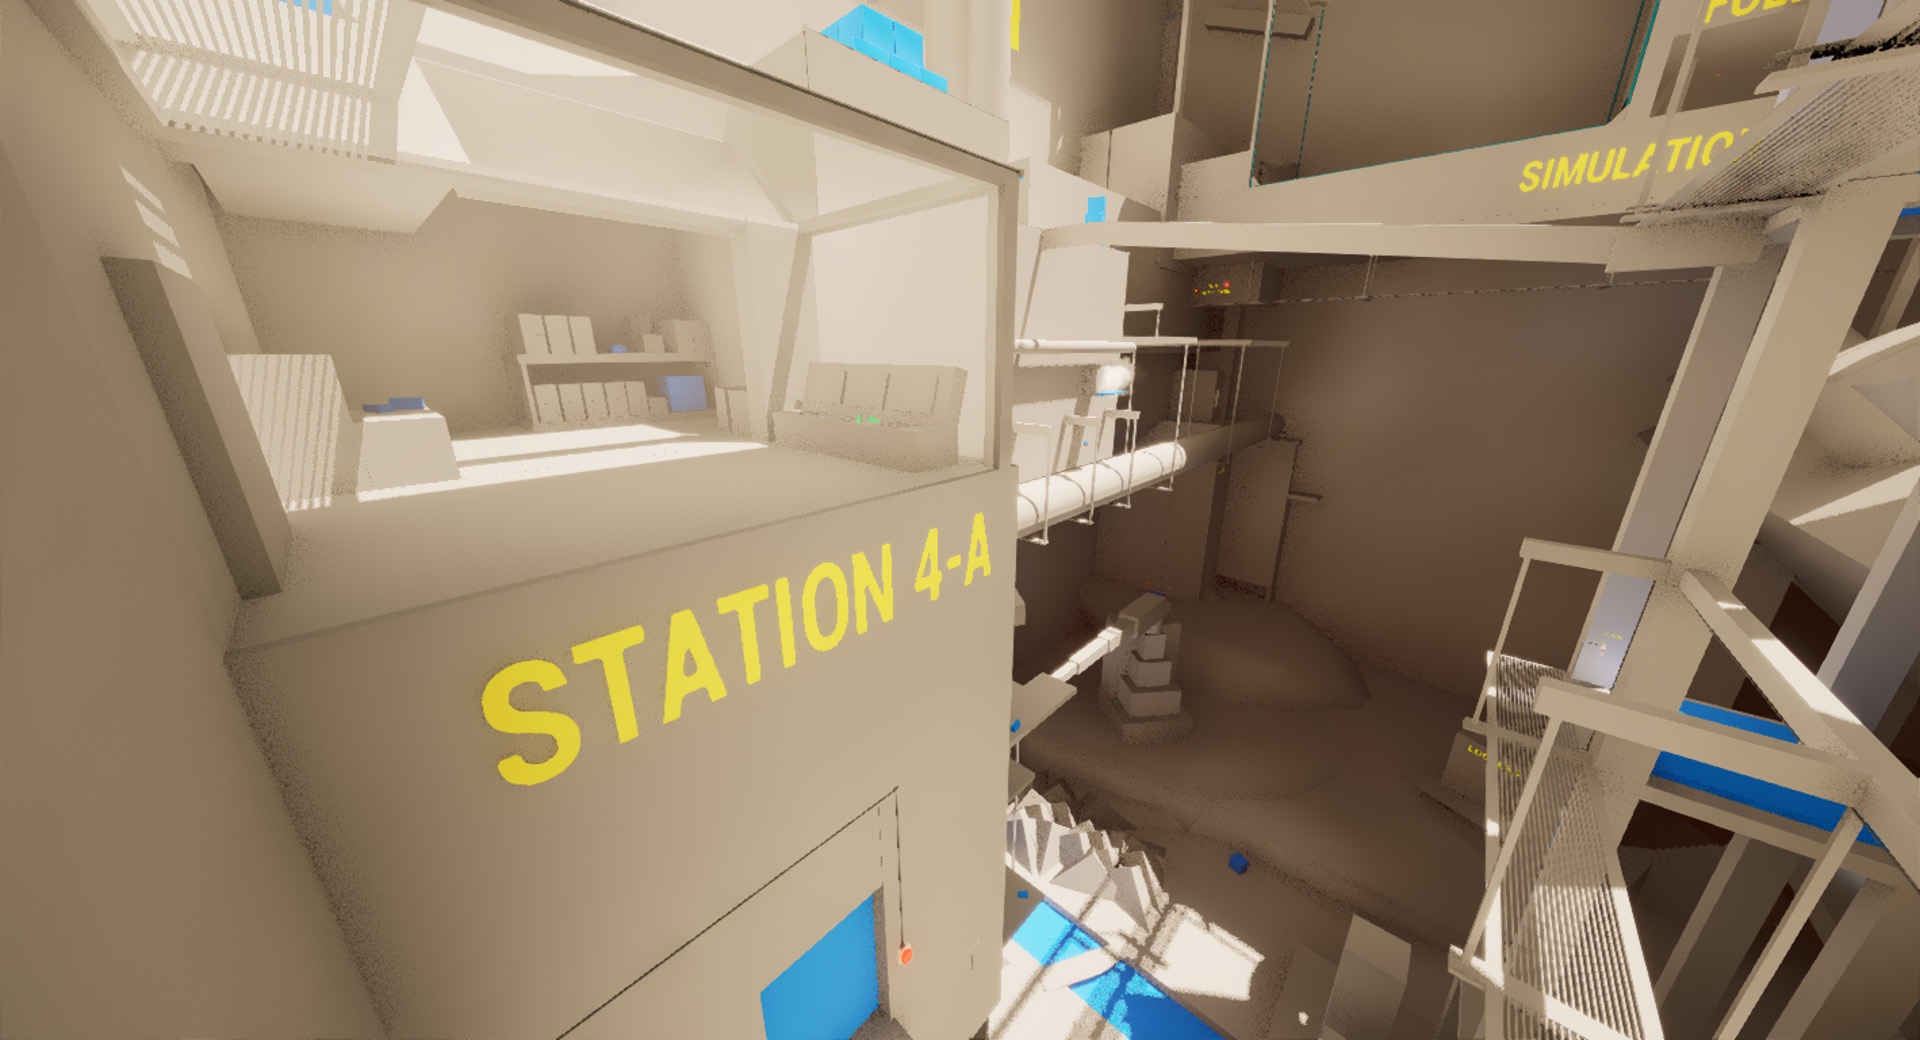
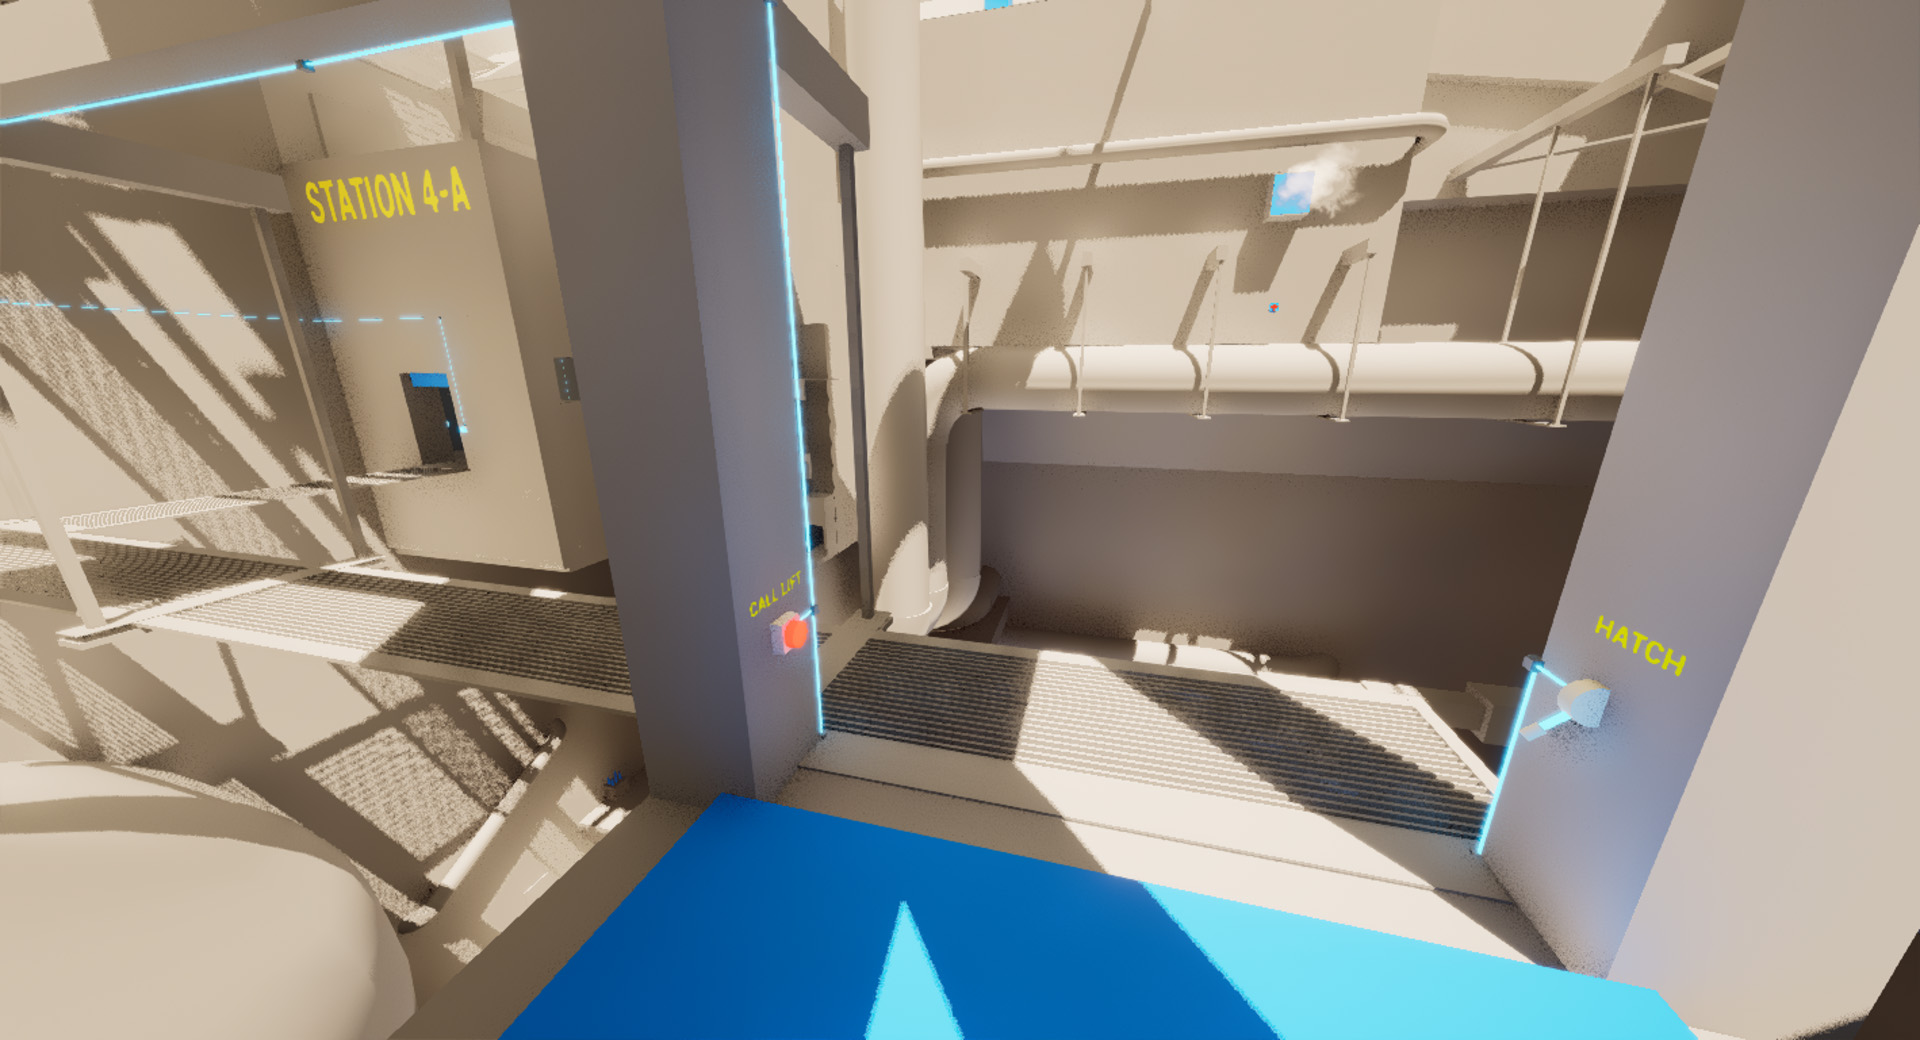
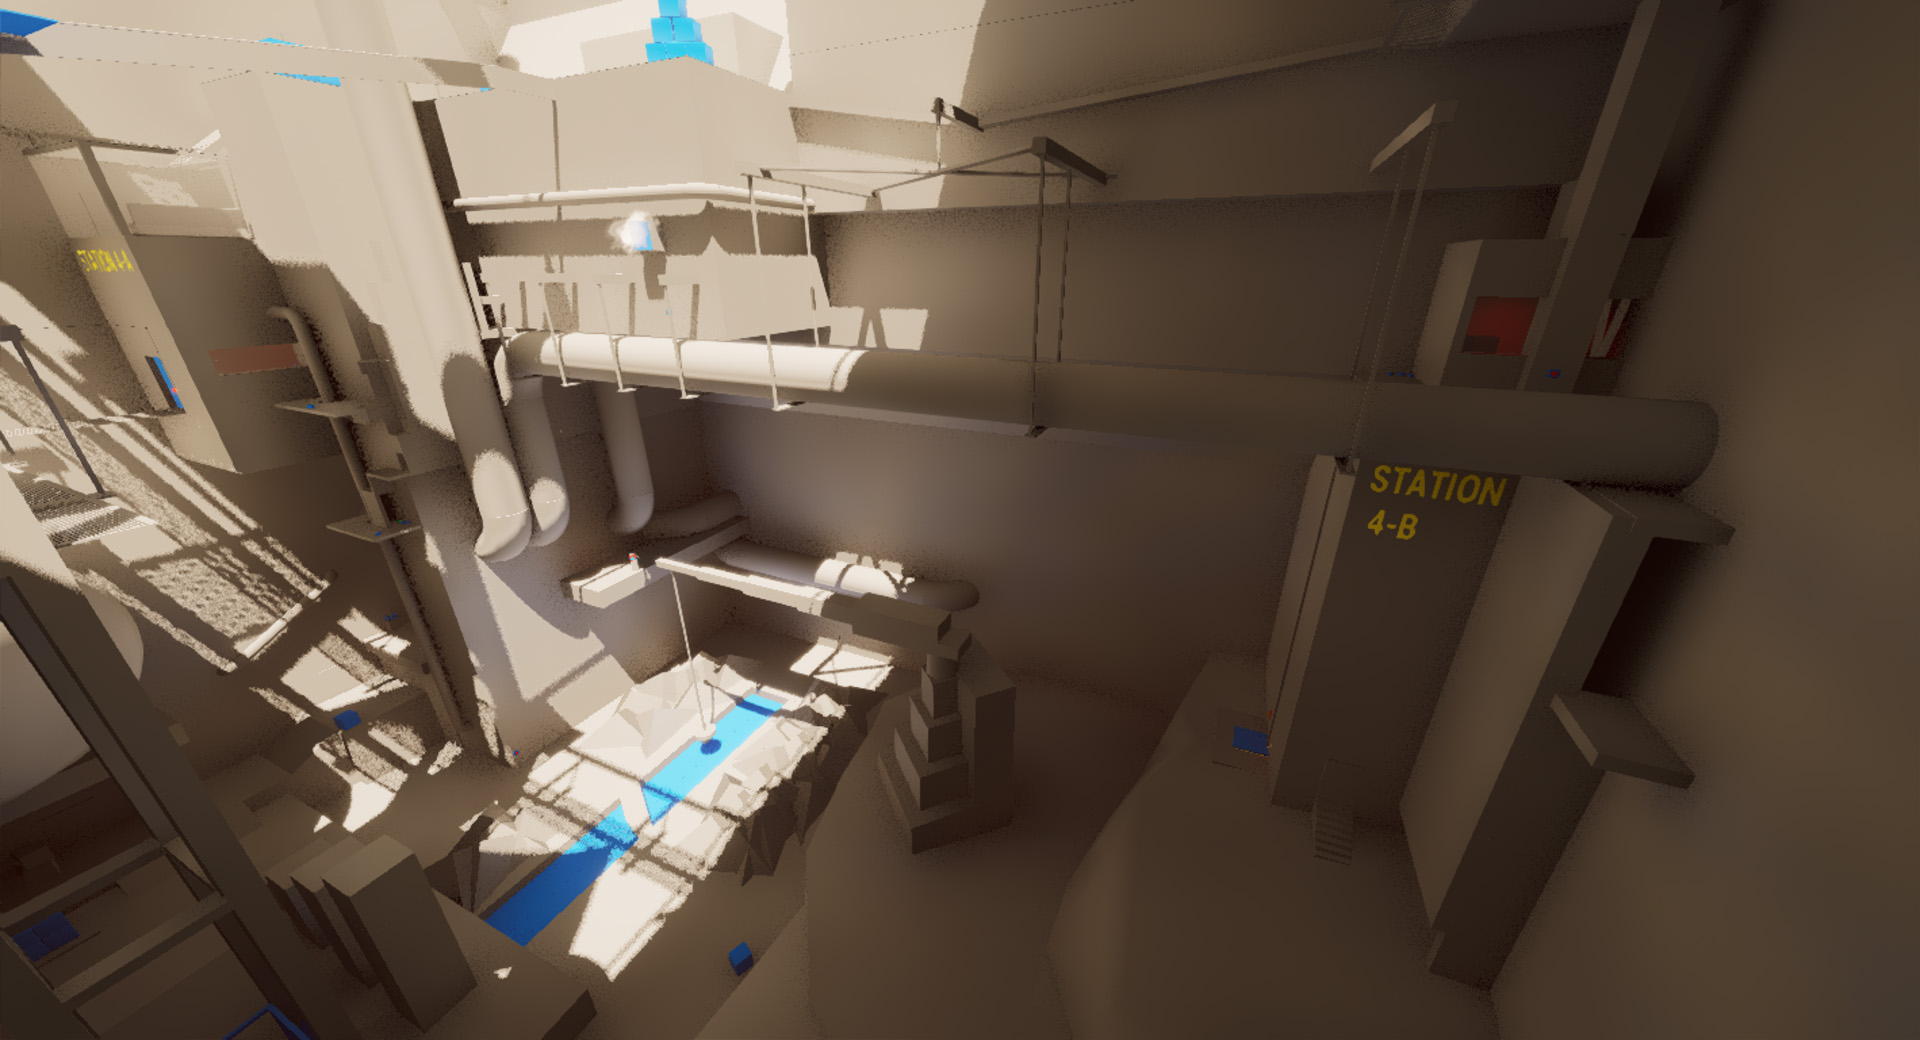
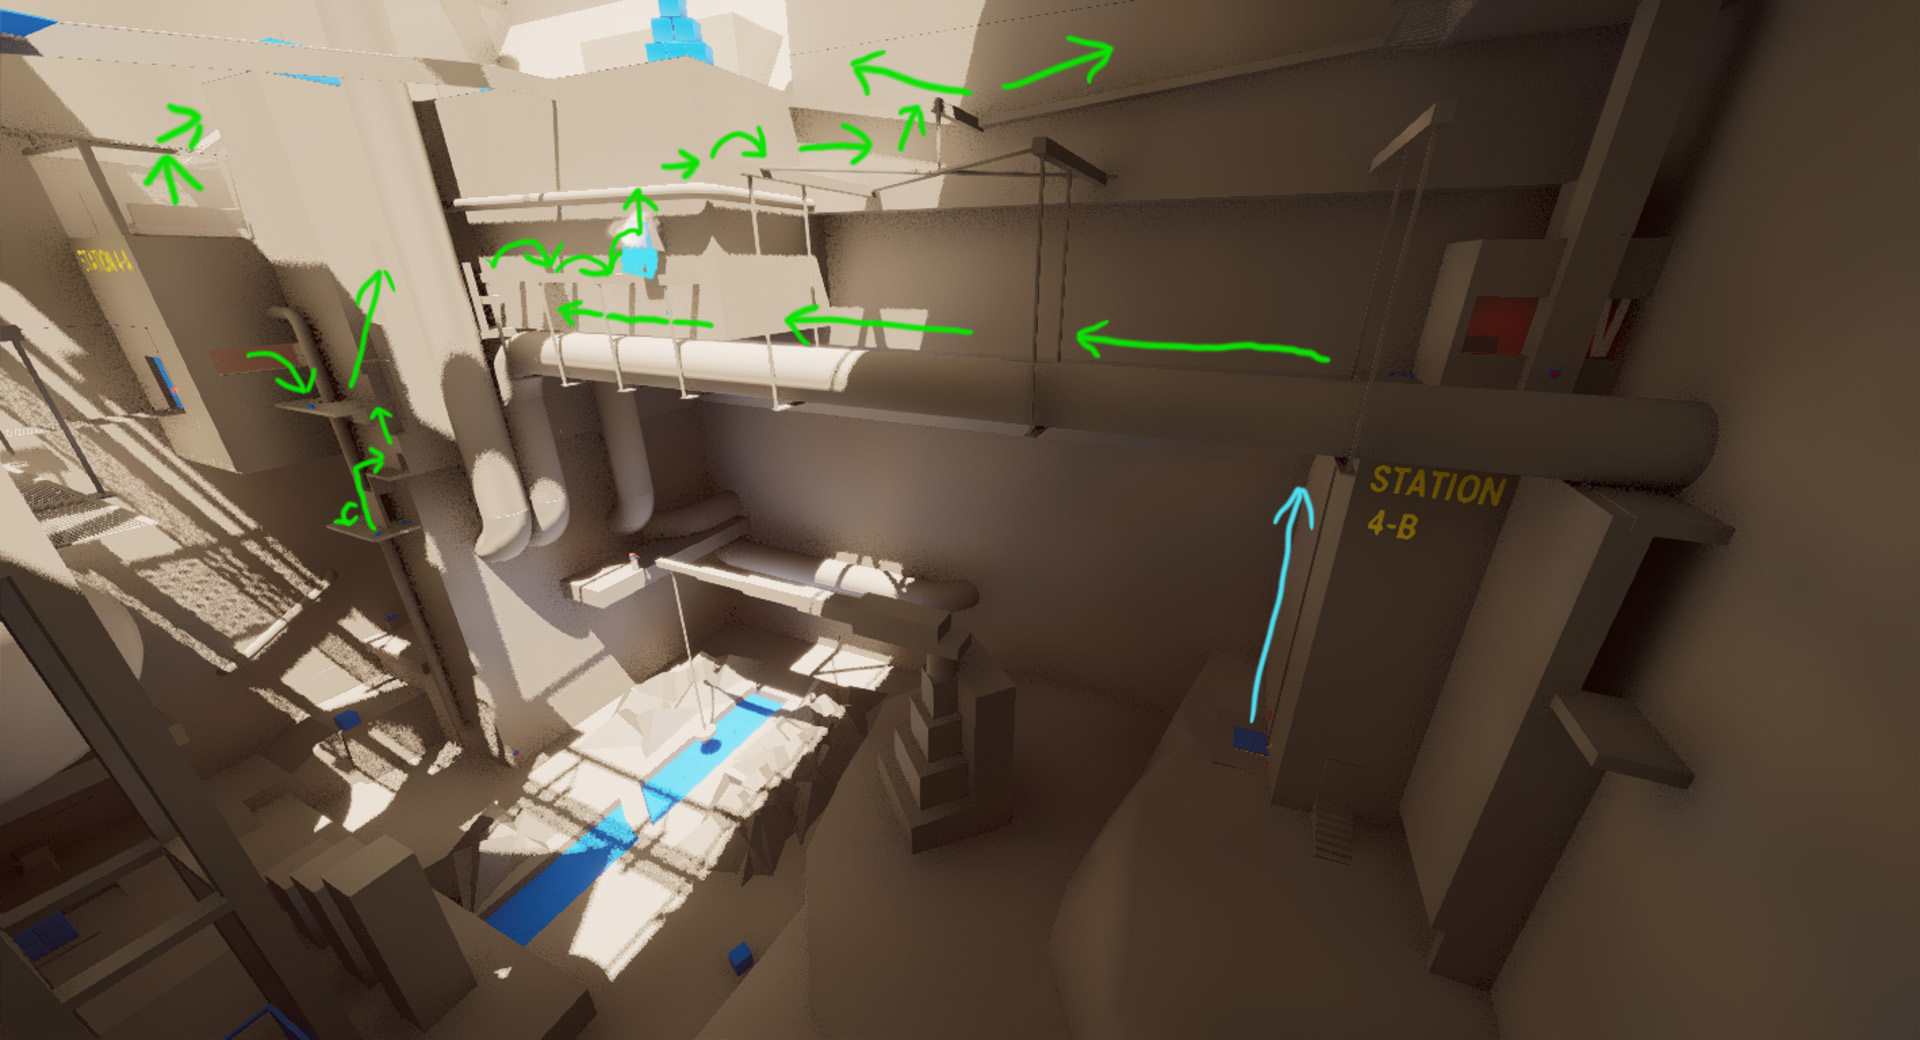
Floor 2 - Station 4A
Floor 2 is unpowered when the player arrives, aside from the auto lift which is currently powered by a charged battery through its own aux power port. The player can take the battery from the auto lift and use it to power the floor. They'll need to time it right to avoid fall damage because the auto-lift will drop as soon as it is unpowered.
The player can then insert the newly acquired battery into the nearby battery port to restore power to floor 2, triggering the visual feedback that they have powered this area. The auto-lift that they had removed the battery from will start working again at this time.
The player can ride the auto lift to station 4A. This room serves a better view of the level, multiple paths forward, and collectables. This area is available to the player via the auto lift either before or after they transfer the battery between the ports on this floor.
This room is where the most common divergence from the "golden path" occurs. Since the lift is not actually required to beat the level, you can actually skip a massive amount of content simply by smashing the glass ceiling and climbing out onto floor 3. If the player does this before restoring power and opening the lift hatch for floor 2 and then decides they want to utilize the lift, they will need to return to this floor. I have aimed to make enough interesting platforming paths throughout the level that this instance of backtracking would be tolerable if encountered.
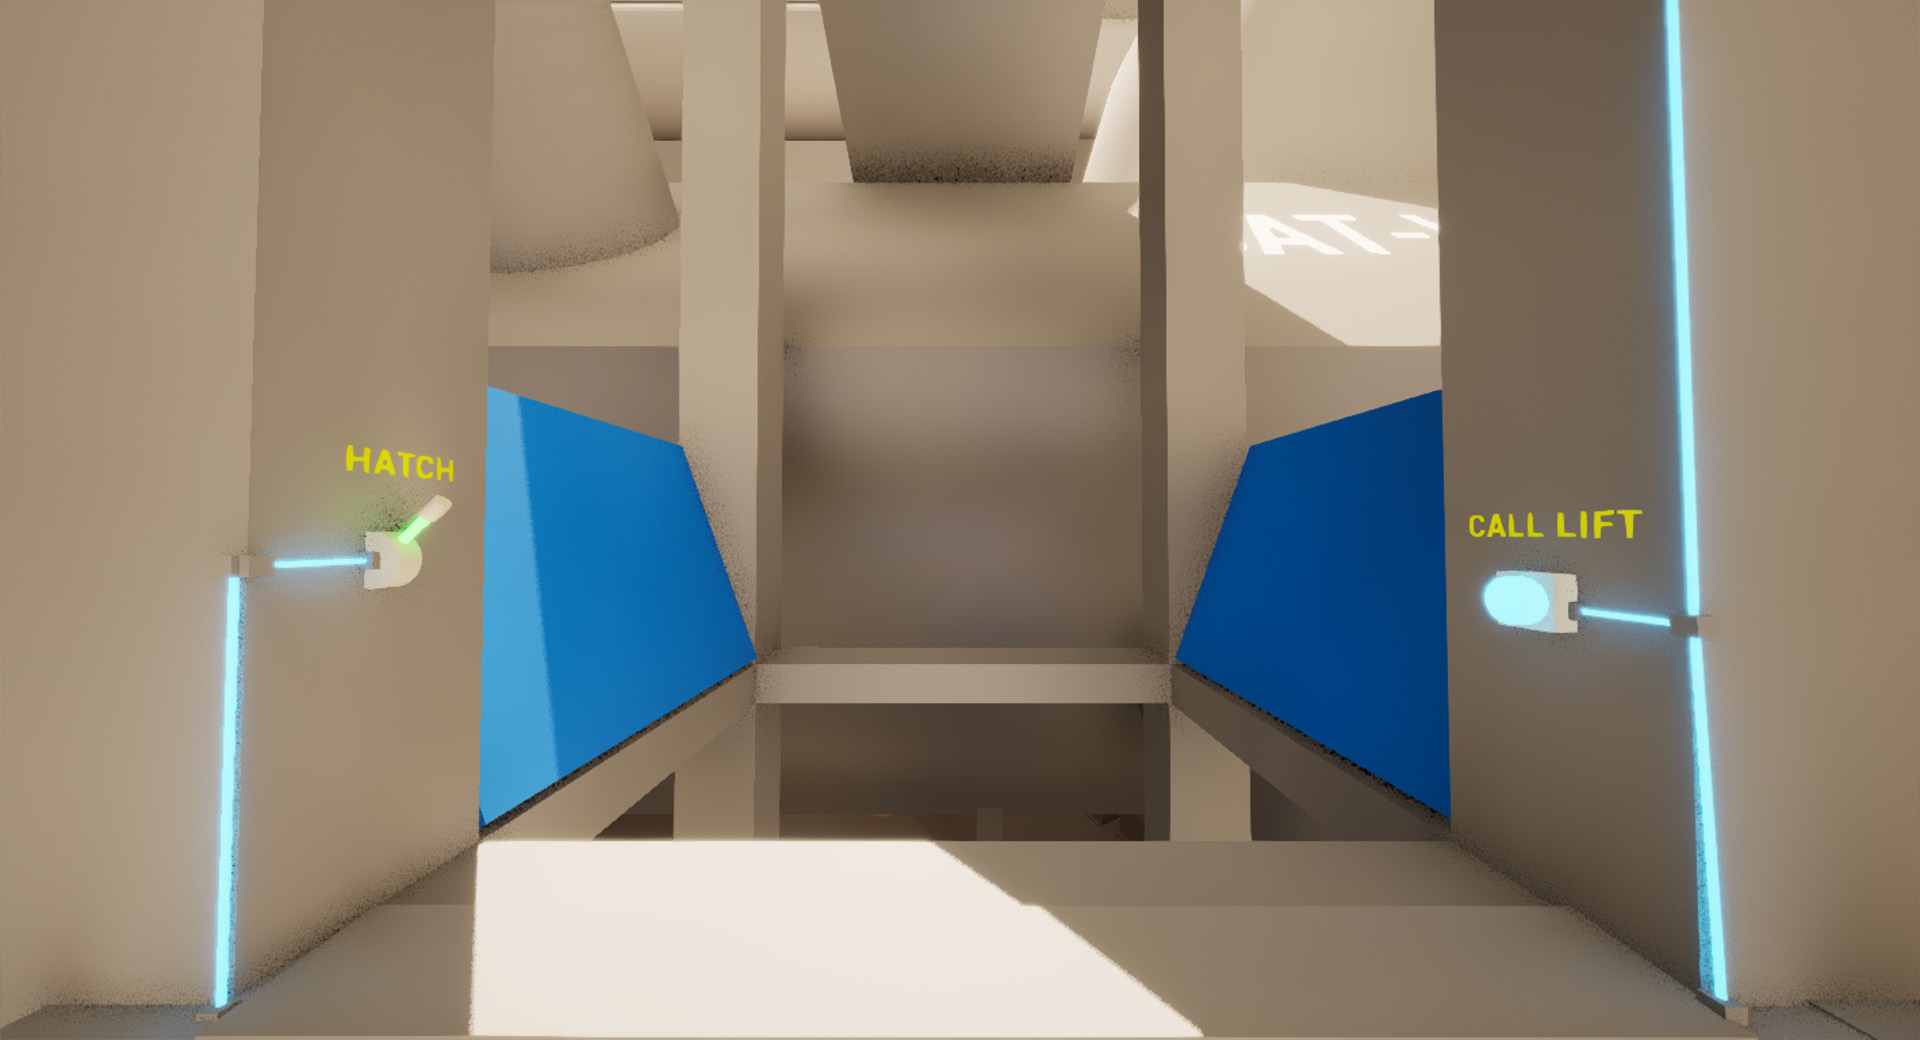
Once floor 2 is powered the player can open the door onto the catwalk which provides access to the lift.
Opening the hatch allows the lift to be called or ridden to floor 2.
At this point the player has unlocked a shortcut connecting the basement, the surface, and floor 2.
There's an alternate path, mentioned previously when the player was climbing through the darkness. This path is accessible from floor 2 by breaking the nearby window with a brick. The path allows bi-directional movement between floor 3, floor 2, and the surface. The climb up to floor 3 from this angle is meant to be difficult to see as it is an alternate path.

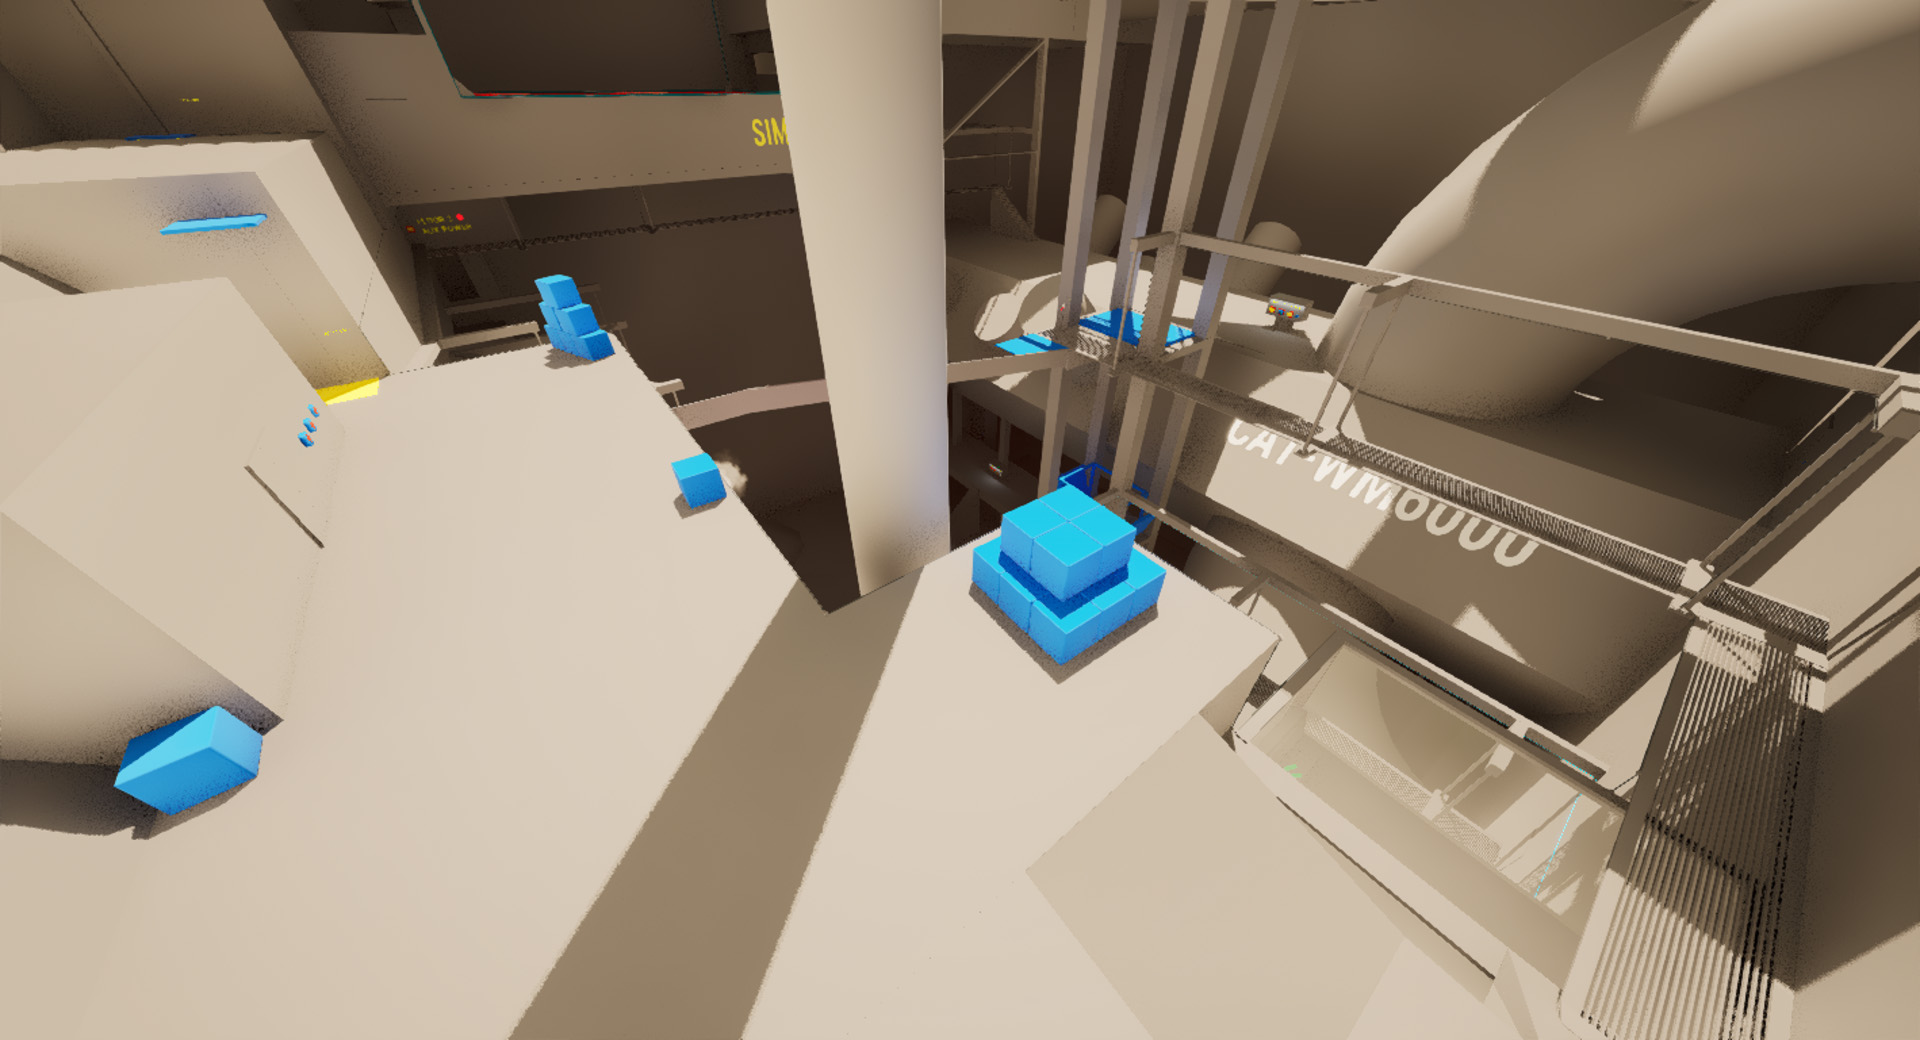
Floor 3
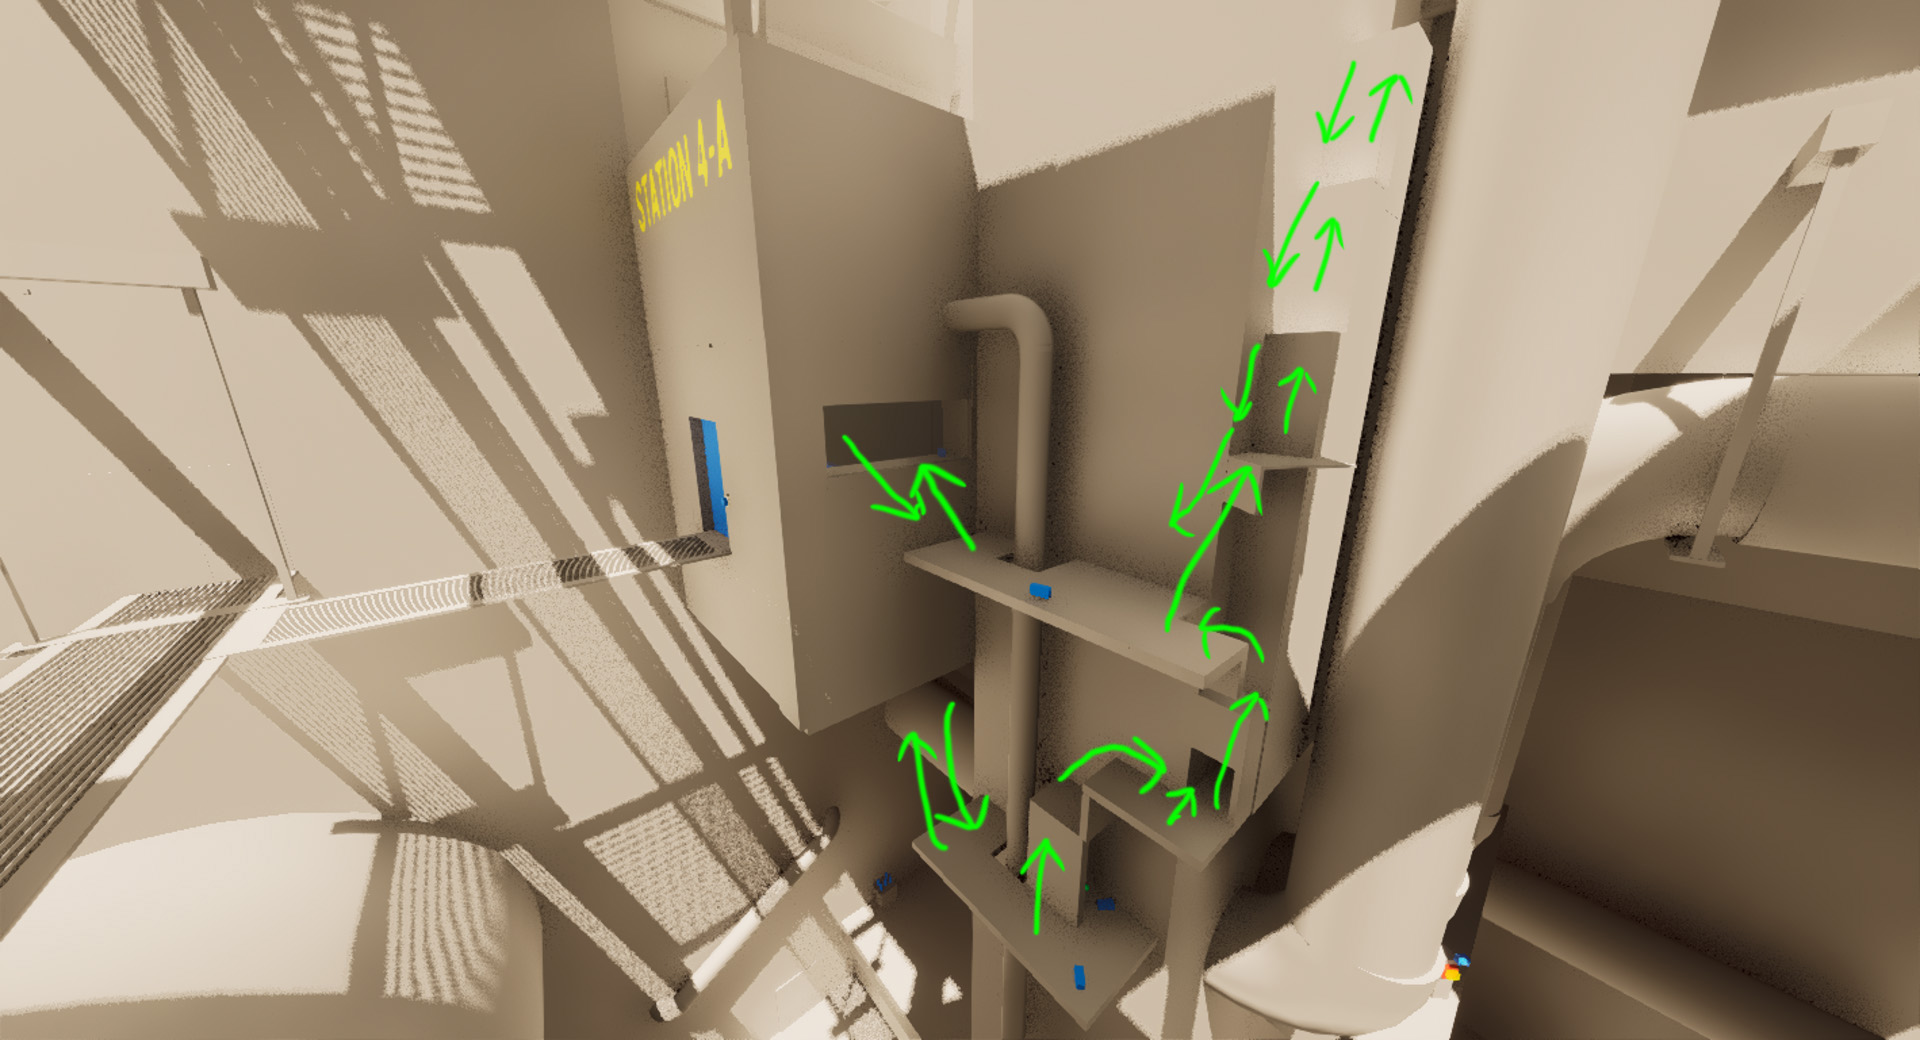
The Climb
This platforming segment, inspired by crash bandicoot (only kind of), connects Station 4A, Station 4B, and the alternate climbing path, all to floor 3.
Floor 3 provides the player with an obvious sightline between the charged battery sitting in the battery charging station, and the floor 3 power port location. I wanted the player to feel like powering this floor was only half as much work. This is to avoid things becoming tedious for players who have encountered frustration earlier in the level.
The floor also features a ton of movable boxes. When the power comes back online, one of the auto lifts is broken. The player can build their own staircase here. The challenge only requires two boxes. Initially it required more, but I found in playtesting that there were two types of players. One type of player expects that the challenge will only take two boxes, and if it takes any more than that they become irritated. The other type of player is excited to build a full staircase, and they will usually build the full staircase regardless of whether or not it is actually required. Neither group minds much if the challenge only truly requires 2 boxes, so this is the best way to make everyone happy.
There are multiple ways to get around floor 3 and each path has collectables. This is meant to make it so the player can go from the battery port, to the battery, and back to the battery port without any actual or perceived backtracking.

The floor 3 power enables the player to open the lift hatch and extend the lift shortcut to this floor, assuming they already connected floor 2. Turning on the power for floor 3 also turns on a horizontal auto platform so players don't have to manually backtrack in this area at all. This area is conquered.
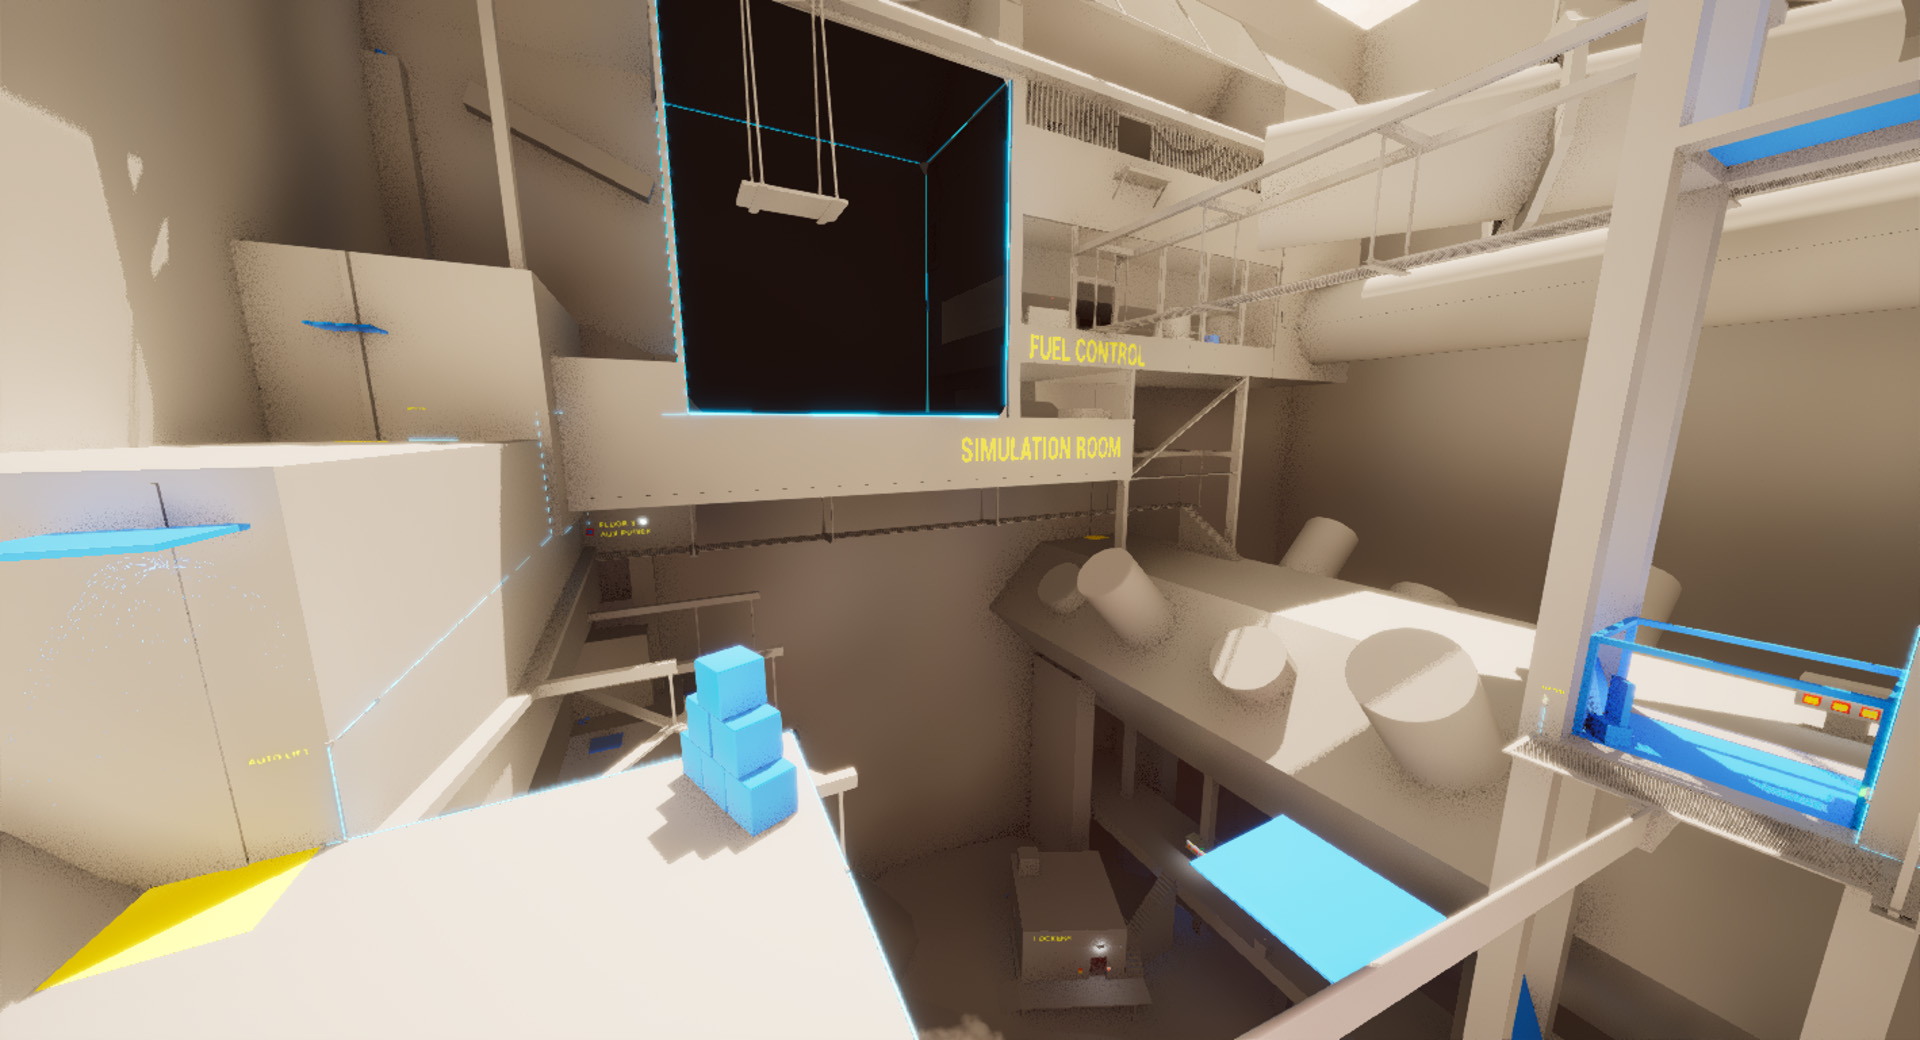
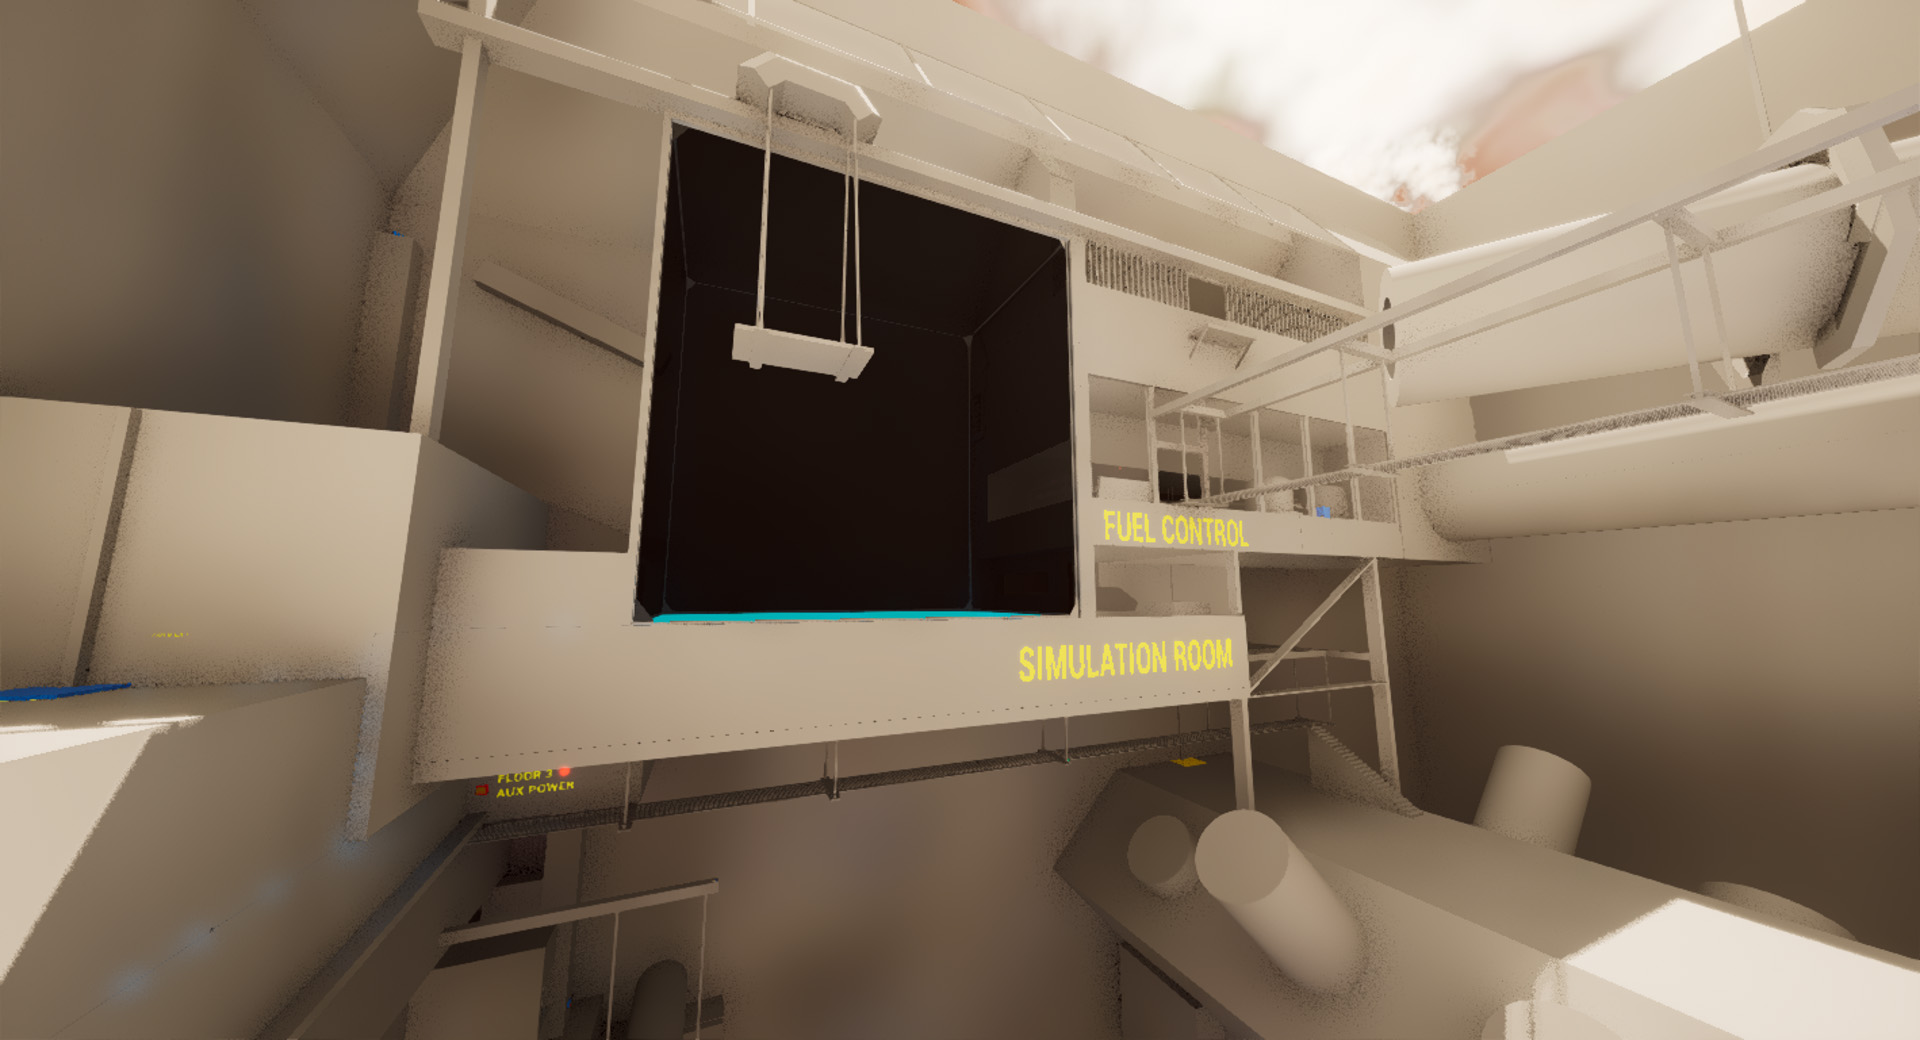
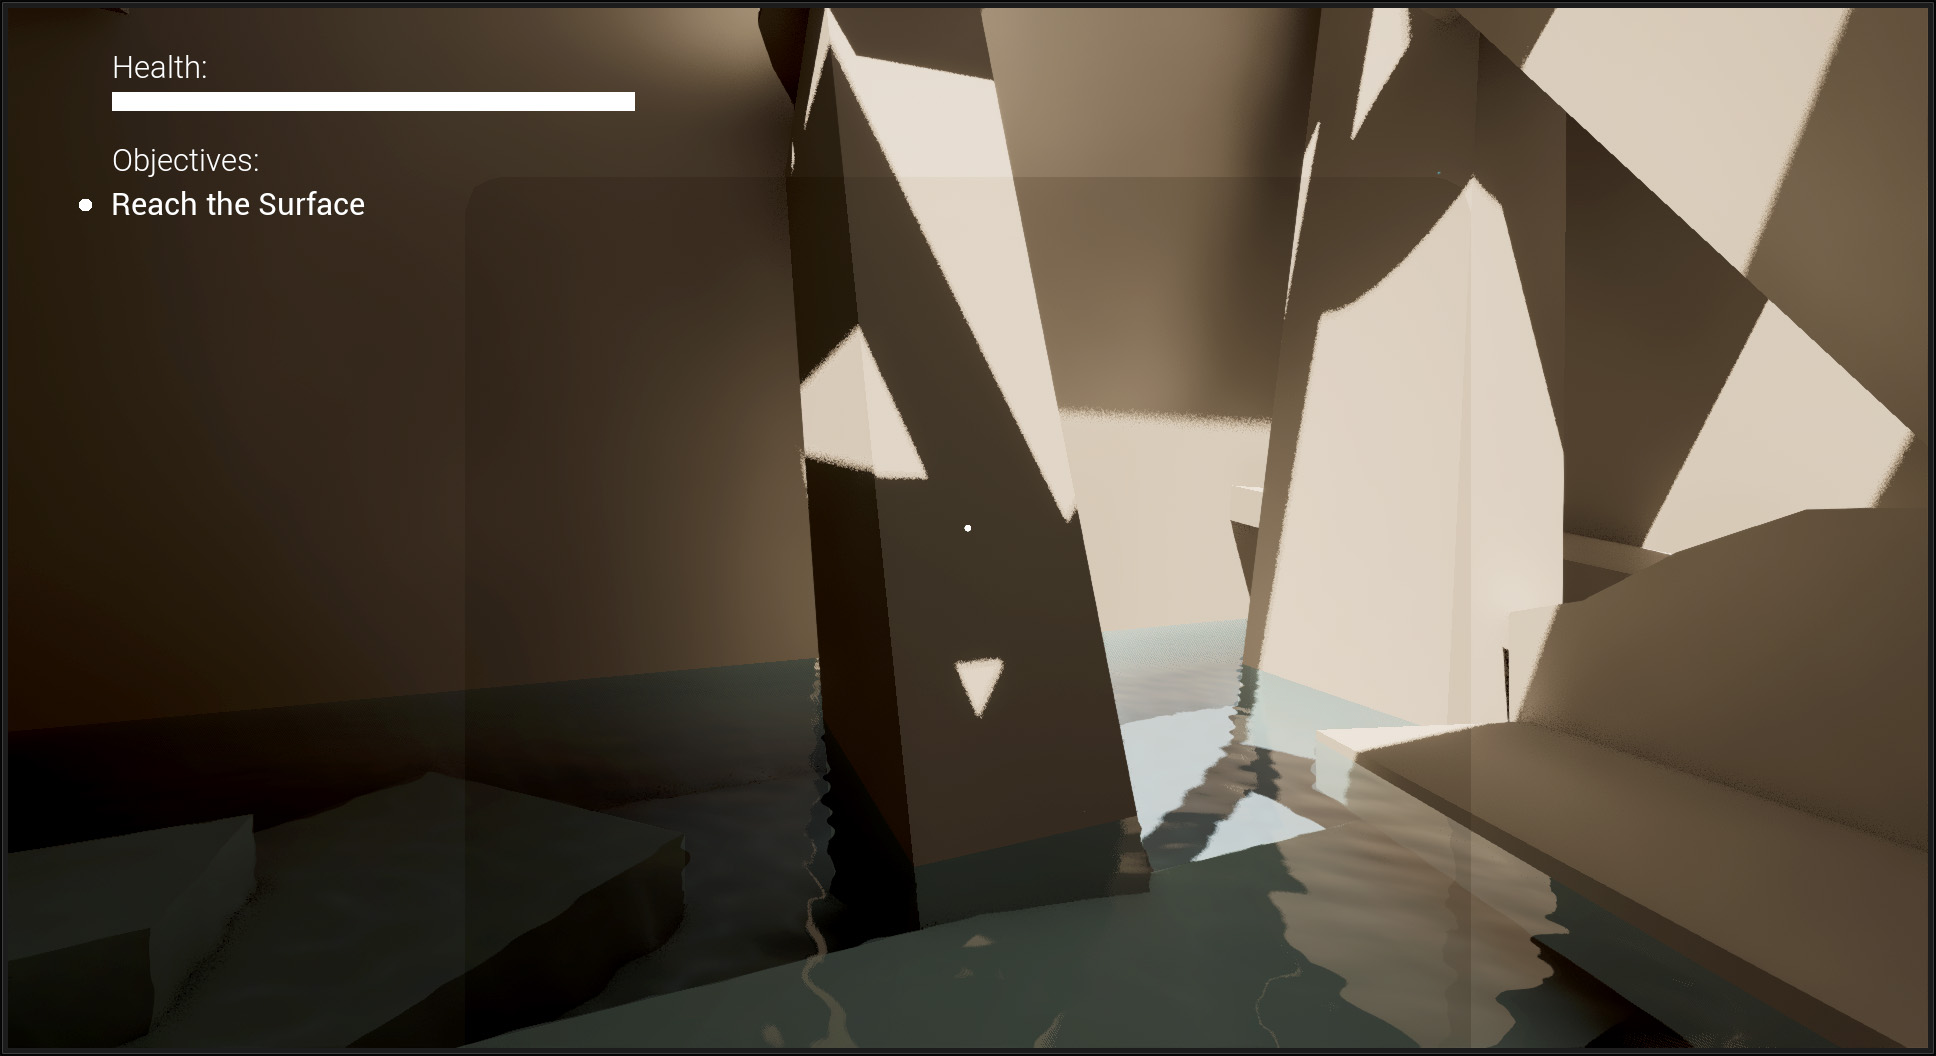
Simulation Room
Floor 3 power enables the simulation room. This room features toggleable platform configurations that are used to reach collectibles and advance to the next area.
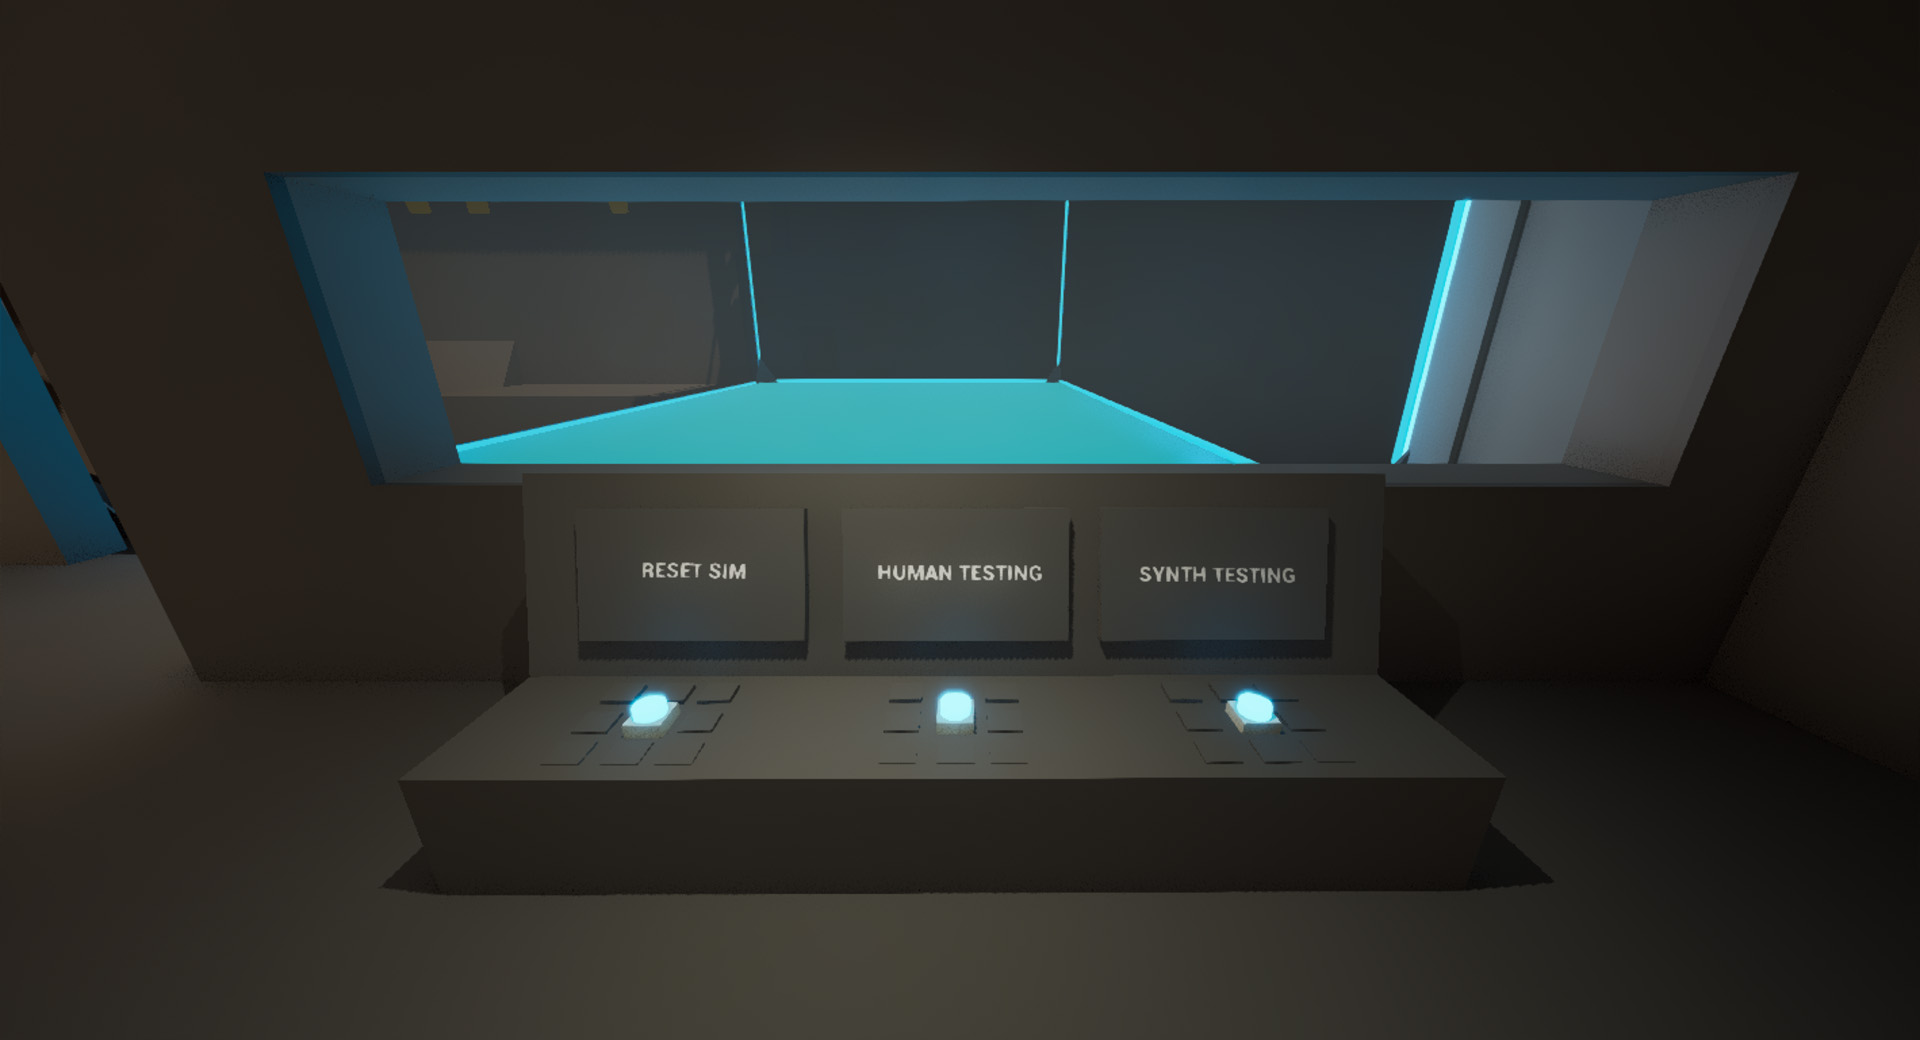
The simulation used to have a transparency to it, but in practice that was awful and unreadable. I had to settle on this material and post processing combination to ensure that readability remained top priority.
This first configuration "Human Testing" Is meant to be a more natural shape of terrain, like rocky hills and cliffs. This configuration can be used to access either of the nearby collectibles. The hanging platform collectible can be reached using this configuration via regular platforming or a skill jump.
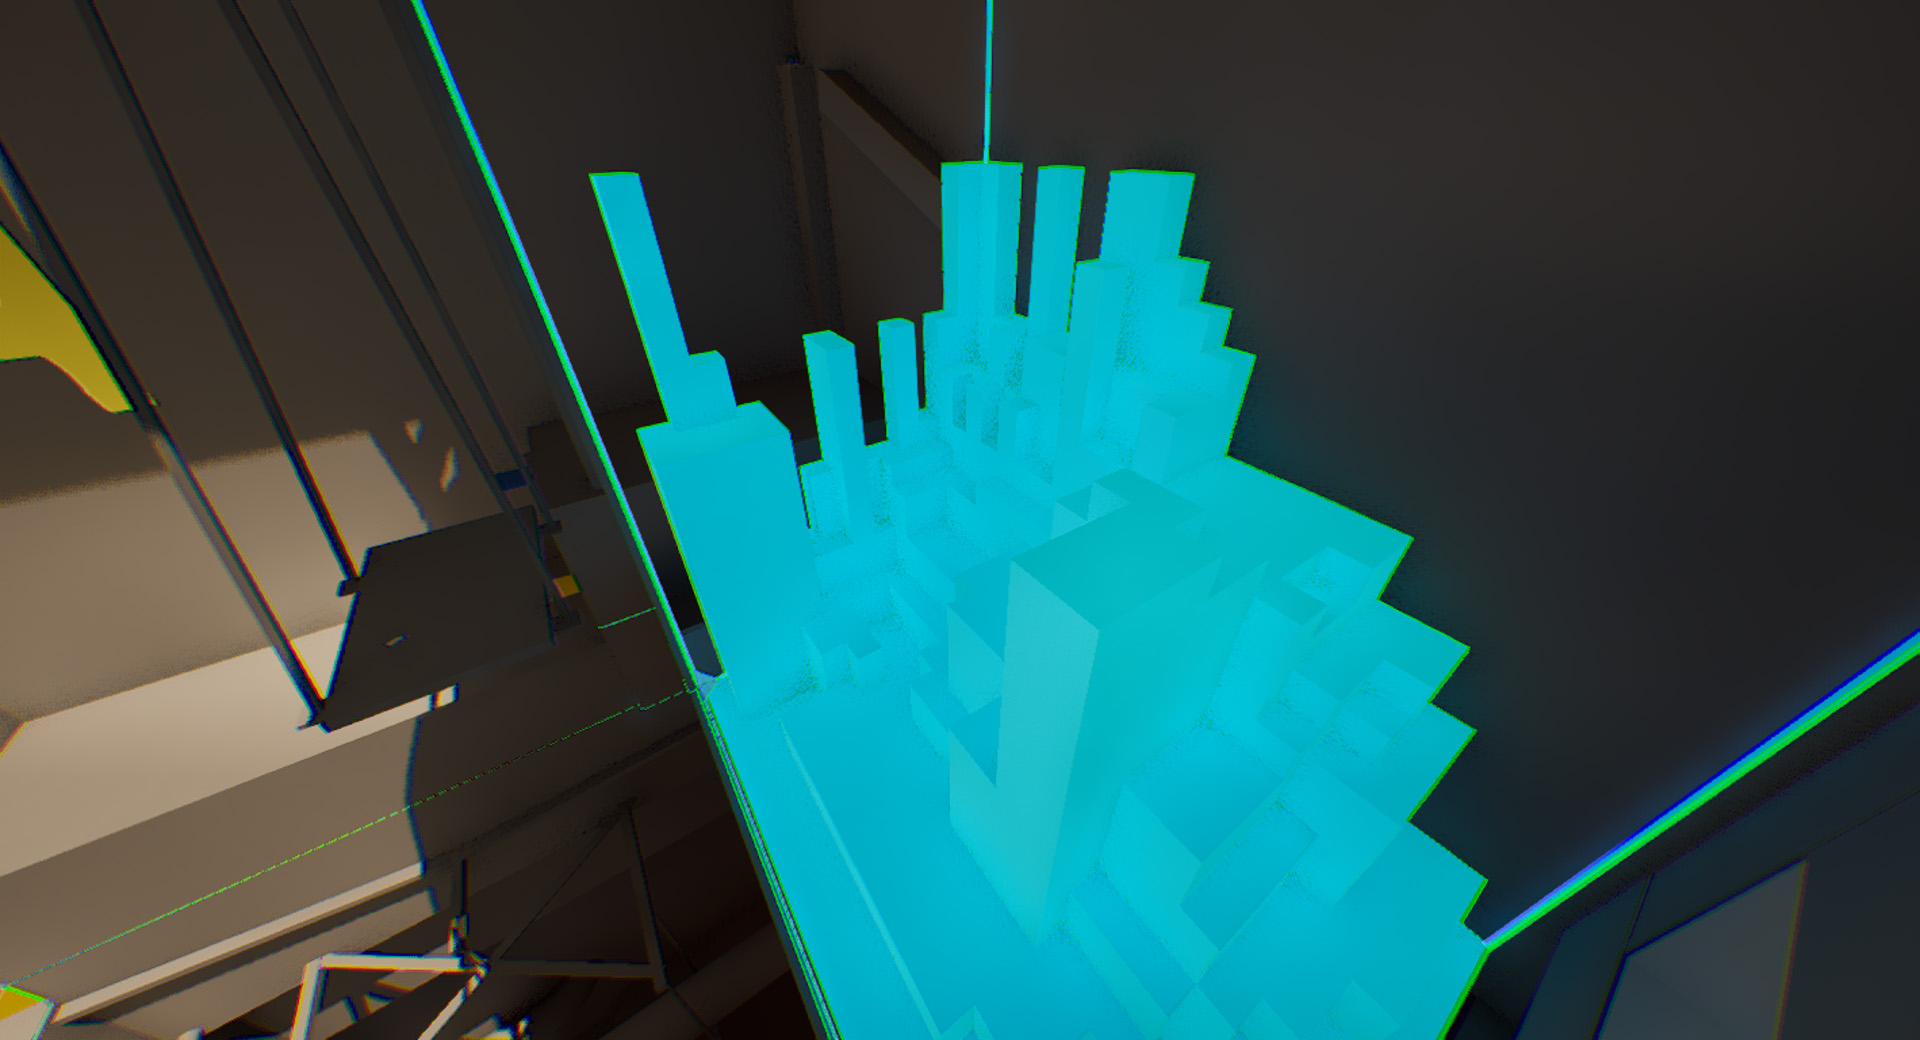
The synth training area is meant to be more unnatural terrain, like an urban or industrial layout. This is a nod toward the type of training the synths have to endure, and what types of jobs they are used for. In the lore and discovery of this level, the player is learning about the synths and the humans through the lenses of both sides. This configuration is meant to re-enforce that in this facility synths are used for dangerous work at heights due to their superhuman jumping and climbing abilities, along with their expendable nature. This is meant to provide another hint to the player that they themselves are a synth as they have been able to navigate the verticality of this industrial environment. Even though it is highlighted in the intro text, the players tend to forget quickly, so this is just a bit more re-enforcement.
Originally the synth training layout is used to progress forward in the level, but it can also be used if the player accesses it via the roof to collect the collectables from this area. This was not always the case, but was designed into the area after watching playtest footage.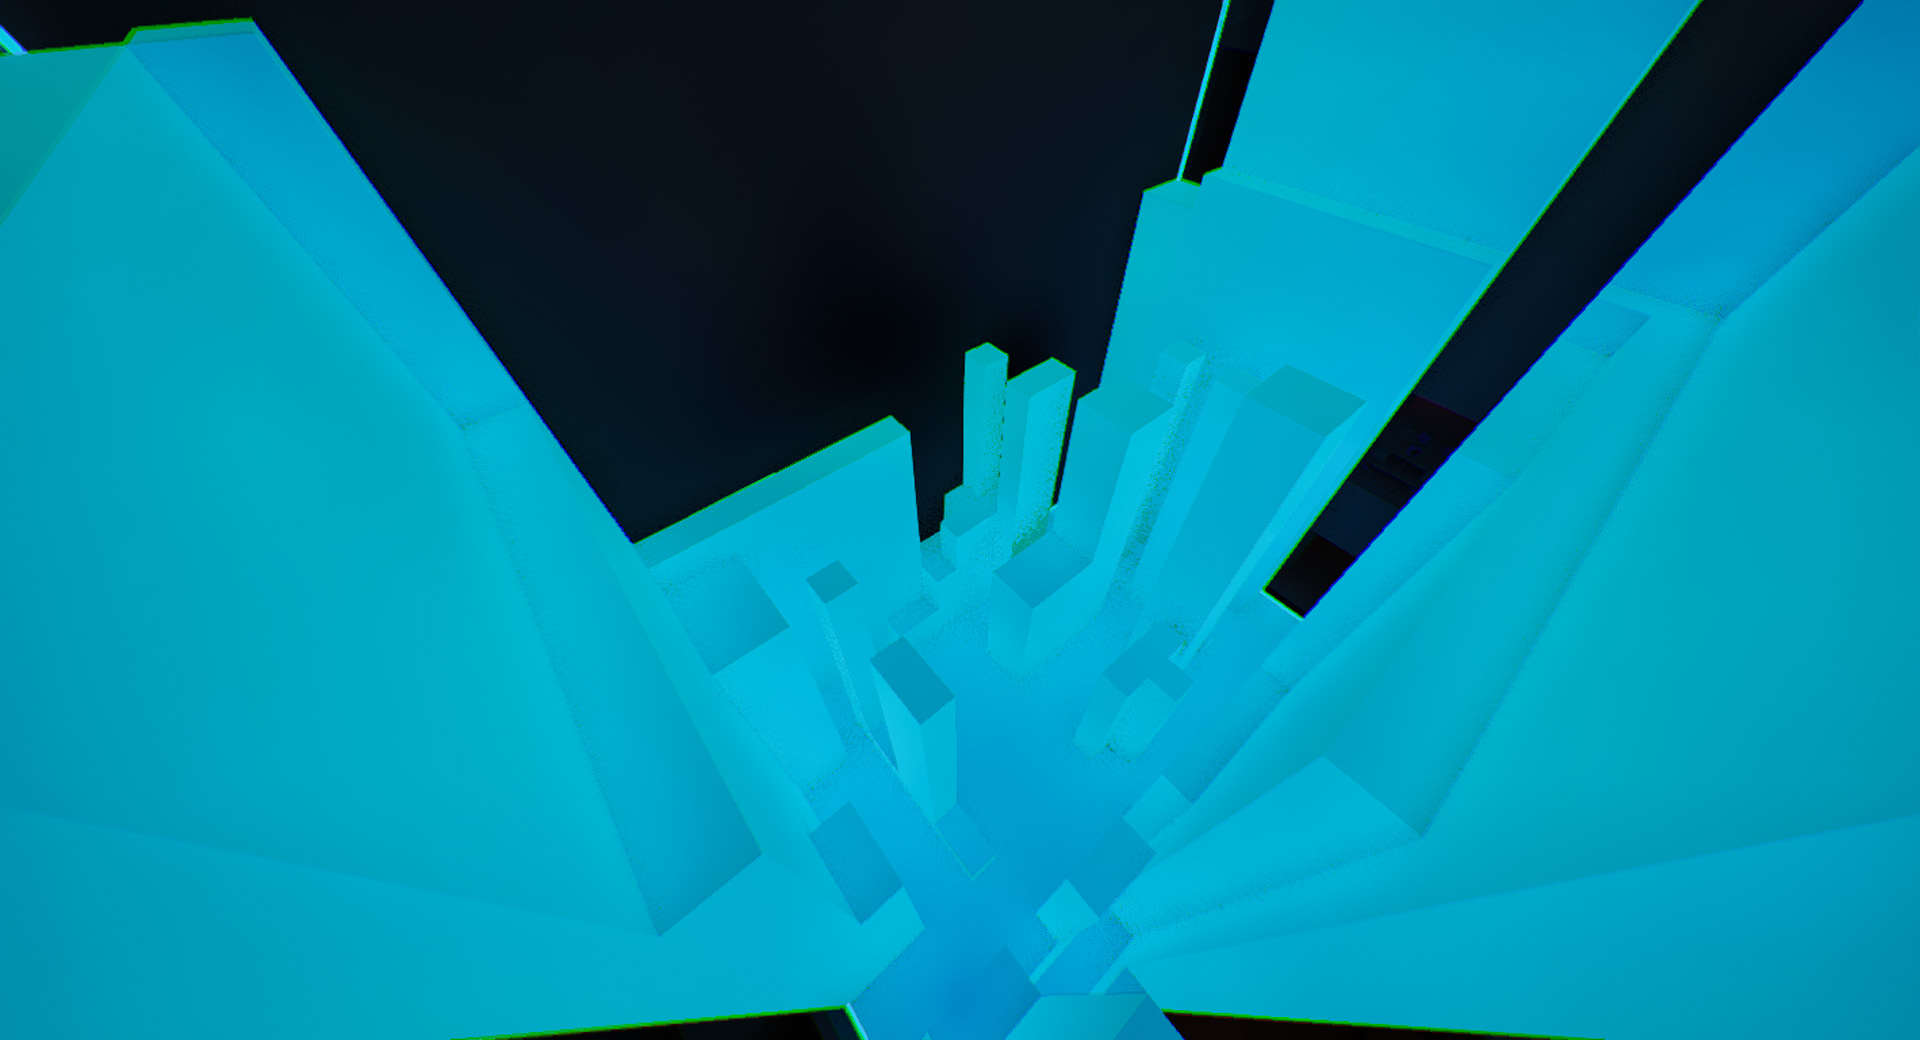
Floor 4
After the sim room the player encounters the fuel room maintenance corridor. It is an oppressive flashlight zone until it is powered. This corridor connects the fuel room to the roof access and the simulation room.
Fuel Room
The fuel room features an abundance of resources and light. The player has nearly made it. It should feel good to be here.
Just as the player finds themselves annoyed at the prospect of backtracking to charge the battery we give them a charged battery. This room is meant to feel good, and they worked hard to get here, we can't punish them now with tedious tasks, instead we give them a pleasant surprise.

This room has two buttons that can be used when the floor is powered. One of them opens the roof access, and the other opens the fuel access. There's a written lore in the room hinting to the player that using the fuel line to access the shipyard will be a stealth based approach.

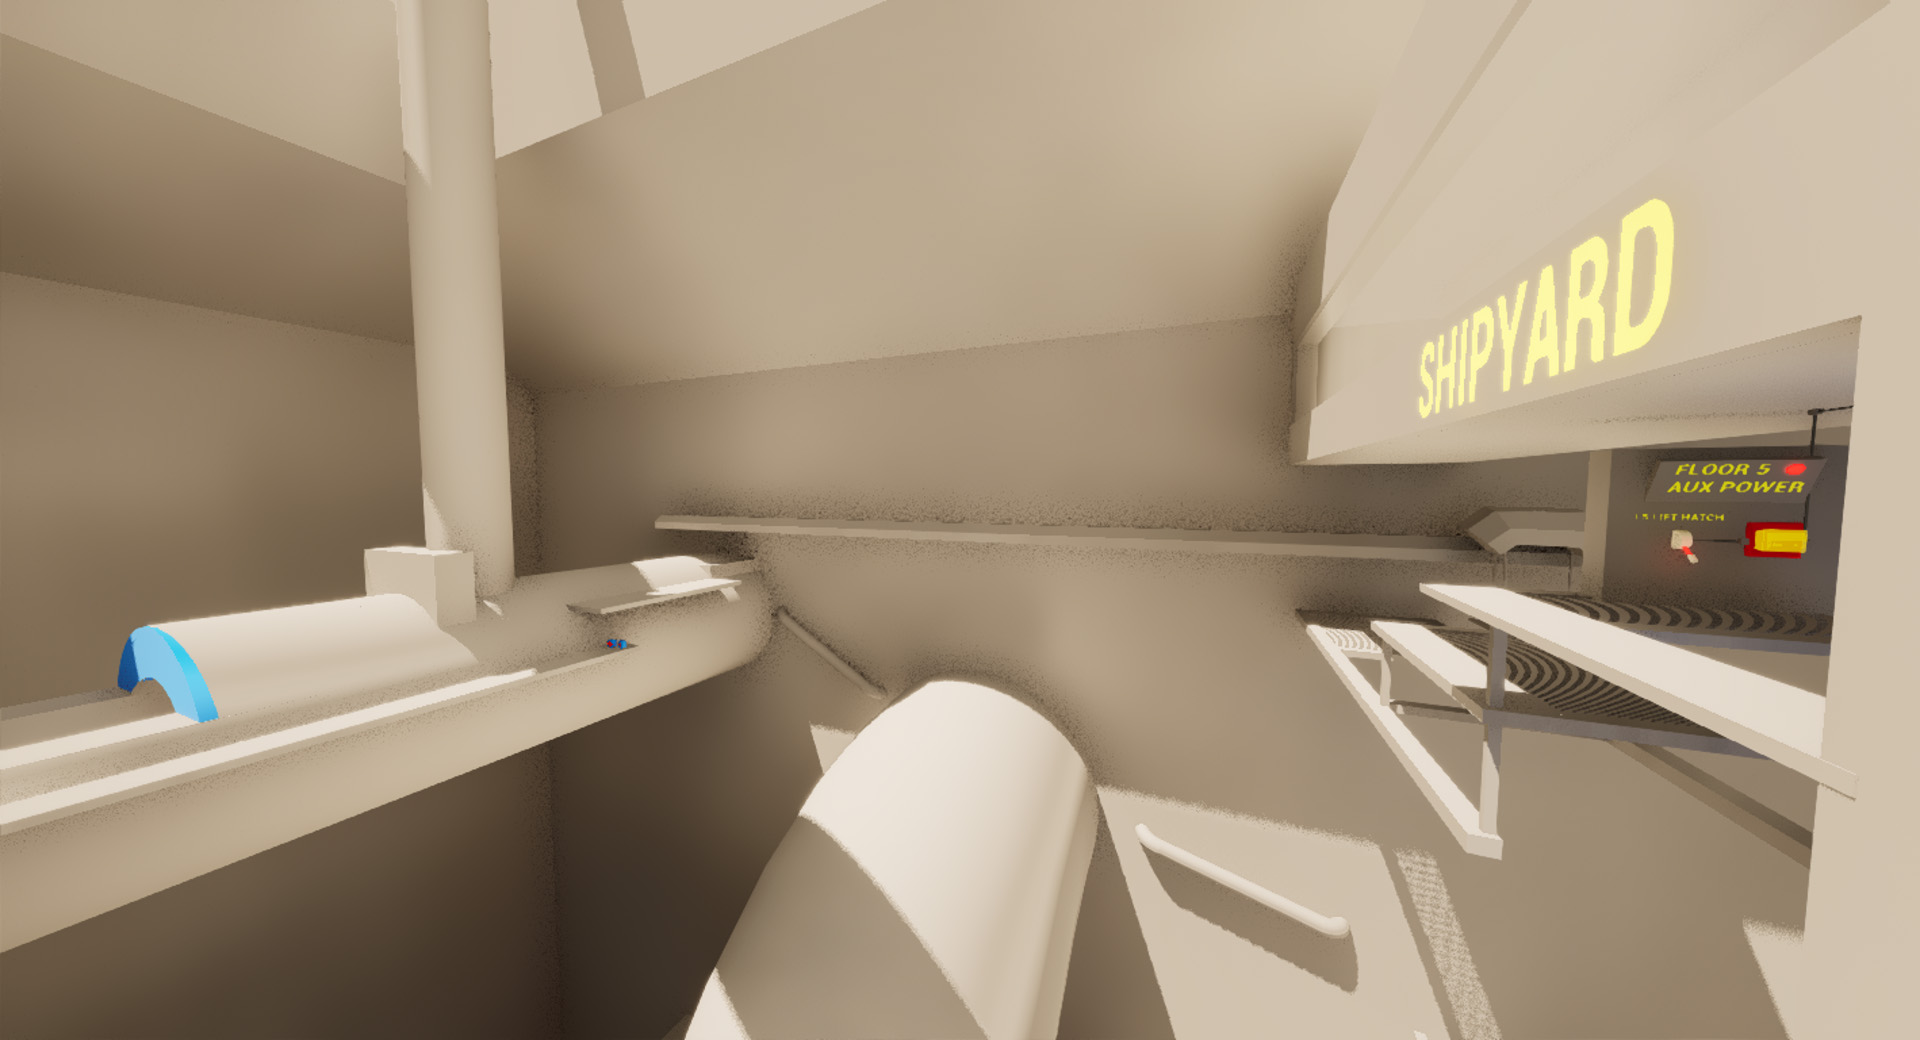
The lift unlock lever is just a short walk down the catwalk from the battery, and it brings the player within clear view of the floor 5 aux power panel which is within the same screen as the lever and hatch that it powers. This shows the player clearly where they need to reach to unlock the final hatch and ride the lift to the shipyard entrance.
Rooftop
The rooftop provides access to the top level of the simulation in case the player wants to go back for collectables. It also gives them a perfectly framed vista showcasing how far they've come. Finally, it gives them access to a stunt jump out to the pipe they need to cross.


There are three ways to access the pipe, but the stunt jump is the most popular method.
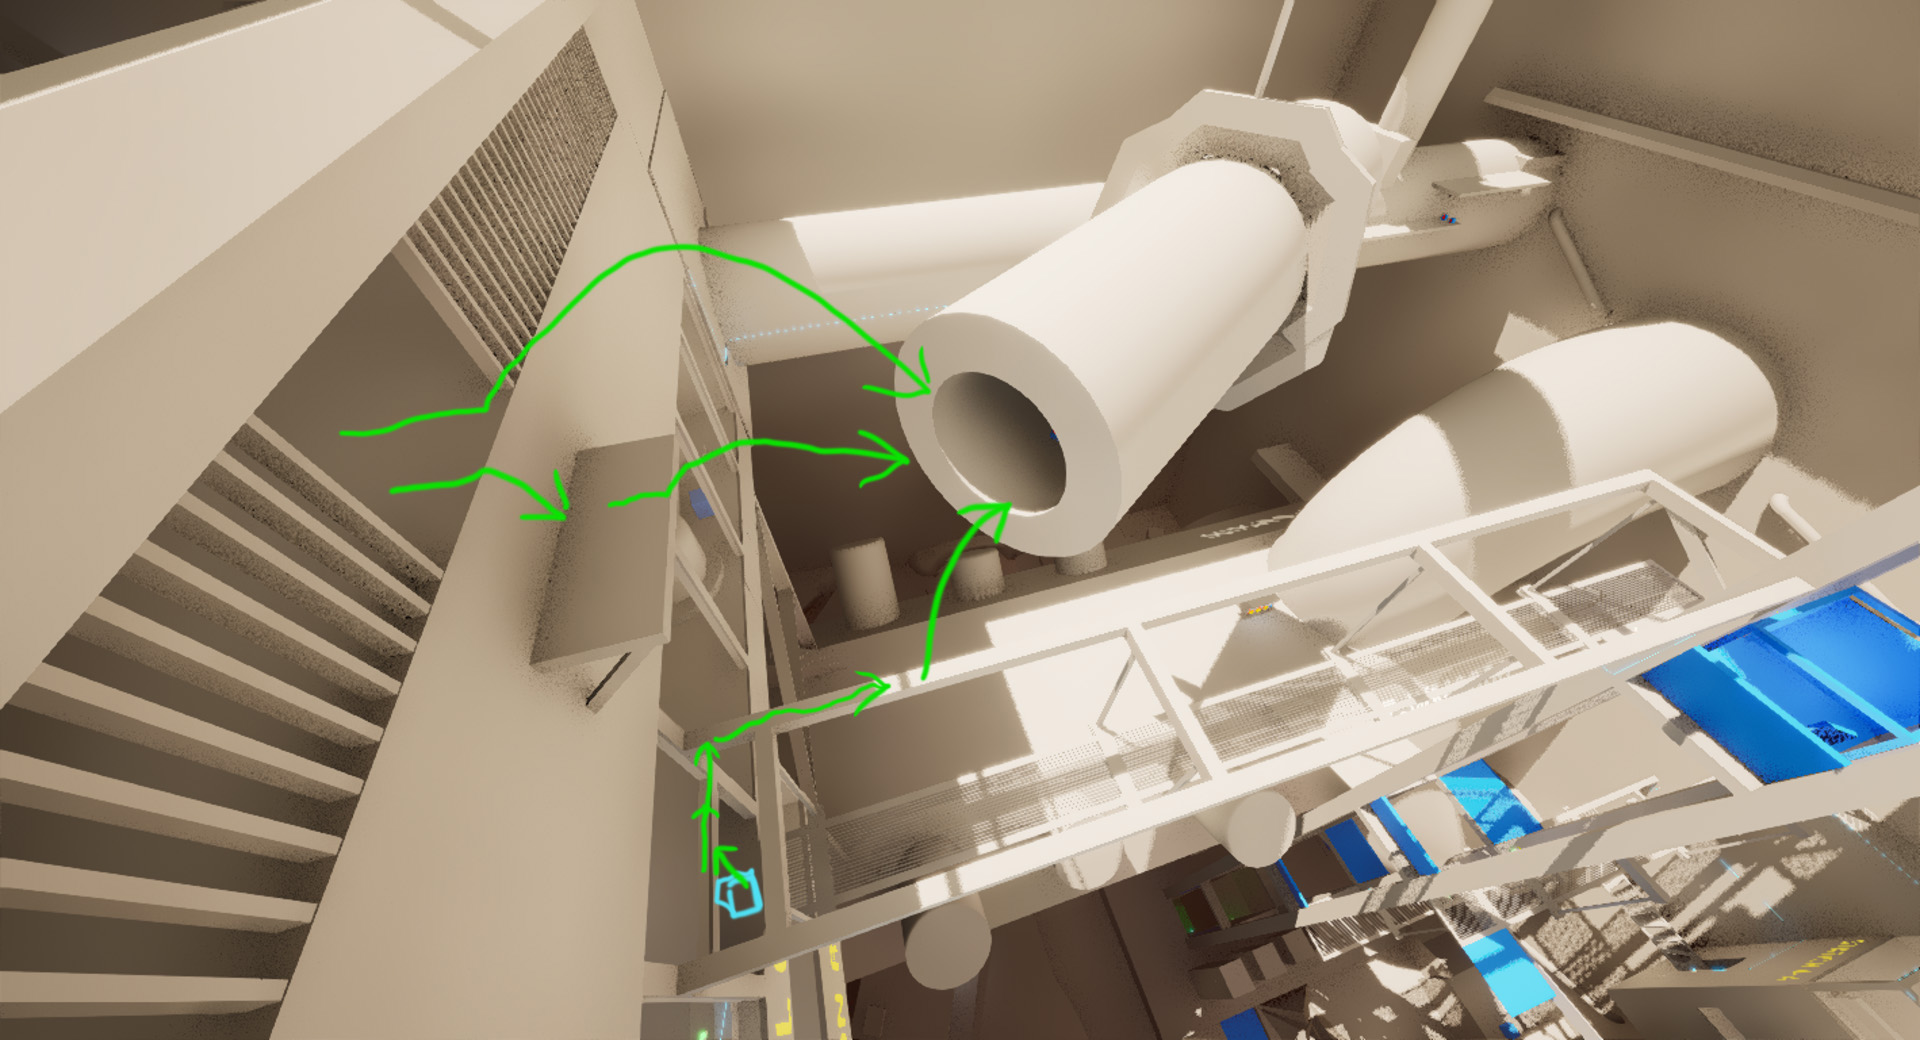
Heights
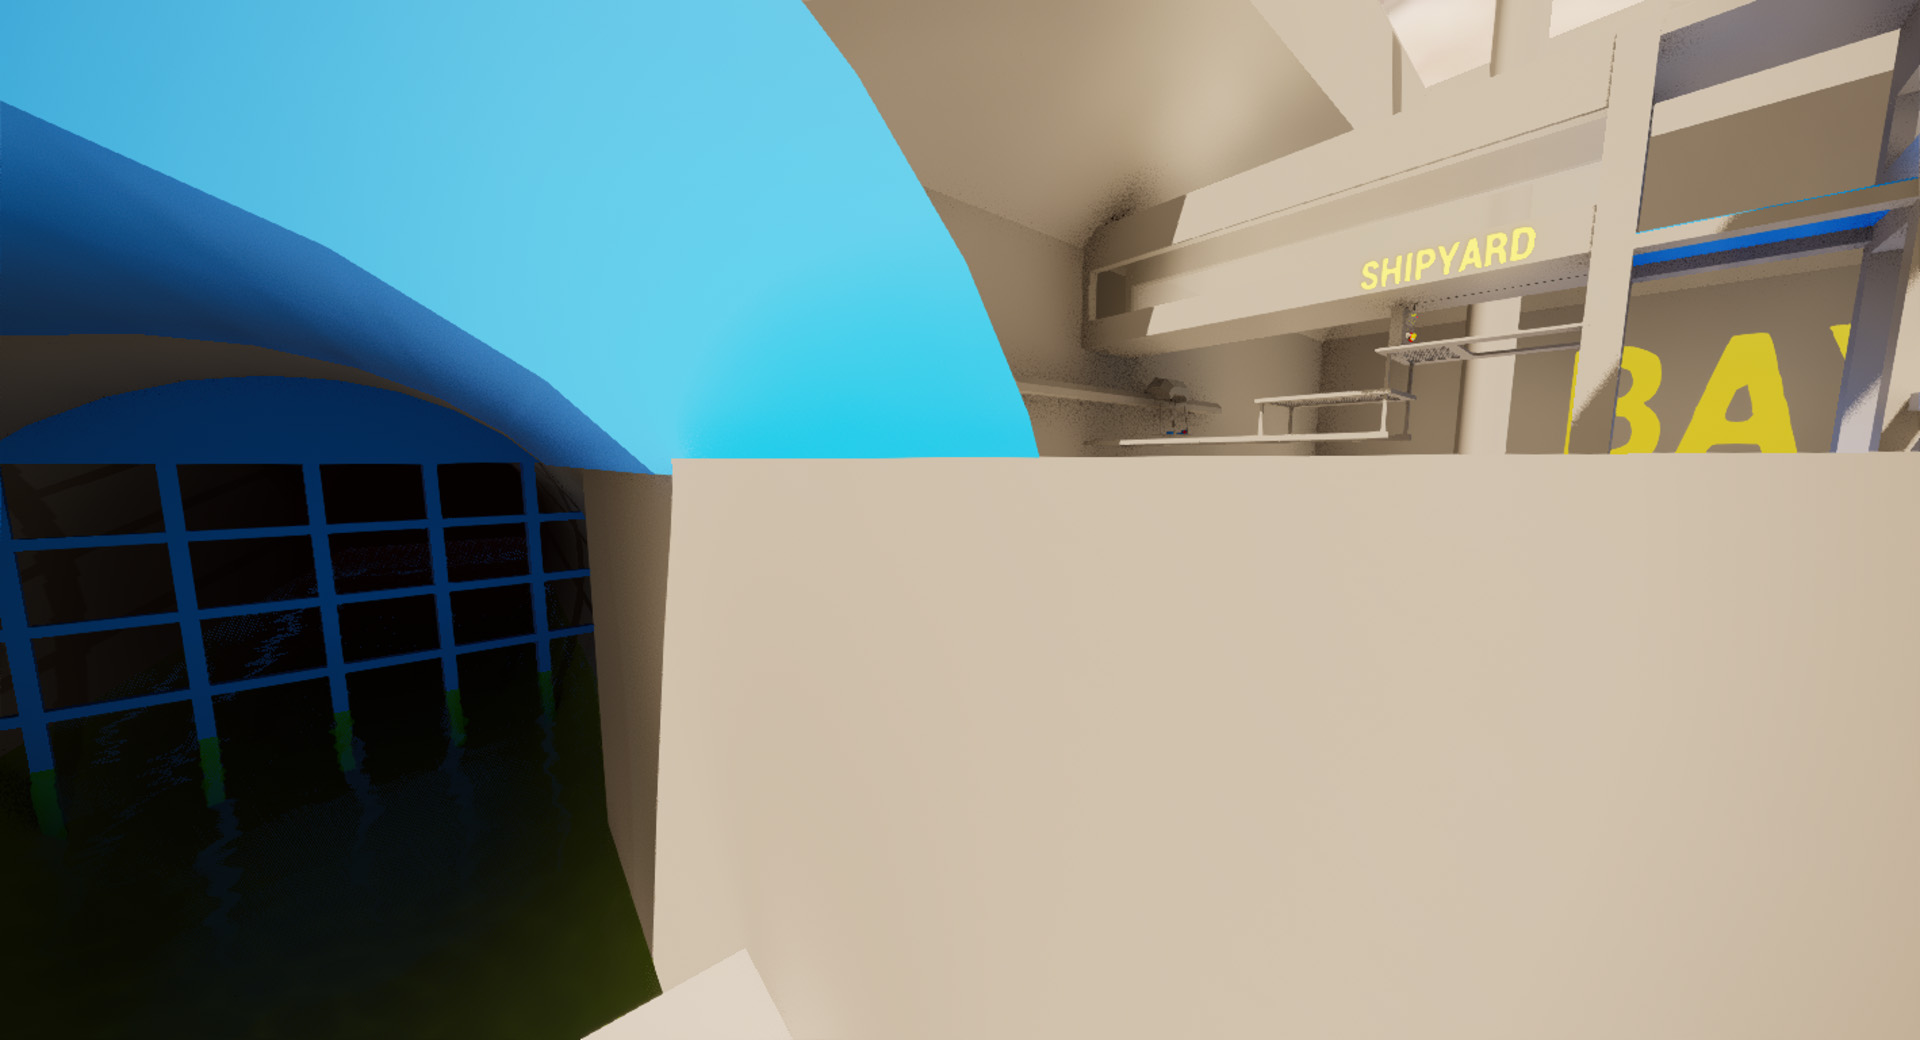
On the way to the floor 5 aux power, the player will encounter a blue gate in the fuel line in the direction of the shipyard. This exit was referenced by a readable in the fuel room a moment ago. This exit leads to a stealth focused entry point for the Shipyard level. Unlocking the fuel line grate requires more time and effort than unlocking the floor 5 lift hatch, but it also allows the player to beat the level without using the lift at all. The Shipyard level doesn't actually exist at this time.
Halfway between the two exit options we give our hard working player free charged battery. This is important to maintain momentum for players who didn't plan ahead. This will allow them to choose either exit without feeling like they have to backtrack or do anything tedious in order to wrap up the level. The players who already brought their own battery will be mildly disappointed, but nothing compared to a frustrated player with no battery having their enjoyment ruined at the very end of the experience. It's best that we just keep this part smooth to maintain momentum going into the next level.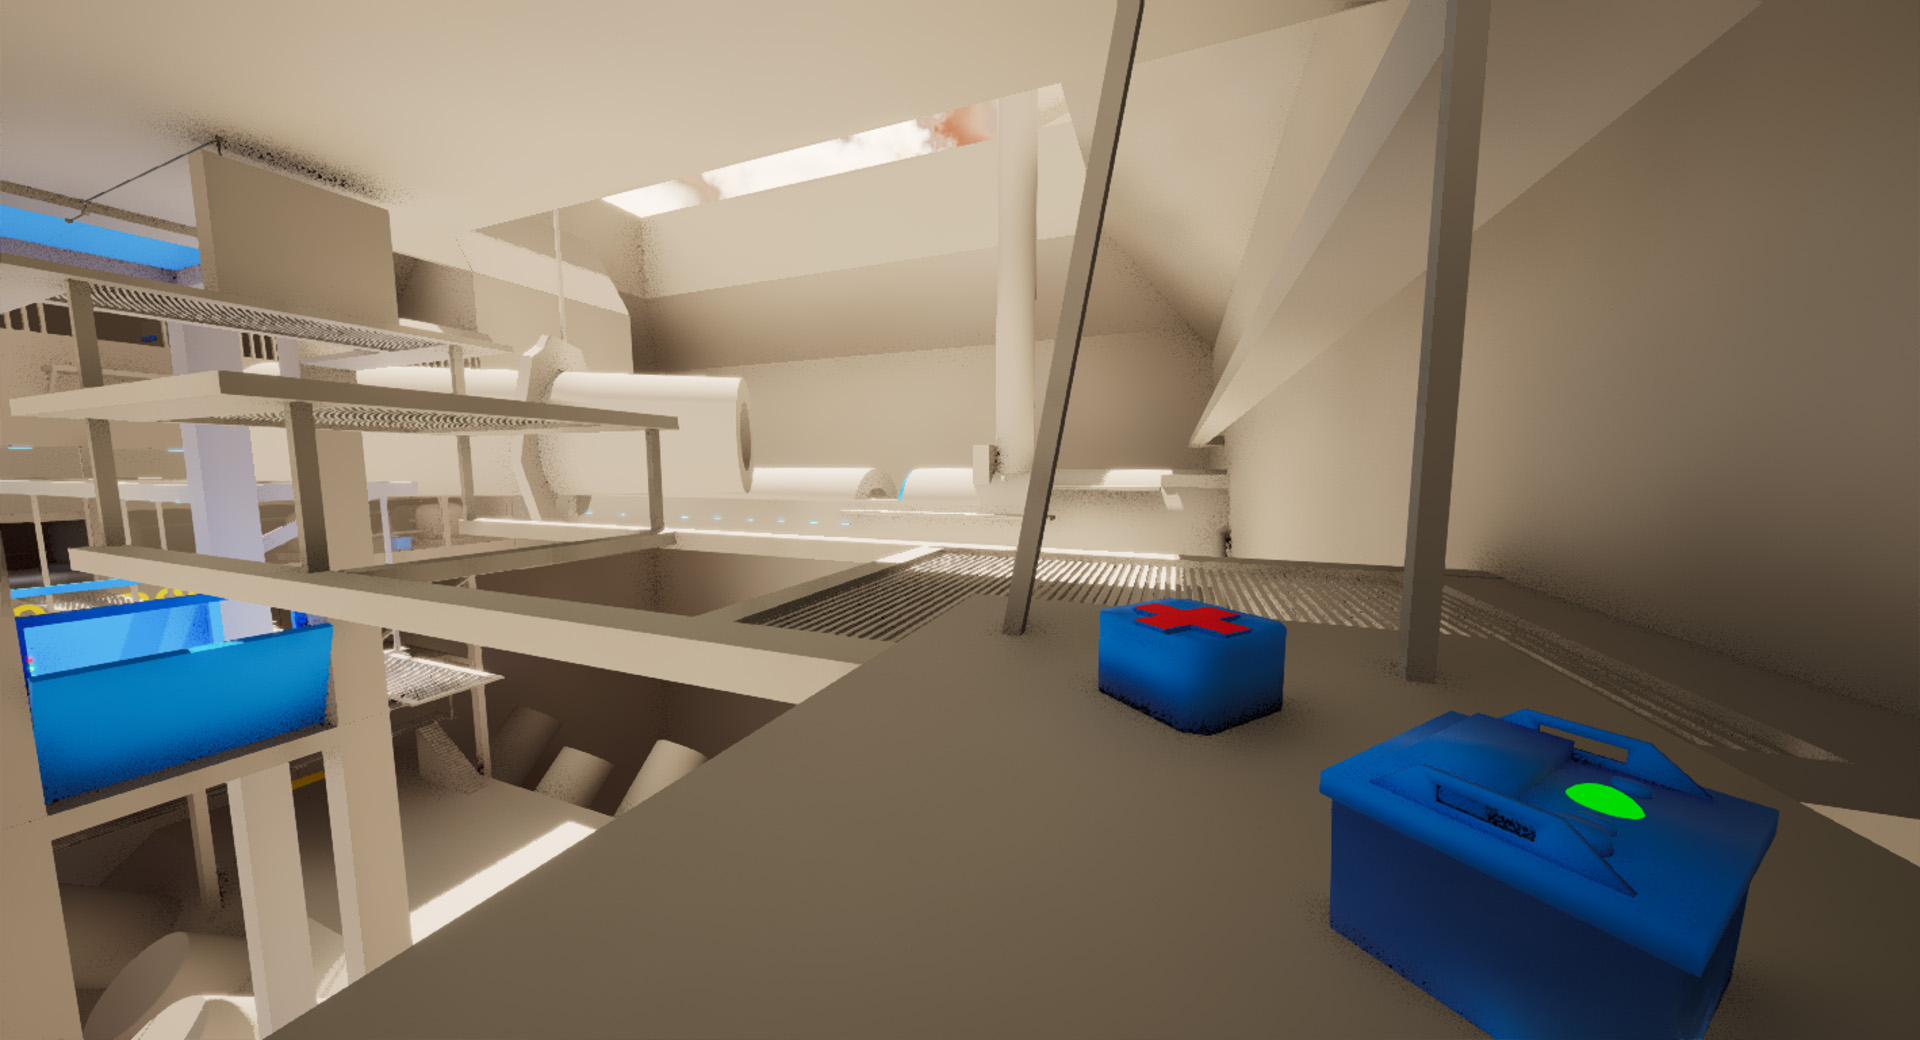
Once floor 5 is powered and the lift hatch is opened, the player is free to take the lift to the exit whenever they want. This is the primary exit of the level. This would lead to a combat focused entry point for the Shipyard level. The Shipyard level doesn't actually exist at this time.
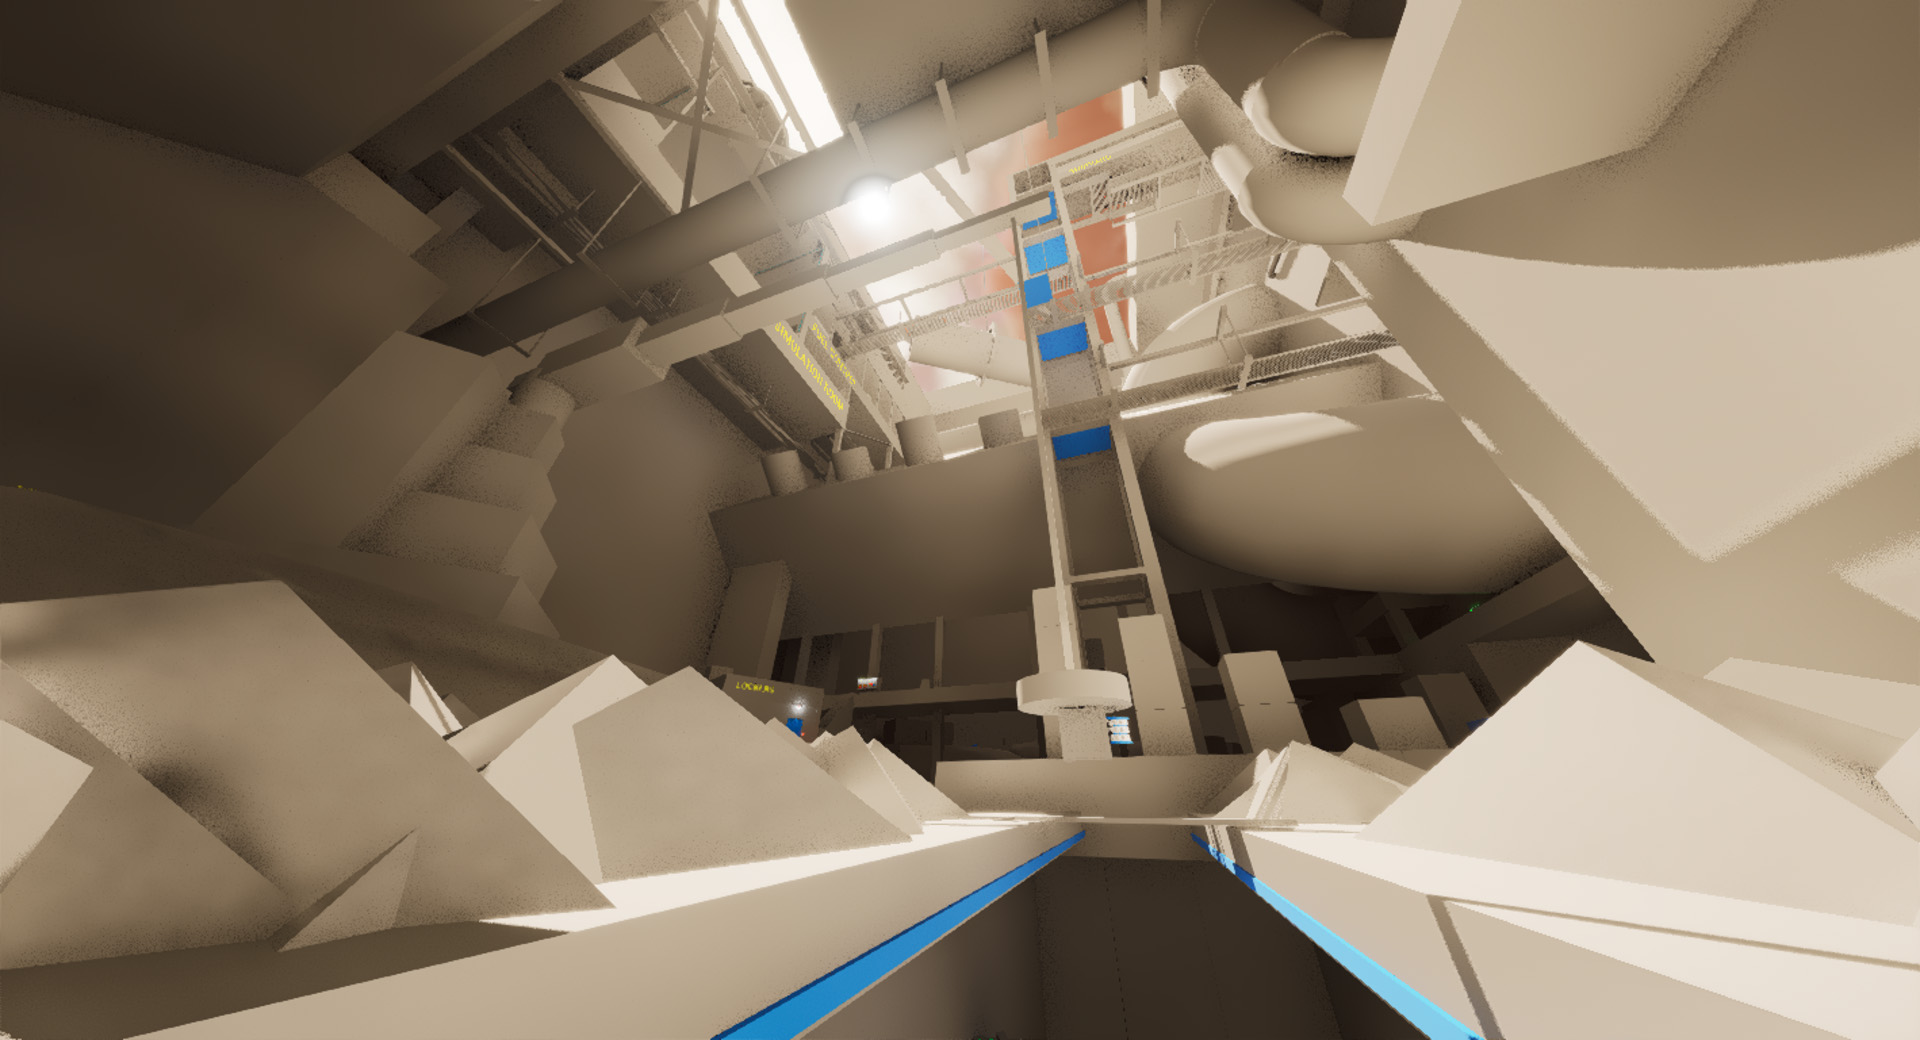
The Lift
The lift is the core of the level. It is nearly always visible. It is sturdy and reliable. It towers above the player, reaching toward the heavens. It facilitates the players ability to backtrack quickly. It is essential for reaching one of the exits. Despite all this, the entire level can be beaten without using the lift. Even the basement.
Tone and Mechanic Influences
- The interconnectivity, the climb, the bleak tone and frequent use of views and are all inspired by Dark Souls series level design. I wanted to create the sensation of the wretch starting in a shadowy pit looking up at the long climb toward the heavens.
- Features like; multiple navigation solutions, multiple problem solutions, and rewarding exploration with tons of written lore about the world; are all inspired by immersive sims and empowered by the level design tools that I used to create the level.
- The focus on using physics based tools like boxes, bricks, breakable glass, batteries, and power grids to overcome obstacles is inspired by various first person puzzle games Half Life 2, The Talos Principle, Portal 1 and 2. These features were also empowered by the level design tools that I was using for the project.
Why did I make held objects difficult to see?
When the player is holding an object, the object becomes a shadow outline and doesn't receive any light. Sometimes in playtesting there has been feedback "I can't always tell when I am holding an item". The default of the level design kit, a material with low opacity that reacted to light, was better for communicating the message "I am holding an object".
So why did I make the design decision to use the shadow material? The issue I faced was, because of the specific lighting and post processing for this project, the default material caused the player to be mostly unable to see when carrying boxes in sunny areas. The problem was especially bad in areas that had a mix of sun and shadow.
My logic in making the design decision to make held objects much less visible is: Players are 100% likely to grow frustrated if their vision is heavily obscured while trying to do platforming challenges. I am having the player carry boxes around in the sunshine, so the situation is guaranteed frustration. Players are not nearly as likely to forget that they are carrying an object. They tend to remember, and if they have any doubts, the object is still visible enough that they can check easily enough.
In a full product I would aim to have a more elegant solution that compensates for both issues, perhaps a dotted outline of the object, or something else that might fit the tone better than that. I would also include accessibility toggles so players can use whichever they truly prefer.
Thanks for reading. Feedback is welcome.
Leave a comment
Log in with itch.io to leave a comment.